12
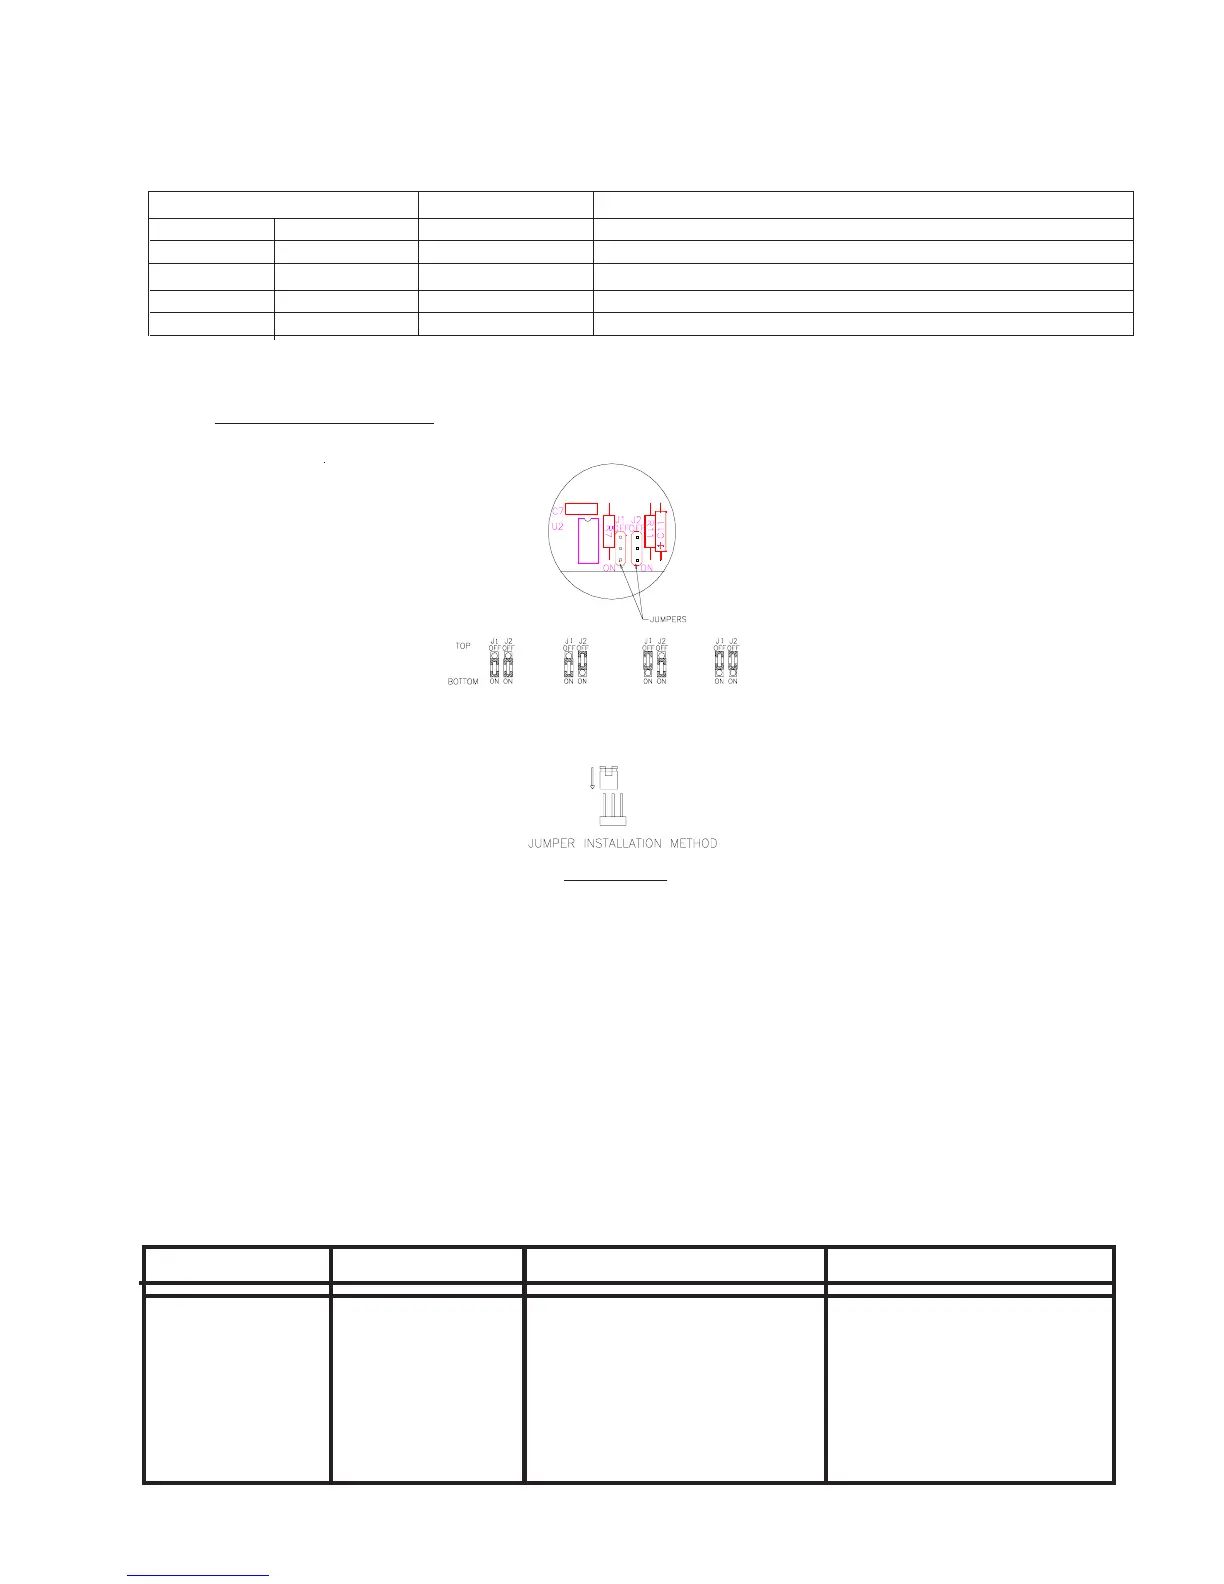
LED Light Head Flash Pattern
Place jumpers as shown to select flash pattern:
See Figure 14, for jumper installation.
Jumper Position Flash Pattern Description
J1 J2
Bottom (on) Bottom (0n) Steady-Burn Steady-burn
Bottom (on) Top (off) Single Flash Single Flashes @ 75 fpm min
Top (off) Bottom (on) Quad Flash Four Pulses per flash @ 70 fpm min
Top (off) Top (off) Cycle-Flash Cycles through various patterns @ 70 fpm minimum
Jumper Installation
FIGURE 14
Troubleshooting
All SuperVisors are thoroughly tested prior to shipment. However, should you encounter a problem during
installation or during the life of the product, follow the guide below for information on repair and troubleshoot-
ing. Additional information may be obtained from the factory technical help line at 314-426-2700 ext. 2132.
Follow the guide below for information on repair and troubleshooting.
TROUBLESHOOTING GUIDE
Note: LED modules must be replaced as a module. There are no user serviceable parts.
PROBLEM
LED module not
operating when
powered.
QUESTIONS POSSIBLE CAUSE
a. Bad power/ground
connection.
b. Defective module.
SOLUTION
a. Fix connection.
b. Replace module
N/A