7
Mounting the SuperVisor™ (continued)
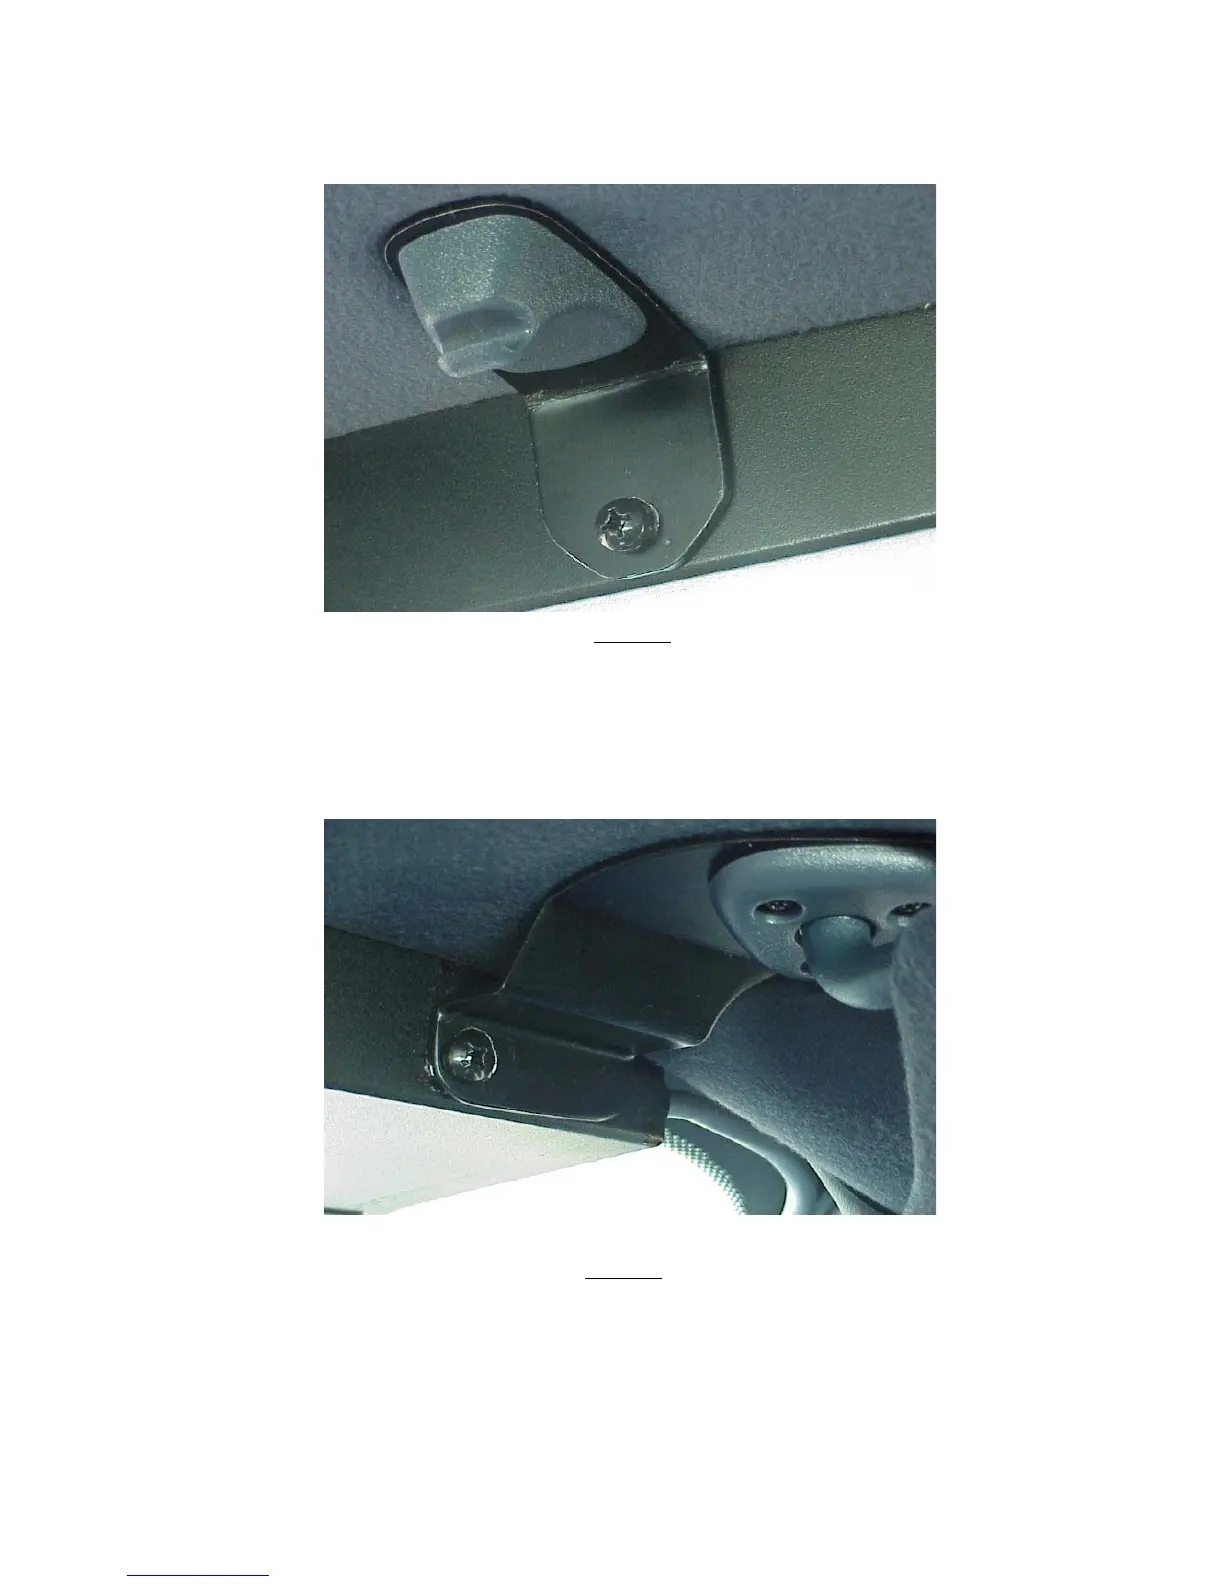
The two center brackets should line up with the holes in the SuperVisor's lower chassis. Using the supplied 1/4"-20 bolts and the internal
tooth lock washers, loosely install them as shown in Figure 8.
FIGURE 8
Next, if necessary, slightly loosen the three pivot arm bracket retaining screws in order to align the pivot arm bracket's hole with the
mating chassis hole on the end of the SuperVisor. Finally, thread the supplied bolts and internal tooth lock washers through the pivot arm
bracket's hole into the hole on the end of the chassis, shown in Figure 9. Tighten all visor mounting torx screws.Next using a tape
measure and a level, center the SuperVisor from side to side and locate a position on the headliner where the SuperVisor is level.
Finally, tighten all four bolts securely. Do not overtighten.
FIGURE 9
Note:Figure 8 and 9 brackets are excellant hard mounting points for radar guns,
video cameras, or etc.
Caution:Drilling into the housing of the light bar could damage internal wiring,
circuitry, or other internal components.