Do you have a question about the CODELOCKS CL200 and is the answer not in the manual?
Procedure for repositioning tumblers with the 'C' button depressed, ensuring correct orientation and placement.
Diagnosing problems related to spindle angle and its impact on latch operation and handle return.
Troubleshooting issues where the knob does not turn due to incorrect or mismatched codes.
Diagnosing smooth latch movement and ensuring proper engagement with the strike aperture.
This document provides instructions for the CL100/CL200 mechanical locks, including code change procedures, diagnostics, and maintenance. These locks are designed for restricted access applications in various settings, from homes to offices.
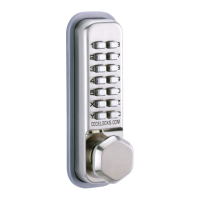
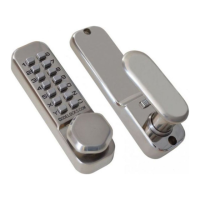
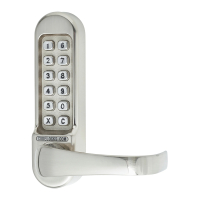
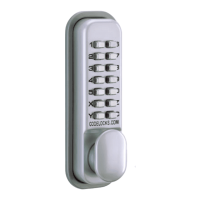
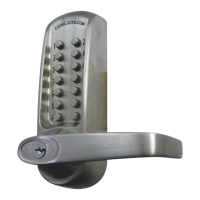
The CL100 and CL200 locks offer a robust and reliable solution for managing access without the need for keys or electronics. They are purely mechanical, relying on a combination of buttons to grant entry. This mechanical nature makes them suitable for a wide range of environments, including residential doors, garages, garden sheds, offices, workshops, and storerooms. The locks are available in three finishes: Silver Grey, Polished Brass, and Stainless Steel, allowing for aesthetic integration with different door types and decors.
One of the key features of these locks is their flexibility in code selection. The code chamber consists of 13 buttons, plus a dedicated 'C' button. The 'C' button serves a crucial role: it must always be the first digit of any code and is also used to reset the chamber after an incorrect entry. This design ensures a consistent starting point for all code entries and a clear method for error correction. A significant aspect of the code system is that buttons can only be used once within a single code. This prevents repetitive sequences like "1212" and enhances security by requiring a unique combination of button presses.
The CL100 and CL200 locks offer a high degree of versatility in code entry. The sequence in which the code digits are pressed does not matter, meaning that "1234" can be entered as "4321," "1342," or any other permutation that is easiest for the user to remember. This flexibility simplifies code recall and reduces the likelihood of entry errors due to sequence memorization. With 13 available buttons, the system provides a total of 8,191 different possible codes, offering a substantial level of security and customization.
The locks are factory-set with a randomly selected 6-digit code, which always begins with the 'C' button. This initial code is not recorded by the factory, ensuring privacy and security from the outset. Users have the freedom to change the code as often as needed to any other 6-digit combination. The code length can also be adjusted to 5 or 7 digits by utilizing spare tumblers, although shorter codes are generally not recommended for optimal security. The default range of 4 to 7 digits offers 5,434 possible codes, providing a good balance between security and ease of use.
Changing the code on a CL100 or CL200 lock is a straightforward process, though it requires careful attention to detail to avoid damaging the internal mechanism. The procedure involves removing the lock from the door, resetting the chamber by pressing the 'C' button, and then disassembling the code chamber plate. The code tumblers, which are colored to indicate their active status in the code, and silver non-code tumblers are then repositioned. A critical step is to hold the 'C' button depressed while repositioning the tumblers. This action is essential to prevent damage to the internal mechanism. The square notches of all tumblers must face outwards, with their colored tips on top, ensuring correct alignment and function. The 'C' tumbler itself should never be repositioned. After reassembling the lock, it is important to test the new code and make a written note of it before re-installing the lock on the door.
For latch locks, proper spindle engagement is crucial. The spindle, with its spring on the code side, must engage the latch correctly. The manual provides diagrams illustrating the correct spindle orientation for doors hung on the right and left, viewed from the outside. This ensures that the outside knob and inside handle retract the latch effectively when turned towards the door frame.
Maintenance for the CL100/CL200 locks is minimal. The working parts do not require oiling. To maintain the finish, regular cleaning with a soft cloth is recommended. A silicone spray or similar product can be used to create a protective film, guarding against grit and grime and extending the lock's aesthetic appeal and operational smoothness.
The document also includes a comprehensive diagnostics section to help users troubleshoot common issues that may arise during installation or use. These simple guides cover problems such as the knob not turning, the latchbolt not moving smoothly, or the handles not returning to the center position. For instance, if the knob does not turn after entering the original code, it might indicate a mismatch with the code card or incorrect tumbler positioning. If the latchbolt does not move smoothly, it could be due to incorrect lock installation or misalignment with the latch. Issues with handle return often point to an incorrectly sized spindle, which may need to be shortened or lengthened depending on the door thickness. The guide also addresses problems like the inside lever handle not returning to the upright position (suggesting a broken spring) or the latch not engaging (potentially due to a warped door or frame, requiring strike adjustment).
Codelocks provides a guarantee for their mechanical locks, offering free repair for any manufacturing faults. This commitment underscores the reliability and quality of the CL100/CL200 series.
| Backset | 60mm |
|---|---|
| Fixings | Included |
| Event Log | No |
| Weight | 1.2kg |
| User Capacity | 20 Users |