Pag. 18
5 - PROGRAMMING
COEF
Master Disco 96
[PROGRAM] SETUP SEQ.
Figure 42
PROGRAMMING
Select Program
to Edit
Figure 43
Scene: 1/1 TS:1.0
MemUsed: 0% TC:1.0
[START] END
COPYprg DELETEprg
Figure 44
Figure 45
Figure 46
Push ENTER in order to enter the stage of program preparation.
Insert the personal PASSWORD in case you have saved your own one (
see chapter SET-UP ).
The display will ask you to select one of the 16 programs (see fig. 45 part
A) and after that it will show the following instructions (see fig. 44) :
Scene 1/1 - the first number indicates the scene you are in at the moment
and the second number indicates the total scenes already programmed.
TS : 1.0 - indicates the STAND time value expressed in seconds (stan-
ding time of a scene before the scene change). Minimum value 0.1 Maximum
value 9.9.
TC : 1.0 - indicates the CROSS time value expressed in seconds (mo-
ving time of the mirror axis; X and Y channels)
[START] - allows you togo immediately to the first scene ofthe program
[END] -allows you to go immediately to thelast scene of the program
[COPYprg] - copy the program you are editing into another program (De-
stination?)
[DELETE prg] - cancel the program you are editing
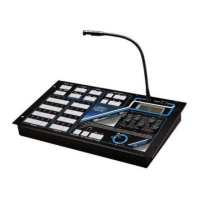
The first step to take when you enter in the programming stage of a pro-
gram is to select the projector or projectors (push-buttons B fig 45) that you
want to insert in the scene; the selected projectors leds will be flashing. You
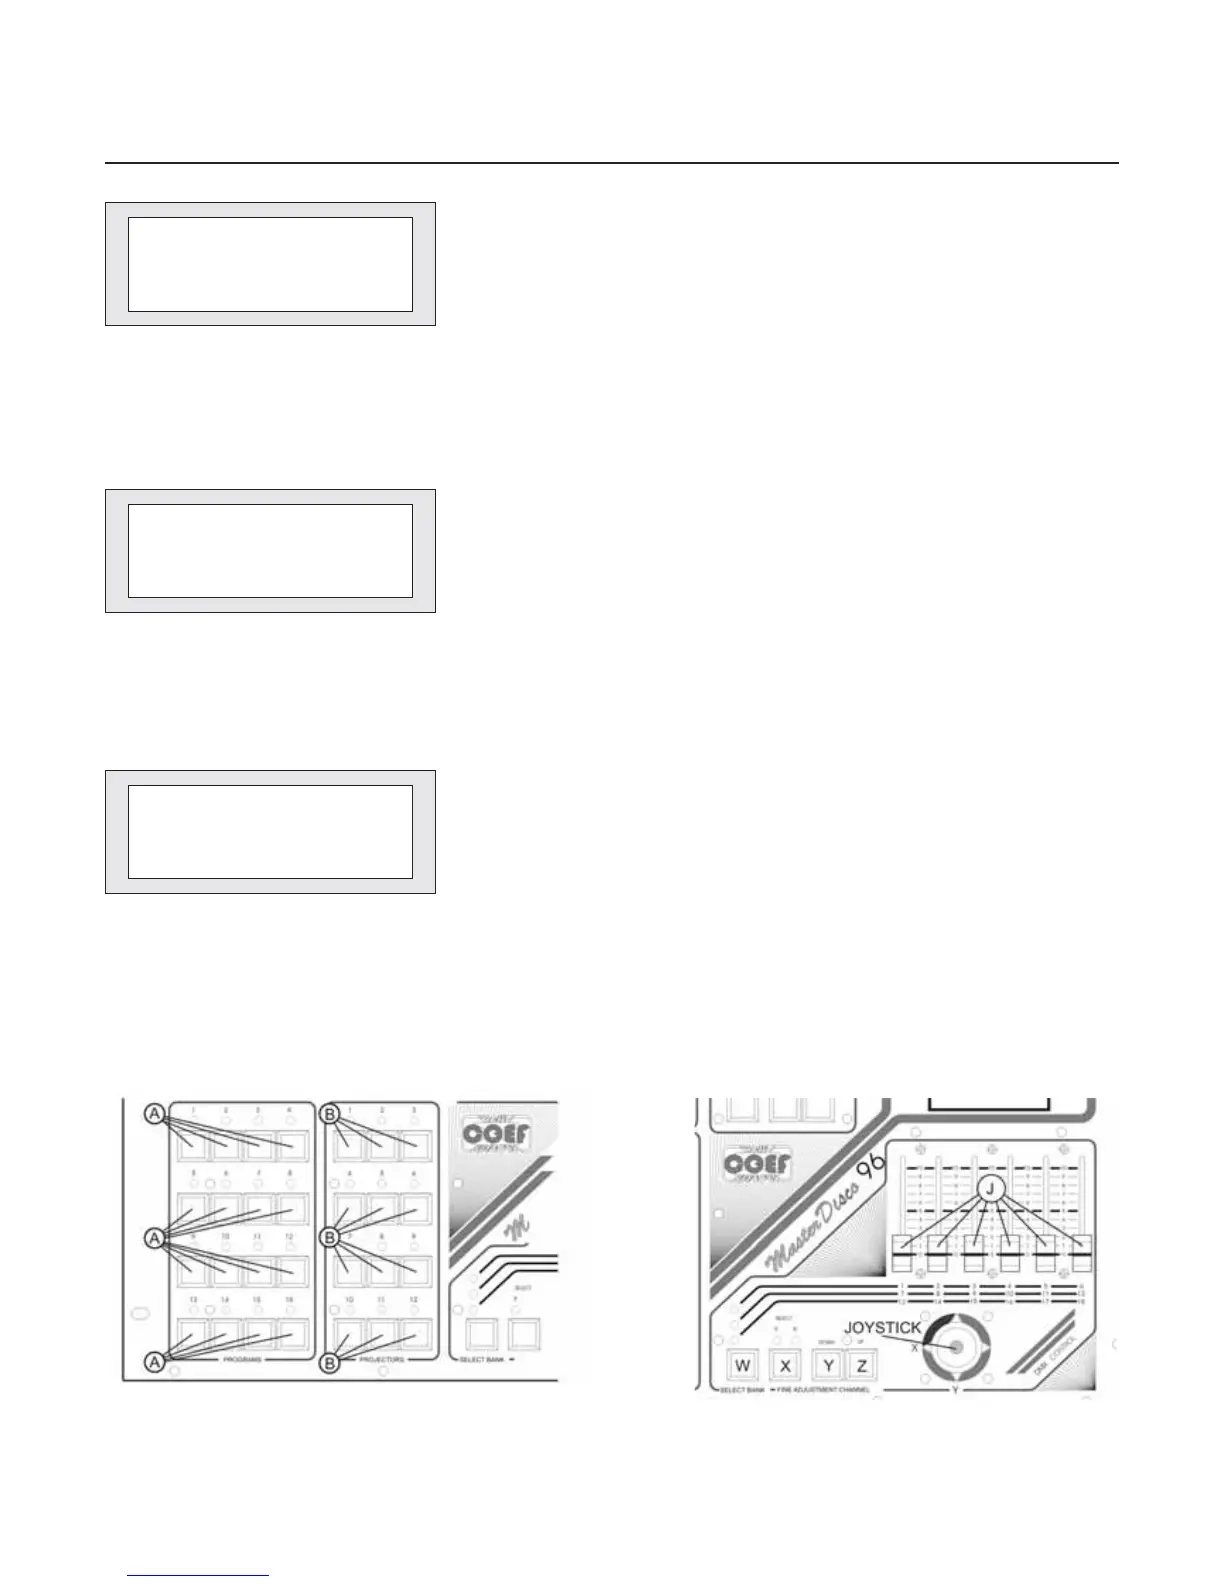
can control the selected projectors by means of sliders J and Joystick (to
control the projector which have more channels, press the push-button W to
change channel bank) ; set the STAND and CROSS times by means of the re-
levant push-buttons in the TIMES section (part. G-H-I-L fig 51) than press IN-
SERT (part. O fig 51) to skip to the next scene. It is possible to go back to the
requested scene by means of push-buttons M and N and to change the proj-
ectors channels values; the projector must be selected (the relevant led flas-
hing) and to proceed to the values changing using the sliders and joystick.
You will notice that any small movement of the slider will activate the channel
and you will see on the display the digital value inserted. In order to make a
fine adjustment of the value, once you have activated the requested channel,
you can use the push-buttons Y and Z that will make adjustments of one digit
by one digit. The X push-button will quickly activate the X and Y channels of
the joystick without having to touch it and this will avoid any possible move-
ment from the setted position.