3
2
1
4 5
6
7
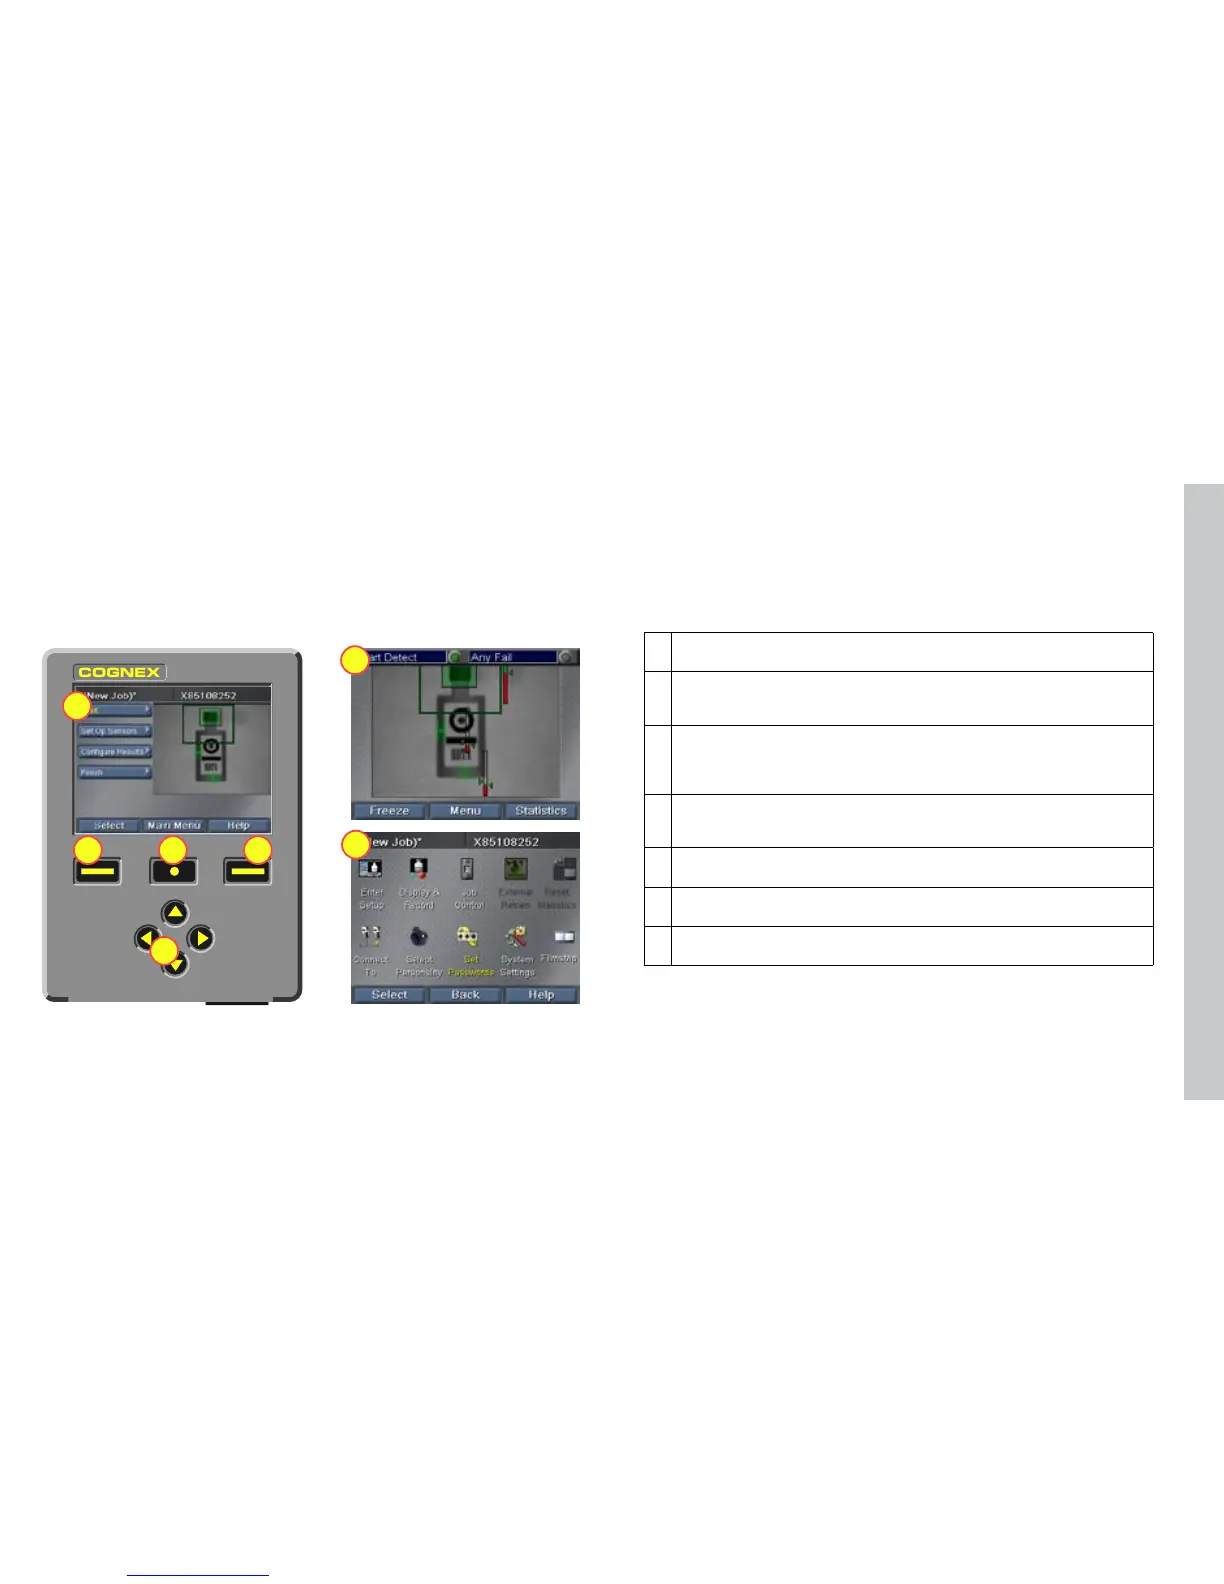
1 Setup mode home screen. Each of the four steps at the left includes substeps to let
you create and modify Checker 3G jobs.
2 Navigation keys. Use these keys to select which item is active on the Checker 3G
screen. If a full-screen view is shown, the navigation keys let you select individual
items or controls on the screen.
3 Select softkey. Pressing this key activates or selects whatever item has been
selected using the navigation keys. If there are outstanding changes to an object,
this key’s name changes to Apply. If Checker is asking for input, this key’s name
changes to Yes.
4 Main Menu or Back softkey. In most contexts, this key returns to the previous
screen. If you are at a top-level screen, it opens the Main Menu. If Checker is
asking for input, this key’s name changes to Cancel.
5 Help softkey. Press this key for context-specic help. If Checker is asking for input,
this key’s name changes to No.
6 Run Mode screen. Displays images or statistics for a running Checker 3G or
Checker 200.
7 Main menu screen. Provides access to system settings, lets you connect to other
devices.
Checker User Interface -- Teach Pendant
SensorView Teach Pendant provides an interactive interface that lets you congure, manage, and
monitor a Checker 3G. For general information on how to use this interface, see the SensorView
Teach Pendant Users Guide and Reference.

 Loading...