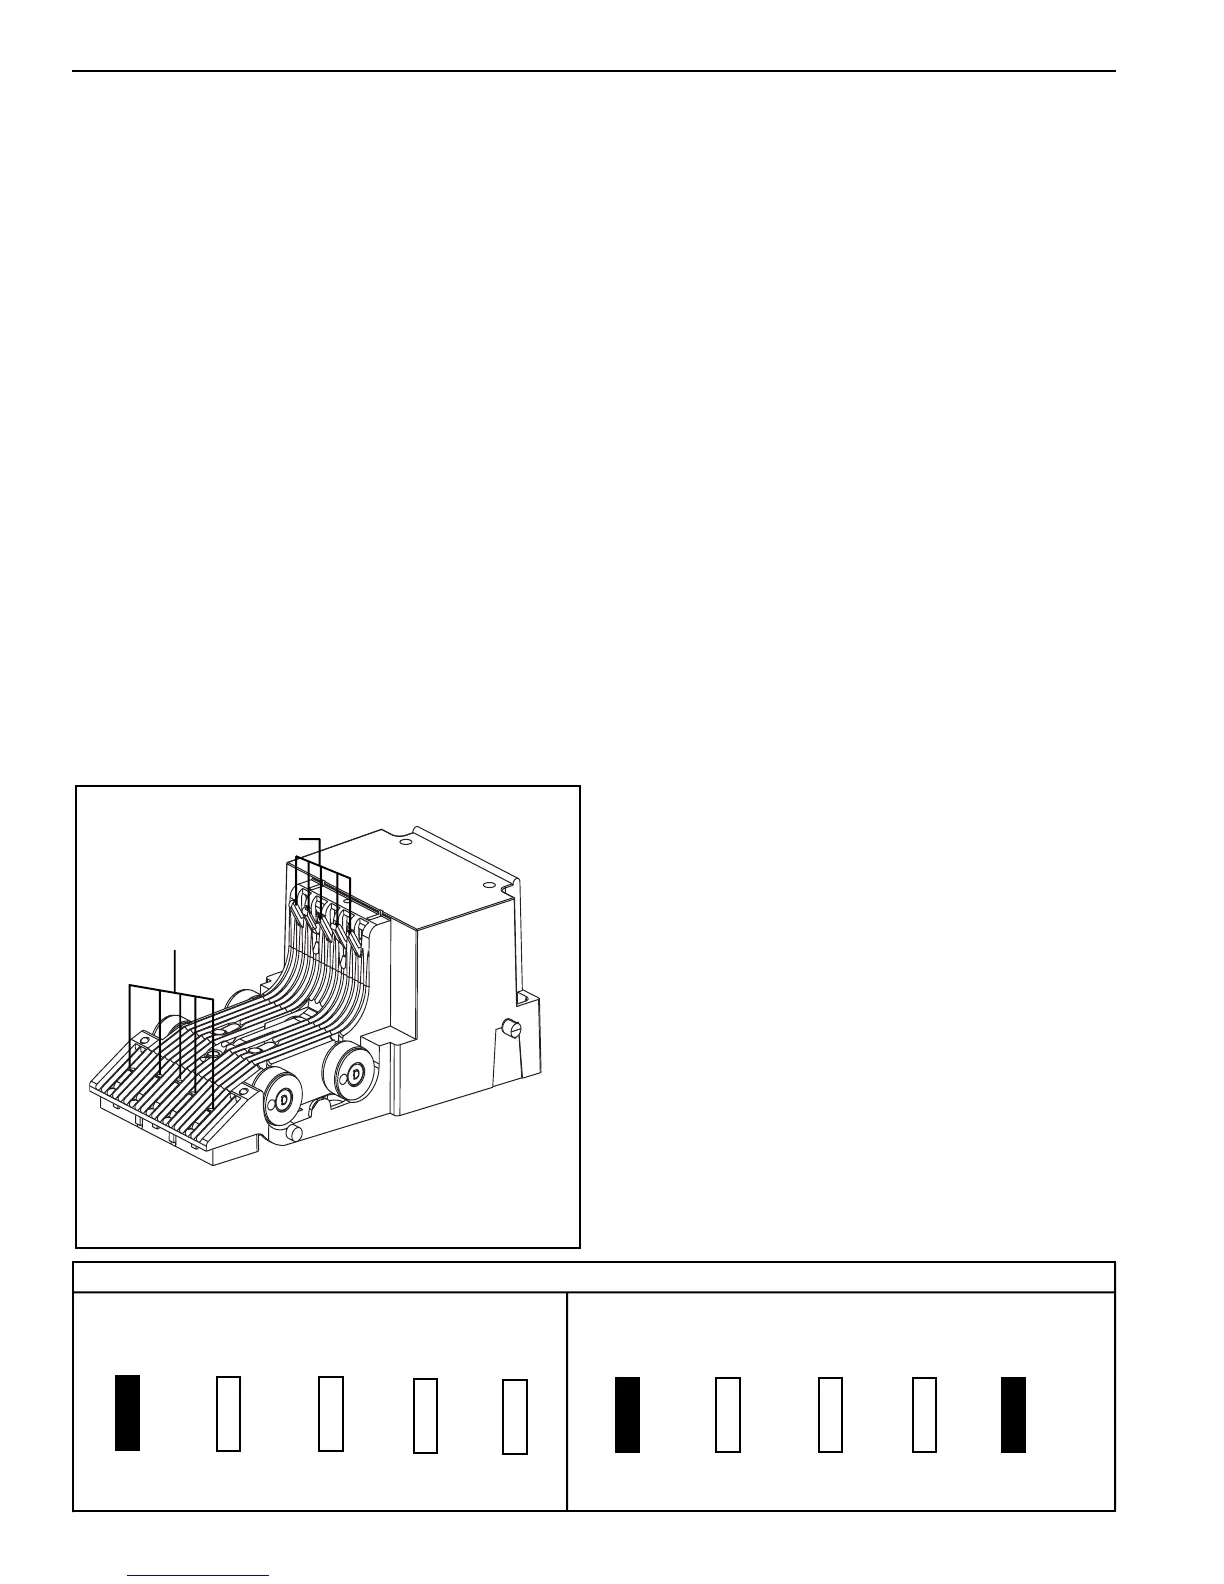
6
Anti-cheat lever
Inlet LEDs
OPTION SETTINGS
The eight different configuration options and the
order in which they are stored in the bill acceptor
are as follows:
• $1 accepted with high security disable
• $1, $5 accepted with high security disable
• $1, $5, $10 accepted with high security disable *
• $1, $5, $10, $20 accepted with high security disable *
• $1 accepted with high security enable
• $1, $5 accepted with high security enable
• $1, $5, $10 accepted with high security enable *
• $1, $5, $10, $20 accepted with high security enable *
Configuring the bill acceptor for bill enabling and
security is accomplished using the anti-cheat lever
and the illuminated inlet. The anti-cheat lever is used
to enter configuration programming mode, scroll
through all possible configuration options and select
the required configuration. The illuminated inlet
provides feedback to the user during the configuration
process by displaying a pattern that corresponds to
each configuration option available.
SECTION 2: INSTALLATION
Figure 2
INSTALLING THE BILL ACCEPTOR
1. Remove the vending machine's power.
2. Install the BillPro Series bill acceptor into the mounting
hole of the vending machine using the appropriate
hardware (NOT INCLUDED).
NOTE: Should additional mounting hardware be
required, please contact your local Coinco office
or machine manufacturer
3. Connect the BillPro MDB interface harness to the the
vending machine and coin changer.
4. Restore power to the vending machine (illuminated inlet
will begin to flash and stacker motor will cycle upon
power-up).
5. Observe that the power indicator light, on the back of
the lower housing, is ON continuously. If the light is
OFF or blinking, check the following:
-Power to machine
-Machine disabling unit
-Bill acceptor harness
-Machine does not have credit already established
6. With the vend price set below one dollar, insert a one
dollar bill.
7. Verify the dollar bill is accepted and stacked into the
bill box.
8. Verify a one dollar credit has been established.
Lower Housing
$1 $5 $10 $20 Security
$1 $5 $10 $20 Security
• Remove the lower housing.
• With power applied, depress and release the anti-cheat lever
five times, holding it down for a half a second each time.
• Once in the configuration mode, depress and release the
anti-cheat lever one time to scroll to the next configuration
option. Continue depressing and releasing the anti-cheat
lever until the desired option is reached.
• Once the desired option is displayed, depress and hold the
anti-cheat lever until the unit exits the configuration mode
(approximately 3 seconds). The new configuration setting
will flash 3 times to confirm the setting.
• Replace the lower housing.
• Test unit to insure proper set-up.
SETTING THE CONFIGURATION
OPTIONS (see Figure 2)
* Options available for BP4 only.
This example shows $1 enable and high security
disable
This example shows $1 enable and high security
enable
Inlet Leds