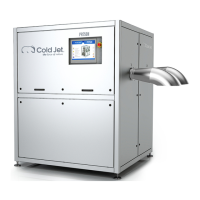
PR750H
User manual
Version: 5
Page: 22 of 21
Date: 2023.05.25
INSTRUCTION – UNPACKING AND PREPARATIONS BEFORE INSTALLATION
Your new PR750H has been assembled as one unit. In order to avoid damages during transport, the PR750H has been
bolted onto the transport pallet.
Unpacking and Examination for Transport Damages
1. Examine the transport box for any damages that may have occurred during transportation.
2. Remove the straps that secure the transport box to the pallet.
3. Remove the top and side plates from the transport box.
4. Remove the straps that secure the PR750H to the pallet.
5. Unbolt the 4 bolts that secure the PR750H to the pallet.
6. Examine the PR750H for external transport damages.
7. Open the cabinet door at the control panel and examine the PR750H for internal transport damages.
Requirements on the Environment Surrounding the PR750H
•
The PR750H must be sheltered from wind and weather.
•
The ambient temperature must be min. +5°C (+41°F).
How to Lift/Transport the PR750H
PR750H: Drawing no. A1
•
The PR750H is supplied with threaded holes for lifting eyes. Always use lifting eyes to lift the PR750H.
•
Always lift the PR750H according to the lifting Instructions in this manual.
•
Lifting over people and animals is prohibited.
•
Always use a forklift truck to transport the PR750H.
•
Pick up the PR750H from the side as shown in the drawings.
•
Transport the PR750H upright.
•
Make sure that the forks are long enough to fully engage the PR750H.
•
Always check that the forks are adjusted to proper width.
PR750H:
Min. load capacity of forklift truck: 2000 kg / 4409 lbs.
Min. fork length: 1.5 m
Floor Characteristics and Minimum Clear Distances
PR750H: Drawing no. A2
•
The PR750H must be placed on a horizontal concrete floor with an adequate load-carrying capacity, free from crack
formation and suitable for bolting the PR750H to it.
•
The minimum clear distances must be observed to provide sufficient space for opening the cabinet doors and servicing.
Preinstallation.
Before the pelletizer can be installed, the owner/operator must prepare the site for installation and operation. It is the
owner’s responsibility to verify that all the necessary preparations have been made for the installation site and meet the
specifications and guidelines detailed in the appendix: Pre-Installation Guidelines & Checklist. This may include but is not
limited to:
•
Providing an indoor space with standard industrial flooring.
•
Installing a liquid CO2 tank and supply pipeline system up to the connection point at the pelletizer.
•
Installing a gaseous CO2 exhaust pipeline from the pelletizer to vent at a safe position.
•
Installing a power supply that is sufficient and up to code.
•
Providing proper room ventilation and other CO2 safety measures.
•
Determine which options and other manufacturing accessories to add/prepare for maximizing production
performance and capabilities.
 Loading...