EasyManua.ls Logo

Coleman MEADOW FALLS 2000001390 User Manual

Coleman MEADOW FALLS 2000001390
2 pages
To Next Page IconTo Next Page
Page #1 background imageLoading...
Page #1 background image
4. Insert one end of each
black pole into pins in
front corners of tent.
(Fig. 2)
5. Go to opposite end of
each pole and gradually
apply pressure to the pole
forming an arch. Insert
the pin into the pole end
at the corners of tent.
(Fig. 3)
6. Attach frame clips along
edgesof tent to black
main poles. (Fig. 3A)
7. Stretch corners and sides
of tent until floor is taut
then hammer stakes
through loops to secure.
(Fig. 3B)
STITCH LINE
MEADOW FALLS
TM
LONG FLY 10’ X 10’
MODEL 2000001390
Before you begin
Read all instructions before set up.
• Select a level campsite clear of rocks, branches, and other hard
or sharp objects, to install your tent.
WARNING: Keep clear of overhead power lines.
Do not set up your tent under trees.
For best results in windy conditions, position end of tent into
the wind.
Enlist the help of at least one other person to assist you when
it is time to assemble the tent.
Fig. 2
To Set Up Tent
1. Unfold tent and spread out on a clean,
level surface with the door facing the
desired direction. (Fig. 1)
2. Assemble two main tent poles by inter-
locking the longer, black shock-corded,
poles.
3. Insert both, long, black poles through
sleeves in top of tent as shown. (Fig. 1)
Fig. 3
Parts and Components
Description Part Number
Main Poles, Long, Black (2) 5010000380
Ridge Pole w/rubber tips, Black (1) 5010000381
Rainfly 5010000490
1. Assemble the black interlocking shock-corded ridge pole with
rubber tips.
2. Unfold rainfly. Locate the web pockets on front and back of rainfly,
and the hook & loop fasteners on the underside of rainfly.
3. Insert rubber-tipped ends of ridge pole into web pockets located
on both sides of underside of the rainfly. (Fig. 4)
4. Locate hook & loop fasteners on the rainfly
and wrap around black ridge pole to secure.
(Fig. 4A)
To Attach Rainfly
(continued on other side)
Fig. 1
Door
Long, Black,
Shock-corded
Main Poles
3A
3B
Web
Pocket
Black Ridge Pole
Fig. 4
4A
Black Ridge
Pole
Question and Answer IconNeed help?

Do you have a question about the Coleman MEADOW FALLS 2000001390 and is the answer not in the manual?
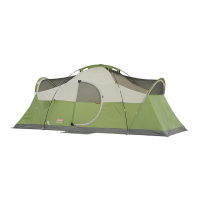
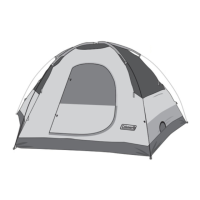
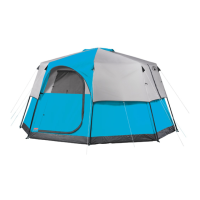
Coleman MEADOW FALLS 2000001390 Specifications

General IconGeneral
ModelMEADOW FALLS 2000001390
TypeDome
MaterialPolyester
Water ResistanceWeatherTec System
Seasons3-season
Doors1
Windows2
Pole MaterialFiberglass
RainflyYes
Dimensions9 ft x 7 ft
Center Height4 ft 11 in
VentilationMesh panels
Capacity4-person

Summary

Before You Begin

Campsite Selection and Preparation

Select a level campsite clear of rocks, branches, and other hard or sharp objects for tent installation.

Safety Precautions

Avoid overhead power lines, do not set up under trees, and position the tent end into the wind for windy conditions.

Assembly Assistance

Enlist the help of at least one other person to assist with tent assembly.

To Set Up Tent

Initial Tent Placement

Unfold tent and spread out on a clean, level surface with the door facing the desired direction.

Pole Assembly and Insertion

Assemble main tent poles by interlocking and insert them through sleeves in the tent top.

Securing Tent Frame

Insert pole ends into pins in front corners and apply pressure to insert into pins at opposite corners.

Attaching Frame Clips and Stakes

Attach frame clips to main poles and secure tent corners and sides with stakes.

To Attach Rainfly

Ridge Pole Assembly

Assemble the black interlocking shock-corded ridge pole with rubber tips.

Rainfly Placement

Drape rainfly over tent, centering ridge pole over the door, ensuring seams align with tent poles.

Securing Rainfly

Attach hook & loop fasteners, clip hooks onto metal loops, and tie guylines through loops to secure.

Cooler Access and Ventilation

Ventilation Feature

Unzip the smaller zippered opening at the rear of the tent to expose screen for ventilation.

Cooler Access Feature

Unzip the other flap to create an avenue for bringing beverages into the tent.

Electrical Cord Access

Power Cord Entry

Use UL approved cords through the access panel in the lower right corner for outdoor usage.

To Store

Preparation for Storage

Ensure tent is clean, dry, remove rainfly, unzip doors/vents before taking down.

Packing and Storage

Fold tent neatly to width of pole bag, roll tightly, place in carry case, and store in a clean, dry area.

Important Information and Warnings

Condensation Management

Condensation can form due to breath/perspiration; minimize by removing wet items and providing ventilation.

Tent Care and Storage

Dry thoroughly before storing, do not pack stakes/poles inside tent, and avoid telescoping poles.

UV Exposure

Avoid leaving tent set up for weeks at a time, as UV rays can damage material.

Flammability Warning

Keep flame and heat sources away; fabric may burn if in continuous contact with flame.

Related product manuals