EasyManua.ls Logo

Coleman MONTANA 9279F127 User Manual

Coleman MONTANA 9279F127
2 pages
To Next Page IconTo Next Page
Page #1 background imageLoading...
Page #1 background image
Connect Frame to Tent
–Locate the pin & ring systems on
either side of the front door and the
corresponding pin & rings on the back
side of tent.
–Insert one end of black frame pole
onto pin & ring system on tent stake
loop on either side of front door. (illus. 3)
–Go to opposite end of pole diagonally
from starting point and gradually apply
pressure to the pole forming an arch
until you are able to insert the pin into
pole end.
–Repeat for second pole.
–Attach tent frame clips to poles.
MONTANA
12’x7’
1
Layout & Positioning
of Tent, Pole Assembly
–Layout and position tent with door
facing desired direction. (illus. 1)
–Unzip door.
–Stake down tent corners, using the
tent stake loops. Keep the floor taut.
(illus. 2)
–Assemble black, longer frame poles
by interlocking black shock-corded
poles.
–Insert the black poles into center pole
sleeves.The poles should cross
forming an “X” in the middle of tent.
(illus. 1)
2
When You Are Ready To Set
Up Your Tent
–Select a level campsite clear of
rocks, branches and other hard or
sharp objects.
–Do not set up your tent under trees.
–For best results in windy conditions,
position the end of tent into the wind.
See owners manual for more tips.
Side Tent
Poles (Grey)
Rainfly Part No.
9279F105
Main Tent Poles
(Black)
Front door
Instructions apply to Part Number 9279F127
illus. 1
illus. 2 Tent
stake through
stake loop
illus. 4
Center section upright
Part No. 9279-102
Part No. 9279-103
illus. 3
Pin & ring system
located on the front &
rear of tent
Black poles
Black poles
U Shaped
Rainfly Poles
Part No. 9279F104
Question and Answer IconNeed help?

Do you have a question about the Coleman MONTANA 9279F127 and is the answer not in the manual?
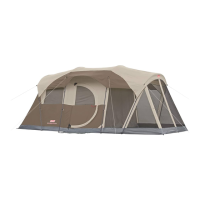
Coleman MONTANA 9279F127 Specifications

General IconGeneral
Capacity6-person
Setup Time15 minutes
Number of Doors1
Pole MaterialFiberglass
MaterialPolyester
Center Height72 inches
Floor MaterialPolyethylene
Inner Tent MaterialPolyester

Summary

Layout and Positioning of Tent, Pole Assembly

Initial Tent Placement and Stake Down

Position tent with door facing desired direction, unzip door, and stake down corners to keep floor taut.

Assemble and Insert Main Frame Poles

Interlock black shock-corded poles and insert into center pole sleeves to form an 'X'.

Connect Frame to Tent

Attach Main Poles to Tent Pins

Insert one end of black frame pole onto pin & ring system near front door, then arch and insert other end.

Secure Tent Frame Clips

Attach tent frame clips to the assembled poles.

Raise Ends of Tent

Insert Side Poles and Secure Ends

Insert grey poles through sleeves at tent ends and secure using pin & ring systems.

Attach Frame Clips to Side Poles

Attach frame clips to the grey poles.

Attach Rainfly

Assemble and Position Rainfly Pole

Interlock rainfly pole, insert into sleeves on underside of rainfly, and drape over tent.

Secure Rainfly to Tent Body

Insert rainfly pole into grommets, and secure rainfly with attachments and 'S' hooks.

Stake Out Guylines

Stake out guylines at the ends of the rainfly for stability.

Important Care and Safety Information

Condensation Management

Minimize condensation by providing good ventilation and removing wet items from the tent.

Tent Storage and Maintenance

Dry tent thoroughly before storage; do not store poles telescoped; use separate storage bags.

Stake Removal

Pull stakes by the stake itself, not the tent fabric or loops.

Flame and Heat Source Warning

Keep all flame and heat sources away from tent fabric; fabric will burn if in continuous contact with flame.

Related product manuals