www.comelitgroup.com
Via Don Arrigoni, 5 - 24020 Rovetta (BG) - Italy
1ª edizione 07/2020
cod. 2G40002500
CERTIFIED MANAGEMENT SYSTEMS
230 V
10A MAX
AC-DC
12V/24V
LL
O
D
E
T
R
SE
-
SE
+
NC
C
O
M
NO C
CA2100A
+CA921x
S2
JP1
SE
-
SE
+
NC NO C
P1
JP1
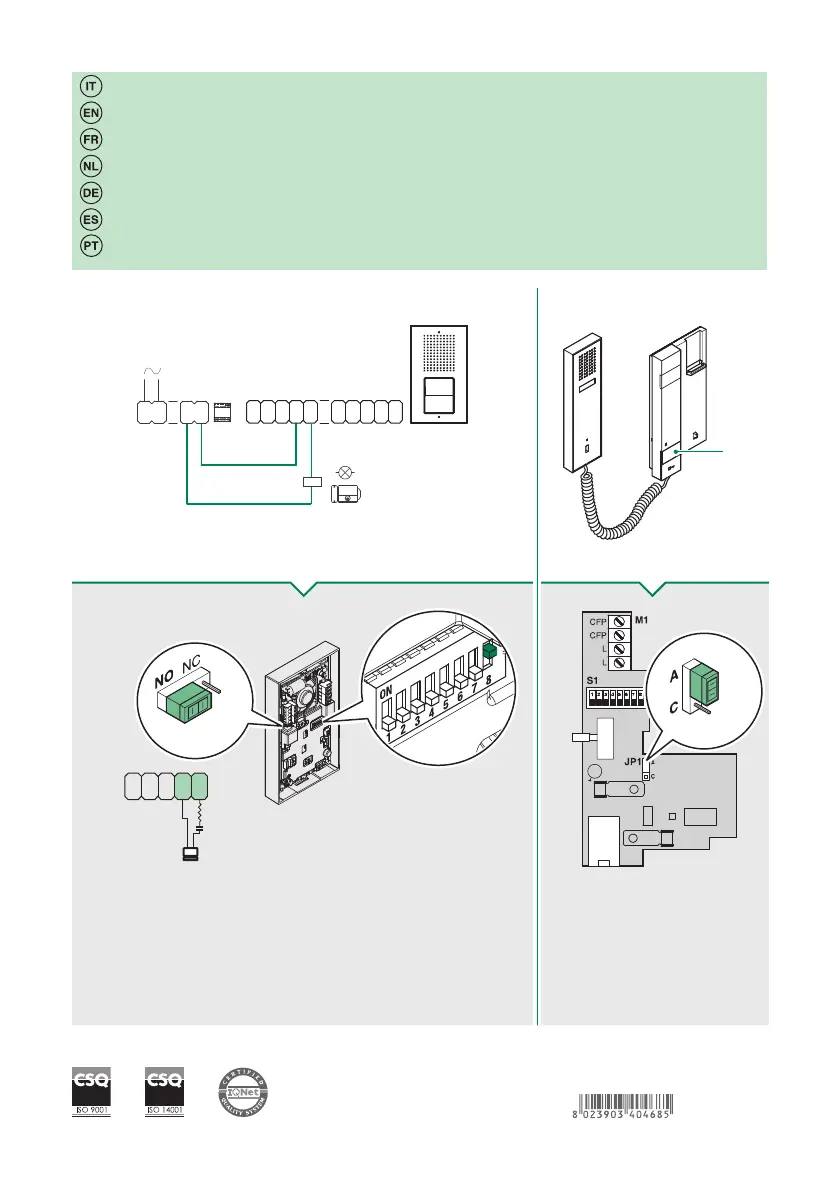
Attivazione del relè C.NC.NO della pulsantiera tramite pulsante P1 del citofono
Impostare JP1 come da figuraImpostare JP1 come da figura Settare il DIP 8 di S2 a ON
Activating C.NC.NO entrance panel relays using button P1 on the door-entry phone
Set JP1 as shown in the figureSet JP1 as shown in the figure
Set DIP8 for S2 to ON
Activation du relais C.NF.NO de la platine à travers le bouton P1 du poste audio
Programmer JP1 comme le montre la figure
Programmer JP1 comme le montre la figure Régler le DIP 8 de S2 sur ON
Inschakeling relais C.NC.NO van het deurstation via drukknop P1 van de deurtelefoon
Stel JP1 in volgens de afbeeldingStel JP1 in volgens de afbeelding Zet DIP 8 van S2 op ON
Aktivierung des Relais C.NC.NO an der Türstation über die Taste P1 der Innensprechstelle
Stellen Sie JP1 wie in der Abbildung gezeigt einStellen Sie JP1 wie in der Abbildung gezeigt ein
Stellen Sie DIP8 von S2 auf ON
Activación del relé C. NC. NA de la placa de calle mediante el pulsador P1 del telefonillo
Configurar JP1 como se ilustra en la figuraConfigurar JP1 como se ilustra en la figura
Configurar el DIP-switch 8 de S2 en ON
Activação do relé C.NC.NO da botoneira através do botão P1 do telefone intercomunicador
Configurar JP1 como na figuraConfigurar JP1 como na figura Definir oDIP-switch 8 de S2 em ON