6
- (Calling is available with the camera by pressing the talk button during the monitoring.)
(2) In case only lobby is installed
Click monitor button once in standby mode to check the images from the lobby and
click the button twice to return to standby mode
- (Calling is available by pressing the talk button during the monitoring.)
•
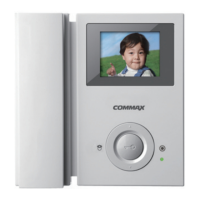
Use 4 function keys positioned right side of the product.
Start or end menu : MENU
Select or Input : SELECT button(Monitor button)
Move upward / Move right : UP button (Door release button)
Move downward / Move left : DOWN button (Guard station button)
5-1. Screen and receiver volume adjustment
Press the MENU button in use of conversation or monitoring, then adjust DOOR(LOBBY),
VIDEO SET, UTIL SET and INFORMATION using UP/DOWN button.
5-1-1. DOOR(LOBBY) VIDEO SET(Adjusting BRIGHTNESS/CONTRAST/COLOR)
In video adjustment mode 5-1, move to DOOR(LOBBY) VIDEO SET and press SELECT button
(LOBBY VIDEO SET should be done during calling from lobby phone or talking with lobby phone)
(1) BRIGHTNESS : Adjust BRIGHTNESS
(2) CONTRAST : Adjust CONTRAST
(3) COLOR : Adjust COLOR
※ Adjusting Brightness/Contrast/Color
①
Move to DOOR(LOBBY) VIDEO SET in display setting mode 5-1 and press
SELECT BUTTON. And then press the SELECT button with UP/DOWN button, move to the
related item.
②
Press the SELECT button to enter the menu.
.
4-4. Monitoring
(1)In case both lobby and individual cameras are installed Click the monitor button once in
standby mode to check the images from Individual camera. Click the button twice for Lobby
images and three times for returning to standby mode. (Note. It is not available during the talk.
During the monitoring
Set up
③
Adjust the values with UP/DOWN button
. Interlocking with Digital Door Lock
This product can be interlocked with Digital Door Lock via RF module and please refer to
connection diagram.
 Loading...