6
left mouse button once (this will select the disk), then move the pointer to the top left
of the screen and click and HOLD the right-hand mouse button and a menu appear,
make sure the Icons menu is selected, move the mouse down the menu and select
Copy
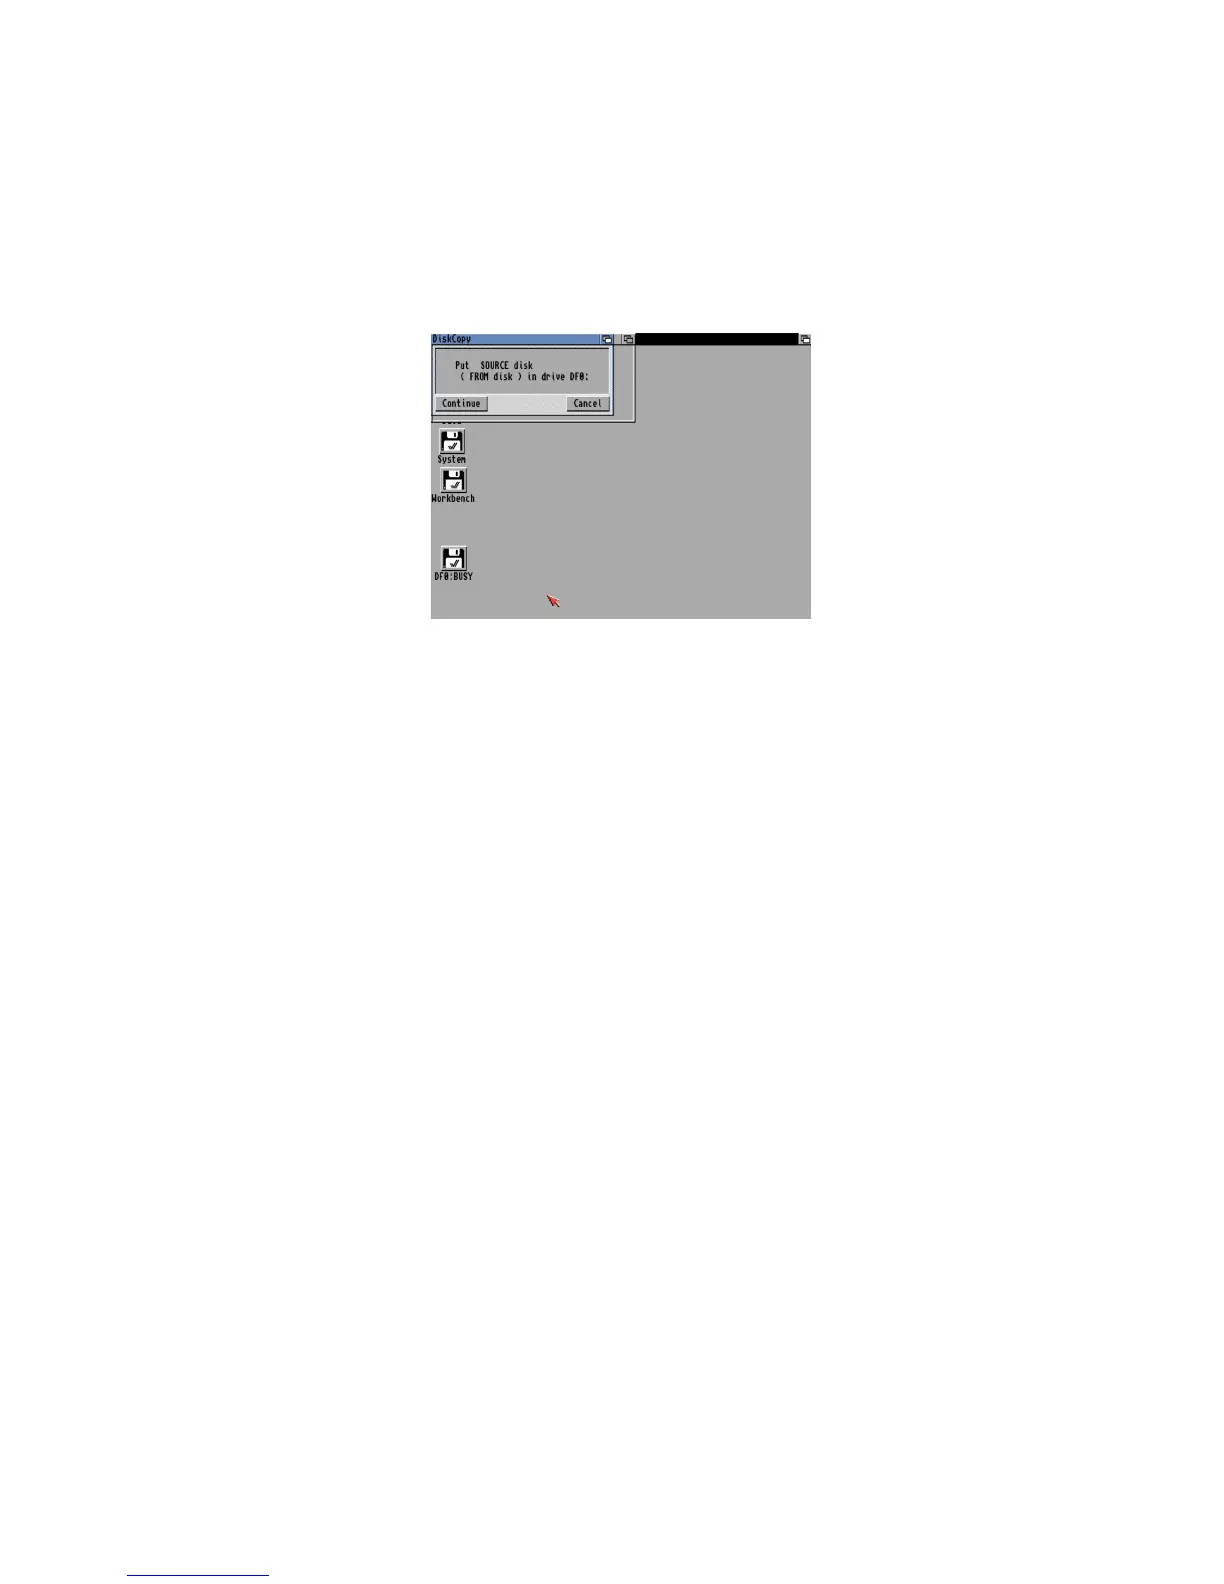
Figure 3
It will say >Put SOURCE disk (FROM disk) in drive DF0:=, remove the disk from the
floppy drive, and make sure it is your original Workbench disk, at the top there is a
hole, make sure it is not covered with the black tab to protect the disk during this
operation. Reinsert the disk, and with the left mouse button click once on Continue.
Once the read operation is complete, it will ask you to Put DESTINATION (TO disk) in
drive DF0:. Press the eject button to remove your original Workbench disk, and insert
your Blank disk (the hole should be covered on this disk). Click on Continue to write
and then verify the information to your new disk
You may need to repeat the disk swap a couple of times more until the operation is
completed. Now you will have a disk called >copy of Workbench=, you can rename
this by selecting the disk, then select Rename from the Workbench menu and change
it to just >Workbench=. You should put your original disk somewhere safe and then
use your copy of Workbench from now on. Reboot with your new Workbench disk in