93
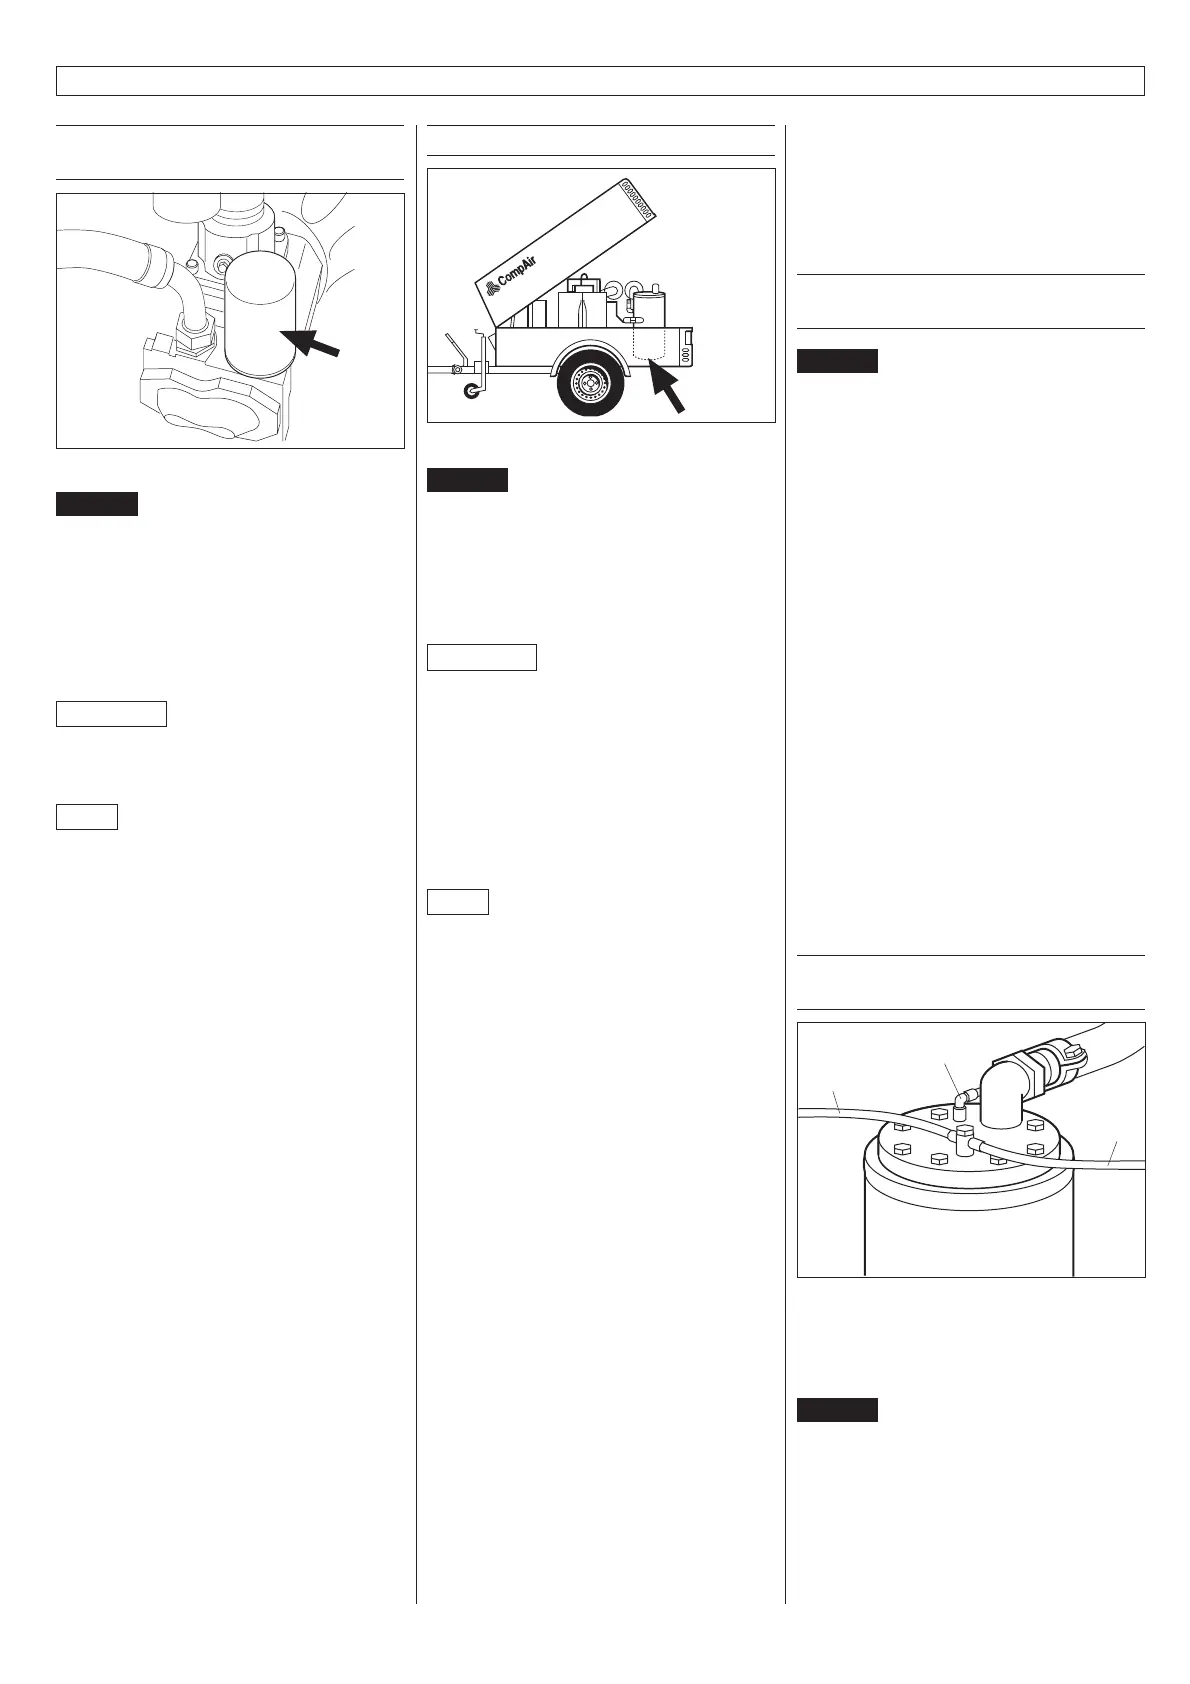
9.4.1 Oil filter replacement
(compressor)
Fig. 26
Danger
Only replace the oil filter cartridge when
the engine is at a standstill and the
screw compressor is not under
pressure.
Caution with hot oil: risk of scalding!
Spill no oil!
Attention
Change the oil filter every 1,000 oper-
ating hours, but at least once per year.
Note
Dispose of oil filter cartridge in accordance
with the relevant regulations - hazardous
waste!
Check for leaks.
Changing the oil filter:
* Unscrew the oil filter cartridge using
appropriate tools
* Dispose of oil filter cartridge
* Apply a thin coat of oil to the seal of the
new oil filter cartridge
* Screw on and tighten the new oil filter
cartridge (Ident-No. 048 199 74) (follow
the instructions on the oil filter cartridge)
* Check for leaks
* Check oil level, add oil if necessary
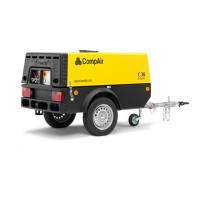
9.4.2 Oil change (compressor)
Fig. 27
Danger
Only change the oil when the engine is
at a standstill and the screw
compressor is not under pressure.
Caution when draining off hot oil:
risk of scalding! Spill no oil!
Attention
Change the oil filter every 1,000 oper-
ating hours, but at least once per year.
The screw compressor must not be
under pressure during oil change.
Drain the oil at operating temperature.
Do not mix oils of different
specifications.
Note
Collect used oil, do not allow it to enter the
soil. Dispose of oil in accordance with the
relevant regulations - hazardous waste!
Spill no oil!
Check for leaks.
Changing the oil:
* Unscrew dipstick
* Place oil drain pan under oil drain valve
* Unscrew the sealing cap of the pressure
vessel
* Collect used oil in the oil drain pan
* When the used oil has been drained
completely, use a new sealing ring on
the sealing screw of the pressure
vessel, position and tighten screw or
close the oil drain valve
* Fill up with new oil (see section
"Specifications" in chapter 1 for initial
oil capacity; use a little less oil when
performing an oil change).
* For lubricants see “Lubricant Table”
* Check sealing ring on dipstick, replace if
necessary
* Screw in and tighten dipstick
* Start screw compressor, run for approx.
two minutes, check for leaks
* Switch off screw compressor
* Check oil level, add oil if necessary
9.4.3 Checking the automatic
monitoring system
Danger
Caution! High voltage! The sensors of
the automatic monitoring system must
not be short circuited.
Check individually every 1000 operating
hours:
1. Temperature sensor - screw compressor
(pressure connection)
2. Oil pressure switch - engine
3. Oil temperature gauge - engine
Checking the automatic monitoring system:
* Disconnect connecting cable
* Connect to ground at oil temperature
gauge.
* Start screw compressor
* The automatic monitoring system must
switch off the screw compressor
immediately after starting, and the
“Fault” indicator lamp must come on.
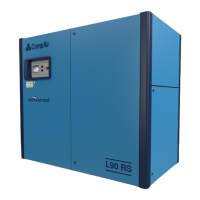
9.4.4 Inspecting / Replacing the fine
separator
Fig. 28
1 Connection for P controller
2 Connection for compressor suction line
3 Oiler connection
Danger
Pressure tank is under pressure. Only
work when the motor is at a standstill
and the screw compressor is not under
pressure.
Caution with hot oil: risk of scalding!
Spill no oil!
9. Maintenance
1
2
3