7
Manual Programming Guide
Temperature Menu (if equipped)
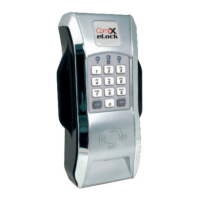
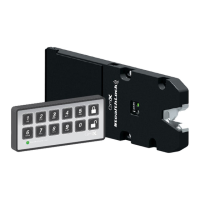
CompX eLocks equipped with temperature monitoring have a
number of features that can be adjusted in the TEMPERATURE
MENU using manual programming.
TURN ON/OFF ALARM
1 Press “MENU.” LOGIN PLEASE will be displayed.
2. Scan valid credential or enter 4-14 digit PIN and press
“ENTER.”
3. Using the “UP”/“DOWN” button, highlight TEMPERATURE
MENU and press “NEXT/SELECT.”
4. A) TURN ON ALARM will appear if alarm is disabled. Press
“NEXT/SELECT” to enable the alarm. Alarm Now
ENABLED will appear.
B) TURN OFF ALARM will appear if alarm already is enabled.
Press “NEXT/SELECT” to disable the alarm. Alarm Now
DISABLED will appear.
RESET OBSERVED TEMPERATURES
(OBSERVED TEMPERATURES IS THE HIGHEST AND LOWEST TEMPERATURE
THAT HAS BEEN RECORDED SINCE THE LAST TIME THE eLock WAS RESET.
THIS WILL NOT RESET THE UPPER AND LOWER LIMITS FOR ALARMING.
IF THE ALARM TEMPERATURE LIMITS NEED TO BE CHANGED, SEE
TEMPERATURE LIMITS)
1. Press “MENU.” LOGIN PLEASE will be displayed.
2. Scan valid credential or enter 4-14 digit PIN and press
“ENTER.”
3. Press “DOWN” button to highlight TEMPERATURE MENU and
press “NEXT/SELECT.”
4. Using the “UP”/“DOWN” button, highlight RESET OBS. TEMPS
and press “NEXT/SELECT.”
5. Reset high and low temperature observations? will appear.
Press ‘UP” and “NEXT/SELECT” to reset.
6. Observations RESET will be displayed.
TEMPERATURE LIMITS
(THE TEMPERATURE RANGE CAN BE ADJUSTED IN 1/10TH DEGREE
INCREMENTS)
Temperature ranges:
Standard Temp eLock: -40°C to 100°C (-40°F to 212°F)
Ultra Low Temp eLock: -100°C to -40°C (-148°F to -40°F)
1. Press “MENU.” LOGIN PLEASE will be displayed.
2. Scan valid credential or enter 4-14 digit PIN and press
“ENTER.”
3. Press “DOWN” button to highlight TEMPERATURE MENU and
press “NEXT/SELECT.”
4. Using the “UP”/“DOWN” button, highlight TEMP LIMITS and
press “NEXT/SELECT.”
5. ALARM SETTINGS will appear along with the current MINIMUM
TEMP & MAXIMUM TEMP settings.
6. Press “UP”/“DOWN” buttons to select value and +/- buttons
or numeric keypad to adjust.
7. Press “NEXT/SELECT” when done.
ALARM SETTINGS
(USING ALARM SETTINGS, ALARM VOLUME, ALARM DELAY, ALARM
DURATION AND THE CHIRP WARNING CAN BE ADJUSTED)
Note: Supervisor level status is required to Enable/Disable
the alarm using ALARM SETTINGS.
CHIRP serves two purposes. First, it is an early warning that
the temperature being recorded has gone outside of the
programmed acceptable range. Second, if the temperature
alarm is disabled, the CHIRP feature allows the eLock to
sound an alert.
When CHIRP is “ON” it will sound at the programmed volume
(OFF, SOFT, MED, LOUD) and escalate at the programmed speed
(OFF, SLOW, MED, FAST) until the programmed ALARM DELAY time
has expired and the eLock starts to alarm, or the temperature
goes back in the programmed acceptable range.
1. Press “MENU.” LOGIN PLEASE will be displayed.
2. Scan valid credential or enter 4-14 digit PIN and press
“ENTER.”
3. Press “DOWN” button to highlight TEMPERATURE MENU and
press “NEXT/SELECT.”
4. Using the “UP”/“DOWN” button, highlight ALARM SETTINGS
and press “NEXT/SELECT.”
5. Alarm Settings will appear along with CHIRP ON/OFF; CHIRP
VOLUME; CHIRP ESCALATION
6. Press “UP”/“DOWN” buttons to select and +/- buttons or
numeric keypad to adjust:
ALARM VOLUME (OFF, SOFT, MED, LOUD)
ALARM DELAY (MINUTES)
ALARM DURATION (MINUTES)
CHIRP (ON/OFF)
CHIRP VOLUME (OFF, SOFT, MED AND LOUD)
CHIRP ESCALATION (OFF SLOW, MED, FAST)
7. Press “NEXT/SELECT” when done.
 Loading...