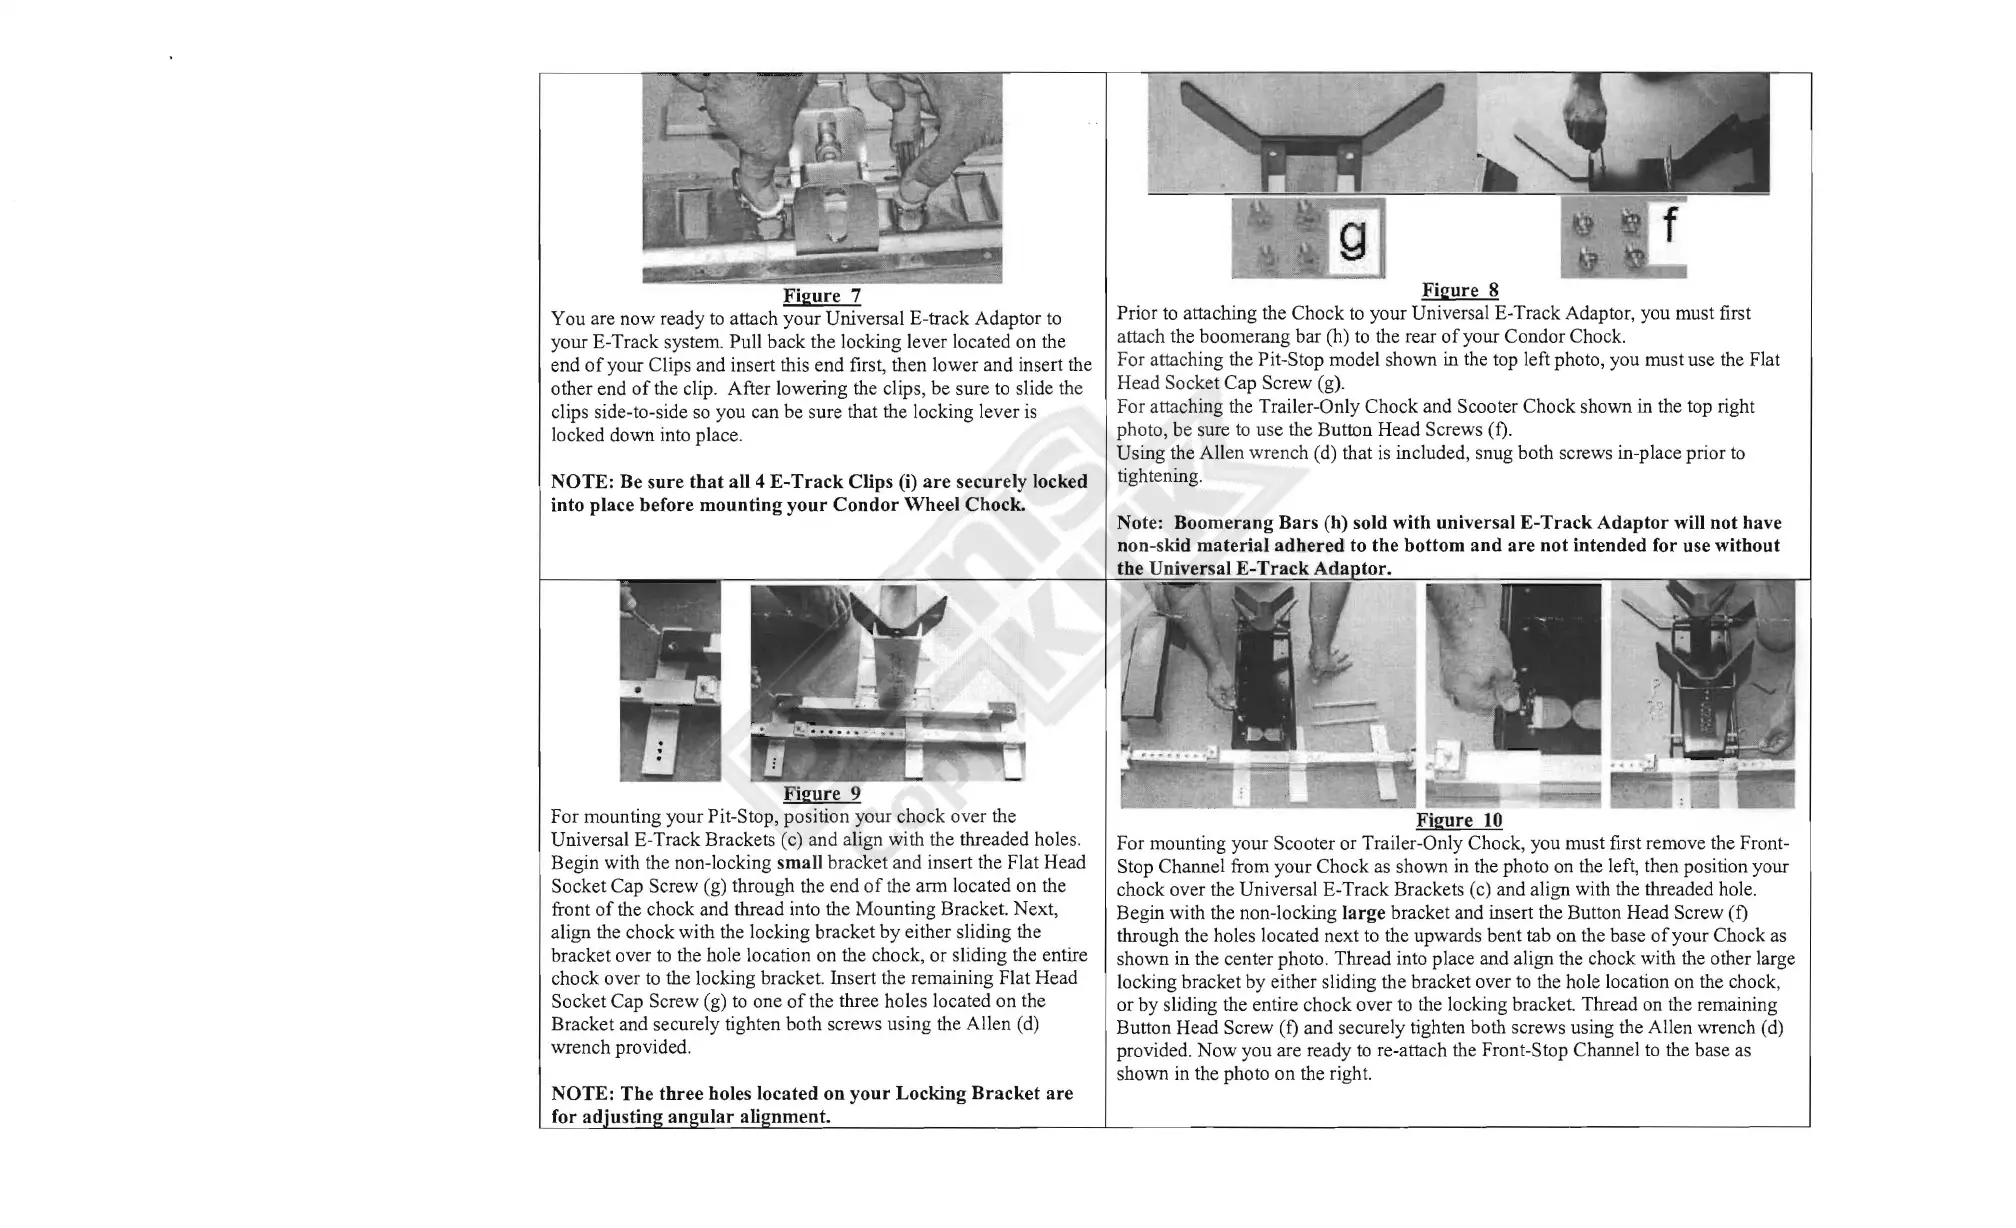
Figure 7
You are now ready
to
attach your Universal E-track Adaptor
to
your E-Track system.
Pull
back the locking lever located on the
end
of
your Clips and insert this end first, then lower and insert the
other end
of
the clip. After lowering the clips, be sure
to
slide the
clips side-to-side
so
you can be sure that the locking lever
is
locked down into place.
NOTE: Be sure that
aU4
E-Track Clips (i) are securely locked
into place before mounting your Condor Wheel Chock.
Figure 9
For mounting your Pit-Stop, position your chock over the
Universal E-Track Brackets (c) and align with the threaded holes.
Begin with the non-locking small bracket and insert the Flat Head
Socket Cap Screw (g) through the end
of
the
ann
located on the
front
of
the chock and thread into the Mounting Bracket. Next,
align the chock with the locking bracket by either sliding the
bracket over
to
the
hole location
on
the chock, or sliding the entire
chock over
to
the locking bracket. Insert the remaining Flat Head
Socket Cap Screw (g)
to
one
of
the three holes located on the
Bracket and securely tighten both screws using the Allen
(d)
wrench provided.
NOTE: The three holes located on your Locking Bracket are
for
attach the boomerang bar (h)
to
the rear
of
your Condor Chock.
Head
Socket Cap Screw (g).
photo, be sure
to
use
the
Button Head Screws (t).
Using the Allen wrench (d) that
is
included, snug both screws in-place prior
to
tightening.
Note:
the
U
Figure 8
Prior
to
attaching the Chock
to
your Universal E-Track Adaptor, you must first
For attaching the Pit-Stop model shown in the top left photo, you must use the Flat
For attaching the Trailer-Only Chock and Scooter Chock shown
in
the top right
Boomerang Bars (h) sold with universal E-Track Adaptor will not have
non-skid material adhered to the bottom and are not intended for use without
shown
in
the photo on the right.
Figure
10
For mounting your Scooter or Trailer-Only Chock, you must first remove the Front-
Stop Channel from your Chock
as
shown
in
the photo
on
the left, then position your
chock over the Universal E-Track Brackets (c) and align with the threaded hole.
Begin with the non-locking large bracket and insert the Button Head Screw
(t)
through the holes located next
to
the upwards bent tab on the base
of
your Chock as
shown in the center photo. Thread into place and align the chock with the other large
locking bracket by either sliding the bracket over
to
the
hole location
on
the chock,
or by sliding the entire chock over
to
the locking bracket. Thread
on
the remaining
Button Head Screw
(t) and securely tighten both screws using the Allen wrench (d)
provided. Now you are ready
to
re-attach the Front-Stop Channel
to
the base as
 Loading...