This document is a comprehensive user and installation manual for the FAR T16012 Induction Hob. It covers safety warnings, installation instructions, operation of the touch controls, cooking guidelines, maintenance, and troubleshooting.
Function Description
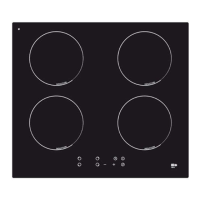
The FAR T16012 is an induction hob designed for domestic cooking. It utilizes electromagnetic vibrations to generate heat directly in the pan, rather than indirectly heating the glass surface. This technology makes it a safe, advanced, efficient, and economical cooking appliance. The hob features four cooking zones, each with independent power control, and a central control panel for operation.
Important Technical Specifications
- Model Reference: FAR T16012
- Supply Voltage: 220V-240V~ / 400V 3N~ 50/60Hz
- Product Size (L*P*H): 590 x 520 x 60 mm
- Building-in Dimensions (L*P): 560 x 490 mm
- Net Weight (N.W.): 10.0 kg
- Total Power: 6400-7200 W
- Cooking Zone Power:
- Left front: 1500 W (180 mm)
- Left back: 2000 W (180 mm)
- Right back: 1500 W (180 mm)
- Right front: 2000 W (180 mm)
Usage Features
The induction hob is operated via a touch-sensitive control panel.
Control Panel Elements:
- Cooking zone selection key: Used to select the desired cooking zone.
- Timer key: Activates and controls the timer function.
- Keylock control: Locks the control panel to prevent accidental changes.
- ON/OFF control: Turns the entire hob on or off.
- Power/Timer regulating key (+/-): Adjusts heat settings and timer duration.
Starting and Adjusting Cooking:
- Power On: Touch the ON/OFF control. The buzzer will beep once, and all displays will show "—" or "— —", indicating standby mode.
- Place Cookware: Place a suitable pan on the desired cooking zone. Ensure the pan bottom and cooking zone surface are clean and dry.
- Select Heat Setting: Select a heat setting by touching the corresponding cooking zone selection key and then using the power regulating keys (+/-). If no heat setting is chosen within 1 minute, the hob automatically switches off. Heat settings can be modified at any time during cooking.
Cookware Compatibility:
- Only use cookware with a base suitable for induction cooking. Look for the induction symbol on packaging or the pan bottom.
- A magnet test can be performed: if a magnet is attracted to the pan base, it is suitable.
- If a pan is placed on a zone and the display flashes "U" alternately with the heat setting, the pan is unsuitable, too small, or not properly centered.
- Suitable materials include iron oil frying pans, stainless steel pots, iron pans, iron kettles, enamel stainless steel kettles, enamel cooking utensils, and iron plates.
- Unsuitable materials include pure stainless steel, aluminum, copper without a metallic base, glass, wood, porcelain, and ceramic.
- Pans should have a smooth, flat base and match the size of the cooking zone for maximum efficiency. Pans less than 140 mm may not be detected.
- Always lift pans off the hob; do not slide them to prevent scratches.
Timer Functionality:
The timer can be used in two ways:
- Minute Minder: Functions as a countdown timer without turning off any cooking zone. The timer can be set for up to 99 minutes.
- Cooking Zone Timer: Sets a specific cooking zone to turn off automatically after the set time.
- Setting the Timer: Touch the timer control, then use the +/- keys to adjust the time. A single touch changes the time by 1 minute; holding the key changes it by 10 minutes.
- Cancellation: Touching +/- together cancels the timer, displaying "00".
- Visual Indicators: The timer display shows the remaining time, and the timer indicator flashes for 5 seconds when set. For cooking zone timers, a red dot next to the power level indicator illuminates.
Safety Features:
- Auto Shutdown Protection: If a cooking zone is left on for an extended period without intervention, it will automatically shut down. Default working times vary by power level (e.g., 8 hours for power levels 1-3, 2 hours for power levels 7-9).
- Over-Temperature Protection: A temperature sensor monitors the hob's internal temperature. If it becomes excessive, the hob automatically stops operation.
- Detection of Small Articles: If an unsuitable size or non-magnetic pan, or small metal objects (knife, fork, key) are left on the hob, it will automatically go into standby in 1 minute. The fan will continue to run for another minute to cool down.
- Hot Surface Indicator ("H"): After cooking, "H" will appear on the display for hot cooking zones. This disappears when the surface has cooled to a safe temperature and can be used to identify still-warm zones for energy saving.
- Keylock Control: Locks the control panel to prevent unintended use, especially by children. All controls except ON/OFF are disabled when locked.
Cooking Guidelines:
- General Tips: Reduce temperature settings when food comes to a boil. Use a lid to reduce cooking times and save energy. Minimize liquid/fat for faster cooking. Start on high, then reduce heat once food is hot.
- Simmering/Cooking Rice: Simmering occurs around 85°C. For rice (absorption method) or flour-thickened sauces, a higher setting may be needed.
- Searing Steak: Allow meat to reach room temperature. Heat a heavy-based frying pan. Oil the steak and pan, then cook. Turn only once. Rest the steak on a warm plate after cooking.
- Stir-Frying: Use an induction-compatible flat-based wok or large frying pan. Prepare ingredients in advance. Preheat pan, add oil. Cook meat first, set aside. Stir-fry vegetables, then return meat and add sauce. Stir gently to heat through.
- Heat Settings (1-9):
- 1-2: Delicate warming, melting chocolate/butter, gentle simmering, slow warming.
- 3-4: Reheating, rapid simmering, cooking rice.
- 5-6: Pancakes.
- 7-8: Sautéing, cooking pasta.
- 9: Stir-frying, searing, bringing soup to boil, boiling water.
Maintenance Features
Cleaning the Glass Cooktop:
- Everyday Soiling (fingerprints, marks, non-sugary spills):
- Switch off the hob.
- Apply a cooktop cleaner while the glass is still warm (not hot).
- Rinse and wipe dry with a clean cloth or paper towel.
- Switch the hob back on.
- Boilovers, Melts, and Hot Sugary Spills:
- Remove immediately with a fish slice, palette knife, or razor blade scraper suitable for induction cooktops.
- Hold the blade at a 30° angle and scrape the soiling or spill to a cool area.
- Clean the soiling or spill with a dish cloth or paper towel.
- Follow steps 2-4 for everyday soiling.
- Spillovers on Touch Controls:
- Switch off the hob.
- Soak up the spill.
- Wipe the touch control area with a clean damp sponge or cloth.
- Wipe the area completely dry with a paper towel.
- Switch the hob back on.
Important Cleaning Notes:
- Always switch off the hob before cleaning.
- Be extremely careful with hot surfaces, even if the "H" indicator is off.
- Avoid heavy-duty scourers, some nylon scourers, and harsh/abrasive cleaning agents as they can scratch the glass. Always check product labels.
- Never leave cleaning residue on the cooktop, as it can stain the glass.
- Do not use a steam cleaner.
Troubleshooting:
The manual provides a detailed troubleshooting guide for common issues, including:
- Hob not turning on (no power, controls locked).
- Unresponsive controls (film of water, rough-edged cookware).
- Scratched glass (rough-edged cookware, unsuitable cleaning products).
- Pans making crackling/clicking noises (normal for induction).
- Low humming noise on high heat (normal for induction technology).
- Fan noise (cooling fan to prevent overheating, normal).
- Pans not heating / "U" in display (unsuitable pan, pan too small/not centered).
- Hob or cooking zone turning off unexpectedly / error code displayed (technical fault).
Error Codes (Failure Display and Inspection):
- F3 - F8 / F9 - FE: Temperature sensor failure (contact supplier).
- E1 / E2: Abnormal supply voltage (inspect power supply, power on after normal supply).
- E3 / E4: Abnormal temperature (inspect the pot).
- E5 / E6: Bad induction hob heat radiation (restart after hob cools down).
The manual emphasizes that any damage or accident derived from non-conformity with instructions is not the manufacturer's liability. It also includes information on the correct disposal of the product in accordance with European directive 2002/96/EC (WEEE).