4. Zur Messung von uA-Wechselströmen betätigen Sie den Taster
“PEAK” einmal. Statt eines uA-Gleichstromes kann nun ein
uA-Wechselstrom gemessen werden. Betätigen Sie den Taster
“PEAK” ein weiteres (zweites) Mal, so können Sie sog. Misch-
ströme (AC+DC) in uA messen. Wenn Sie zur Gleichstrommes-
sung “uADC” zurückkehren wollen, betätigen Sie ein weiteres
(drittes) Mal den Taster “PEAK”.
5. Mit dem Taster “DUAL” wird die kleinere Anzeige zusätzlich ein-
geschaltet, auch möglich bei der Wechselstrommessung “uAAC”
und der Mischstrommessung “uAAC+DC”.
DC
Einmal drücken: Gleichstrom in uA im großen und Frequenz im
kleinen Display.
Zweimal drücken: Gleichstrom-Anzeige in uA im großen, Wech-
selstromanzeige in uA (AC) im kleinen Display.
Dreimal drücken: Rückkehr zur “normalen” uA-Gleichstrommes-
sung ohne kleines Display.
AC
Einmal drücken: Wechselstrom in uA im großen und Frequenz im
kleinen Display.
Zweimal drücken: Wechselstrom-Anzeige in uA im großen,
Gleichstromanzeige (DC) in uA im kleinen Display.
Dreimal drücken: Rückkehr zur “normalen” Wechselstrommes-
sung (AC) in uA ohne kleines Display.
AC+DC
Einmal drücken: Mischstrom (AC+DC) in uA im großen und Fre-
quenz im kleinen Display.
A
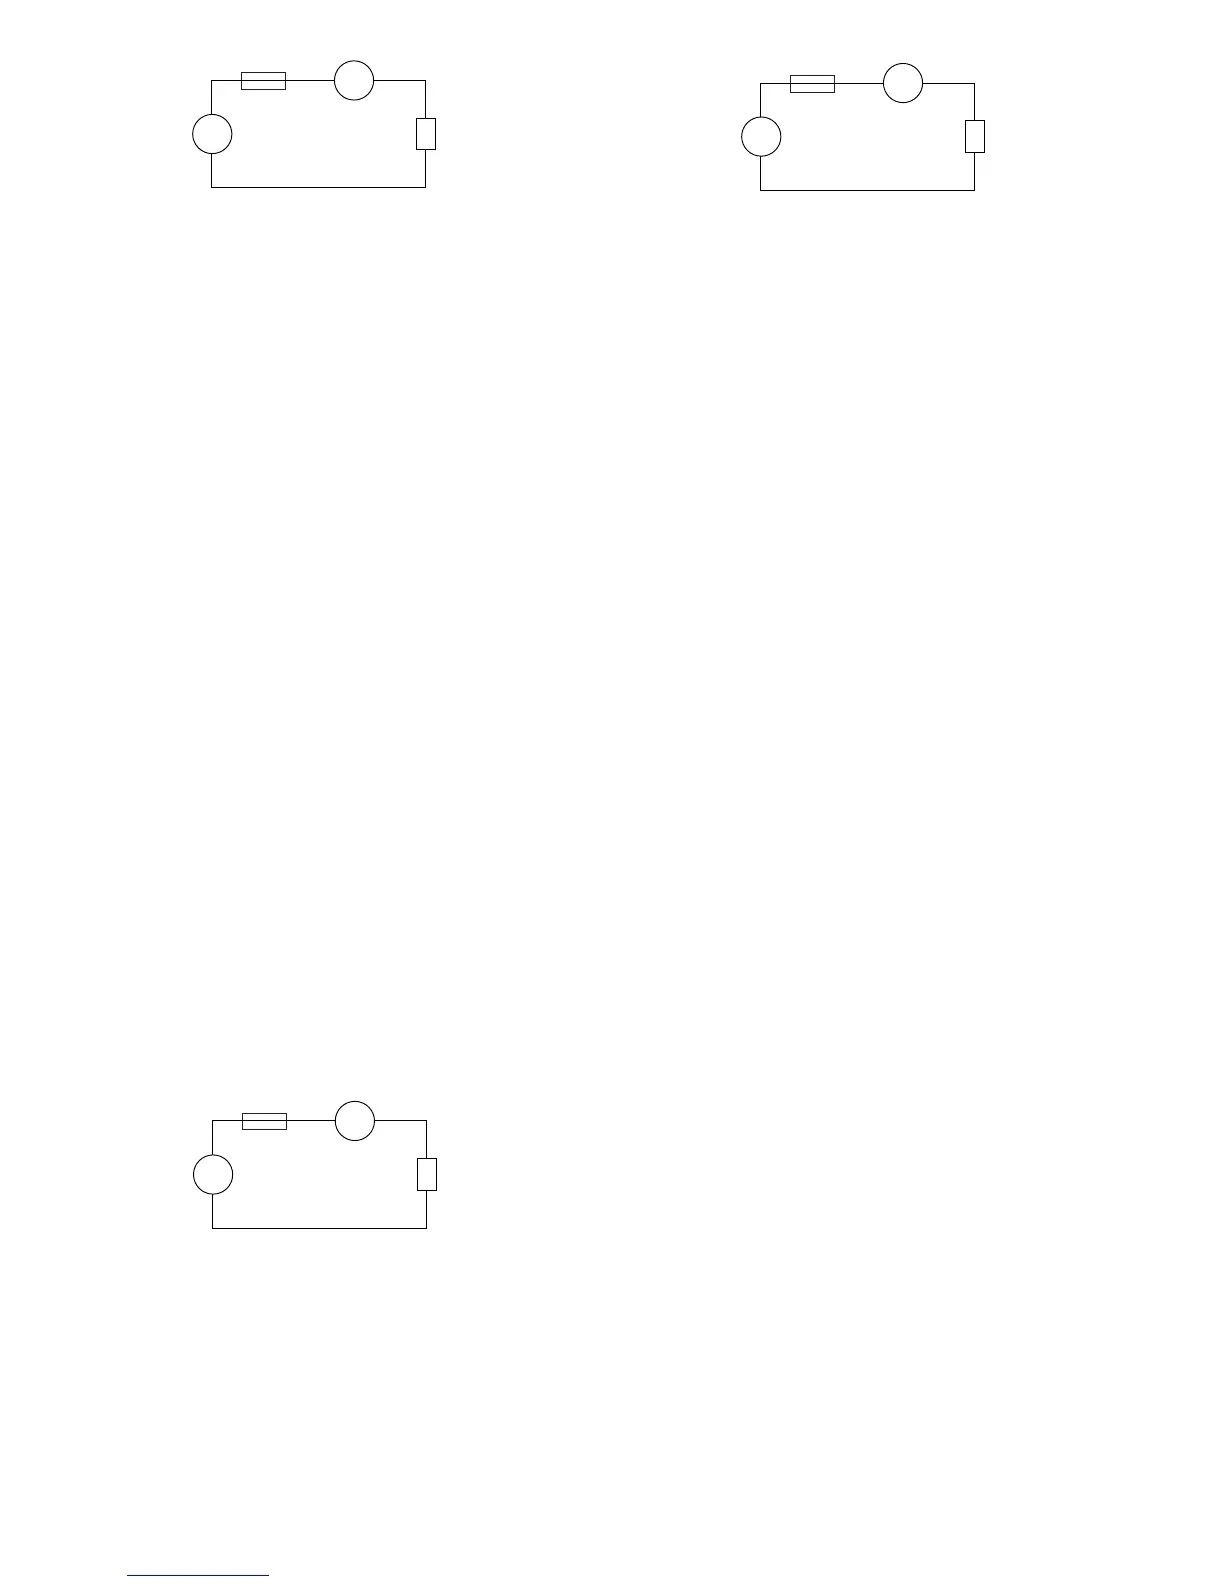
...
Sicherung Duu
Strom-
quelle
Verbraucher
(Last, Schaltung
usw.)
–
–
4. For the measurement of µA AC currents, press the "PEAK" but-
ton once. Instead of a uA DC current a uA AC current can be
measured. Press the "PEAK" button a second time and so-called
mixed currents (AC+DC) in µA can be measured. To return to µA
DC current measurement, press the "PEAK" button a third time.
5. The smaller display can be switched on in addition by pressing
the button "DUAL", also possible with µA AC current measure-
ment and µA AC+DC mixed current measurement.
DC
Press once: DC current in µA in the large, frequency indication in
the small display.
Press twice: DC current indication in µA in the large, AC current
indication in µA in the small display.
Press three times: return to "normal" µA DC current measure-
ment without small display.
AC
Press once: AC current in µA in the large, frequency indication in
the small display.
Press twice: AC current indication in µA in the large, DC current
indication in µA in the small display.
Press three times: return to "normal" AC current measurement in
µA without small display.
AC+DC
Press once: mixed current (AC+DC) in µA in the large, frequency
indication in the small display.
Press twice: mixed current indication in µA in the large, AC cur-
rent indication in µA in the small display.
A
...
Fuse Duu
Current
source
Consuming
device
(bad, switch)
–
–
E mA - Messung (Strommessung, AC, DC, AC+DC)
Zur Messung von Gleich- oder Wechsel- oder Mischströmen in mA
bis max. 400 mA gehen Sie wie folgt vor:
1. Verbinden Sie die schwarze Meßleitung mit der COM-Buchse
und die rote Meßleitung mit der uA/mA-Buchse.
2. Stellen Sie den Drehschalter auf “=~mA”.
3. Verbinden Sie die Meßleitungen in Serie mit dem Meßobjekt (sie-
he nachfolgende Abbildung). Der Meßwert wird im großen Dis-
play angezeigt.
4. Zur Messung von -mA-Wechselströmen betätigen Sie den Taster
“PEAK” einmal. Statt eines mA-Gleichstromes kann nun ein mA-
Wechselstrom gemessen werden. Betätigen Sie den Taster “PE-
AK” ein weiteres (zweites) Mal, so können Sie sog. Mischströme
(AC+DC) in mA messen. Wenn Sie zur Gleichstrommessung
“mADC” zurückkehren wollen, betätigen Sie ein weiteres (drittes)
Mal den Taster “PEAK”.
5. Mit dem Taster “DUAL” wird die kleinere Anzeige zusätzlich ein-
geschaltet, auch möglich bei der Wechselstrommessung
“mAAC” und der Mischstrommessung “mAAC+DC”.
DC
Einmal drücken: Gleichstrom in mA im großen und Frequenz im
kleinen Display.
A
...
Sicherung Duu
Strom-
quelle
Verbraucher
(Last, Schaltung
usw.)
–
–
Press twice: dBm indication in the large, DC voltage indication in
mV in the small display.
Press three times: DC voltage measurement in mV in the large,
AC voltage measurement in mV in the small display.
Press four times: return to "normal" mV DC voltage measure-
ment without small display.
AC
Press once: AC voltage in mV in the large, frequency indication
in the small display.
Press twice: dBm indication in the large, AC voltage indication in
mV in the small display.
Press three times: AC voltage measurement in mV in the large,
DC voltage measurement in mV in the small display.
Press four times: return to "normal" mV AC voltage measure-
ment without small display.
AC+DC
Press once: mixed voltage in mV in the large, frequency indica-
tion in the small display.
Press twice: dBm indication in the large, mixed voltage indica-
tion in mV in the small display.
Press three times: mixed voltage indication in mV in the large,
AC voltage indication in mV in the small display.
Press four times: mixed voltage indication in mV in the large, DC
voltage indication in mV in the small display.
Press five times: return to "normal" mixed voltage measurement
in mV without small display.
6. The smaller display can also be switched on in addition by pres-
sing the "Hz" button.
Press once: frequency indication in the large, mV voltage indica-
tion (with PEAK: AC or DC or AC+DC) in the small display.
Press twice: mark-to-space ratio indication in % in the large, mV
voltage indication (AC or DC or AC+DC) in the small display.
Press three times: pulse width indication in ms (half-wave) in the
81
 Loading...