Initial Setup of the Meter and Connection to Compatible MiniMed
®
Insulin Pump
1
Remove the USB cap to reveal the USB connector.
The CONTOUR
®
NEXT LINK meter has a permanent
rechargeable battery. Before you do anything else,
charge your meter with the wall charger included
with your kit or by plugging the USB connector into
a computer. Be sure the computer is turned on. Your
meter will briefl y display “Do Not Test—Charging”
and the test strip port light will fl ash.
You cannot do a blood glucose test while the
battery is charging. When charging is fi nished,
the test strip port light will turn off. Unplug your
CONTOUR NEXT LINK meter to test.
2
To begin setup,
hold down
Menu button
for several
seconds until
the meter turns on.
3
Choose your
language and
press OK.
4
Press OK on the next screen to
begin the connection process.
NOTE: Pump refers to your
compatible MiniMed Insulin
Pump.
5
STOP. Do NOT press
ANY buttons.
This screen displays the
meter ID number (in the
bottom left corner). This ID is needed to complete
the connection process.
Put down your meter. Pick up the compatible
MiniMed Insulin Pump and continue with Step 6.
6
Press ACT to go to
the MAIN MENU.
Scroll to Utilities by
pressing the down
arrow. Press ACT.
7
Scroll to Connect Devices from the
UTILITIES MENU and press ACT.
8
Select On and press ACT. If you are
replacing a meter, go to Step 9. If
you are adding a new meter, go to
Step 11.
9
If replacing a meter, select Delete ID
and press ACT.
10
If you have multiple meter IDs,
repeat Step 9 for each one.
11
To add a new meter, select Add ID
and press ACT. Refer to Step 5 (or
see meter back) to fi nd meter ID.
13
Return to your
CONTOUR NEXT LINK
meter. After you
have entered the
meter ID into your
compatible MiniMed Insulin Pump, press OK.
12
Select Review ID on
your compatible
MiniMed Insulin Pump
to confi rm that your
CONTOUR
®
NEXT LINK
meter ID has been
correctly entered. If
incorrect, go back to
Step 9.
NOTE: For detailed instructions, see
your compatible MiniMed Insulin
Pump user guide.
14
SEND OPTIONS controls
how your meter will
send blood glucose
readings to your
compatible MiniMed
Insulin Pump.
Choose the SEND OPTION that is best for you.
Always = Meter will always send results.
Ask Me = Meter will ask you before sending results.
Never = Meter will never send results.
16
Choose your
AUTOLOG settings.
AUTOLOG allows
you to mark a test as
Before Meal, After Meal or No Mark.
17
The meter comes
preset with the de-
fault blood glucose
target ranges as
shown. Accept the
default blood glucose target ranges or Change them
after talking to your health care professional.
18
Follow the display prompts
to set your meter High and Low
Limits. Choose Accept to use
the default setting (250 mg/dL
for the meter high limit and
70 mg/dL for the meter low
limit). Choose Change if you
wish to use different limits.
Connecting Meter to Compatible MiniMed
Insulin Pump
Choosing Meter Send Options
Set Meter Date/Time to Match MiniMed Pump
Additional Meter Settings
SETUP IS NOW COMPLETE!
Setting Up the Meter
= Help
Charging the Meter
85591681 Rev. 12/16
NOTE: High and Low Limits can only be set outside
your selected Target range(s). Targets can only be set
inside your selected High and Low Limit(s). For
additional information, you may contact Customer
Service at 800-348-8100, available Monday through
Sunday, 8:00 am through 12:00 Midnight, Eastern Time.
Use the up and down arrow buttons
to enter the six character meter ID
shown on the meter screen.
Press ACT after
each character
entry.
Then scroll to Meters and
press ACT.
8:O3 AM
METER BG
mg/dL
93
93
mg
dL
Before Meal
01:33PM l 11/10
Reminder
Notes
QUICK REFERENCE GUIDE
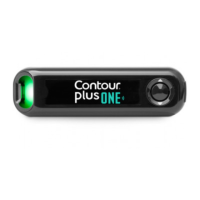
Uses only CONTOUR
®
NEXT
Blood Glucose Test Strips
Wireless Blood Glucose
Monitoring System
15
The date and time on
your meter must match
the date and time on
your MiniMed Pump.
Pick up MiniMed
Pump.
Press ACT to go
to the MAIN
MENU. Scroll to
Utilities and
press ACT. Scroll to Time/Date and press ACT.
Select a time format and press ACT. Note the time
and date.
Return to your meter. Follow instructions on your
meter to change the time and date to match your
compatible MiniMed Insulin Pump.