5 Align and bend the wires carefully to fit them
inside the back box.
6 Align and carefully slide the power box into the
back box.
7 Secure the power box into the back box using
the screws provided.
NOTE: Overtightening the power box screws
could result in a poor connection between the
Touch Screen and the power box and could
also cause the Touch Screen to warp.
8 Align and slide the back of the Touch Screen into
the power box. The Touch Screen is magnetic
and should snap into place easily.
9 (Optional) To secure the Touch Screen inside the
power box, remove the tape covering the bottom
security pin (see Figure 10) before attaching the
Touch Screen to the power box.
PowerOverEthernet(PoE)Connection
Connect the PoE Injector to power and the network,
and then connect it to the power box.
The steps below describe how to install a Control4
PoE Injector.
1 Connect the Control4 PoE Injector to an AC
outlet using the power cord.
2 Connect one of the RJ-45 LAN ports on the
gateway/router/switch to the PoE Injector’s LAN
port using the RJ-45 Ethernet cable.
3 Connect the PoE Injector’s PWR LAN-OUT
port to the RJ-45 Ethernet cable that will be
connected to the Touch Screen.
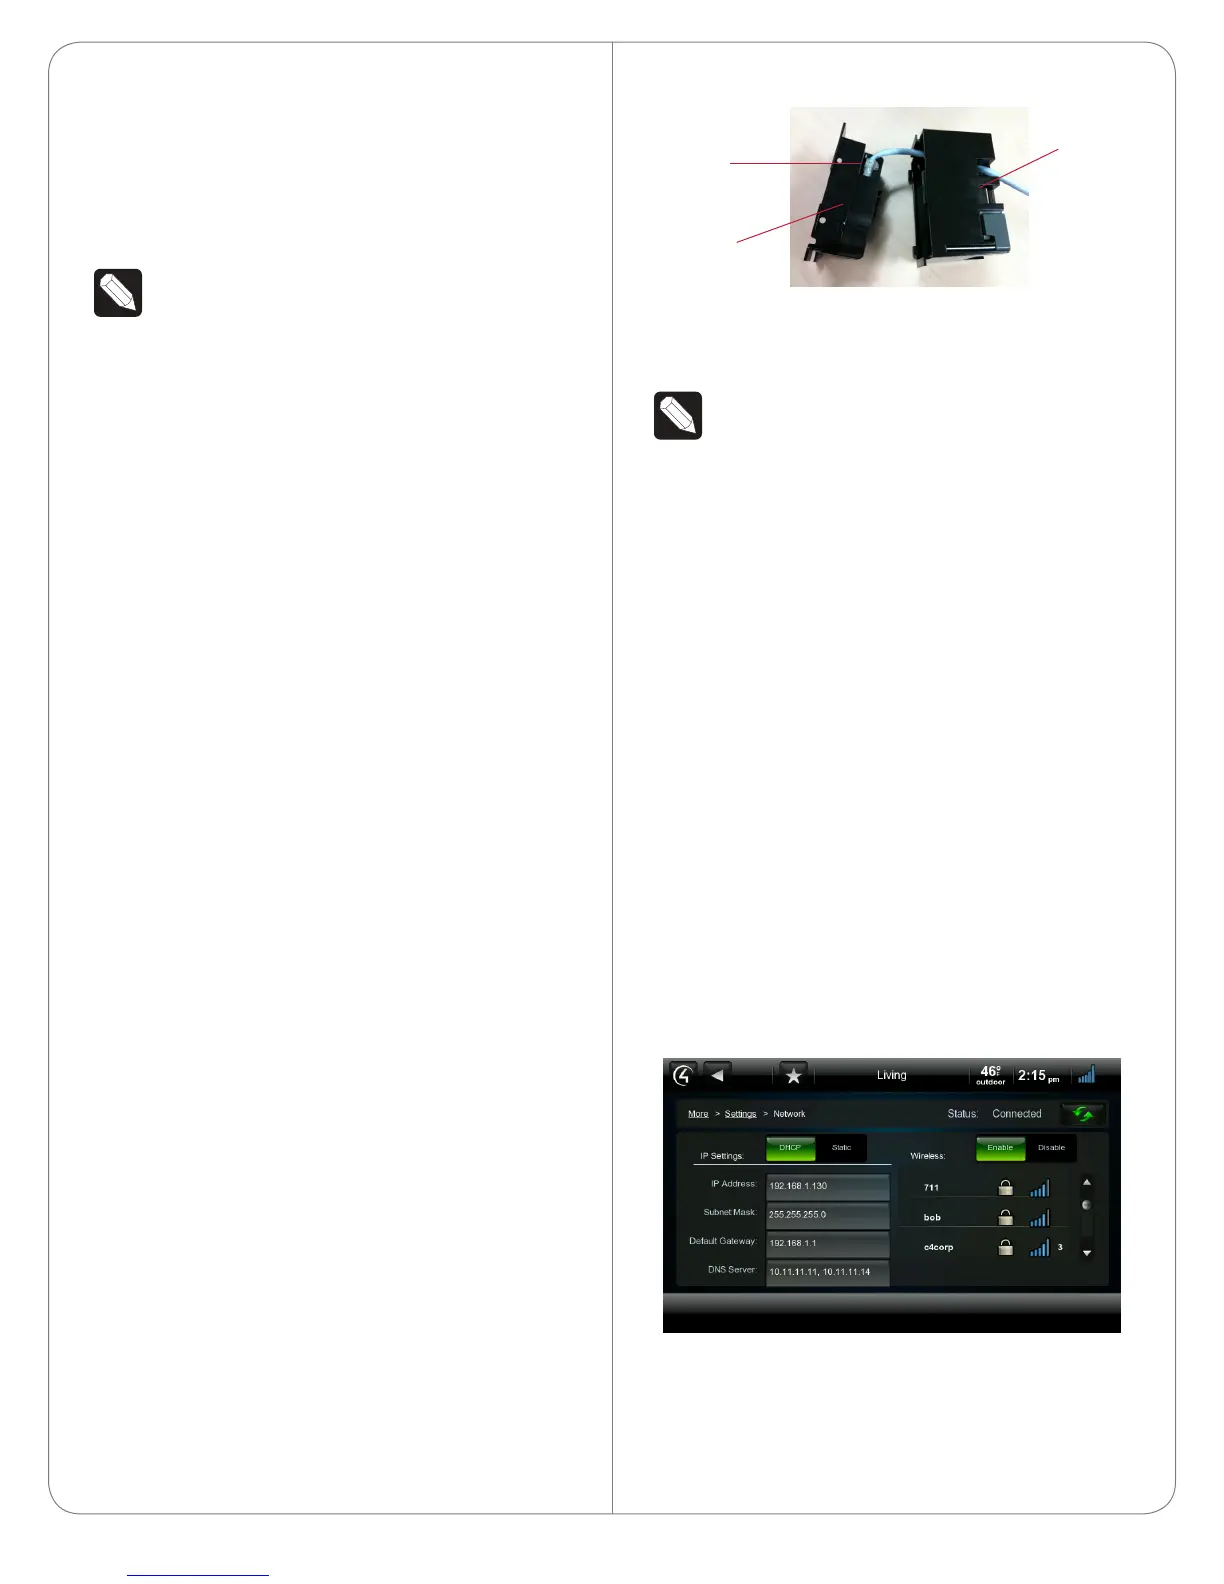
4 Pull the Ethernet cable through the top back hole
of the back box to the Ethernet connector on the
top back of the power box, and then connect it
(see Figure 8).
5 Align and carefully slide the power box into the
back box until the Touch Screen is attached to
the power box.
Figure 8. Ethernet Connection
6 Secure the power box into the back box using
the screws provided.
NOTE: Overtightening the power box screws
could result in a poor connection between the
Touch Screen and the power box and could
also cause the Touch Screen to warp.
7 Align and slide the back of the Touch Screen into
the power box. The Touch Screen is magnetic
and should snap into place easily.
8 (Optional) To secure the Touch Screen inside the
power box, remove the tape covering the bottom
security pin (see Figure 10) before attaching the
Touch Screen to the power box.
Configuration
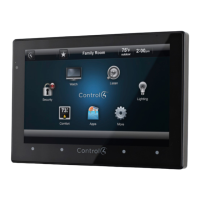
Configure for Wireless
(WiFi only) Connect to a WAP on the Touch Screen
(see Figure 9):
Figure 9. Wireless Configuration
1 After initialization, press and hold the large White
4in the center of the Touch Screen to enter the
configuration screen.
2 Press the Network button on the Touch Screen’s
6
Ethernet
Connection
Power Box
Back Box