CoolPlug CooLinkHUB HVAC Bridge Wireless CoolPlug & CooLinkHUB – Installation Guidelines
QIG Version 2.2 25 CoolPlug CooLinkHUB
15. Wireless CoolPlug & CooLinkHUB – Installation
Guidelines
Important Notes:
1 To successfully pair the CooLinkHUB to the CoolPlug they must be in line-of-sight
proximity one to the other (no more than three meters).
2 The CoolPlug is powered from the HVAC terminal. It can also be powered via USB
during the setup process (either from a PC or the CooLinkHUB).
3 The CooLinkHUB can connect simultaneously to both wired and wireless CoolPlug
units.
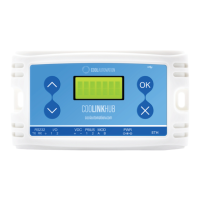
How to pair and connect a CoolPlug with the CooLinkHUB
1 On the CooLinkHUB, press the OK button.
2 An Option menu is displayed on the LCD screen.
3 With the up/down arrow buttons, select the Wireless option.
4 Press the OK button. A new options menu is displayed on the screen.
5 With the arrow buttons select the Pair option.
6 On the CoolPlug, press the button five consecutive times. A fast blinking red light is
displayed while pairing to the CooLinkHUB.
Note: The Wireless CoolPlug has a Red LED
instead of Yellow.
Red LED status indication:
▪ Constantly ON – CoolPlug is not paired.
▪ ON with intermittent blink – Paired but not
connected to the CooLinkHUB
▪ Fast blinking – CoolPlug is in Pairing process
▪ OFF – Paired and Connected
7 On the CooLinkHUB, press the OK button.
8 When pairing is complete the red LED (# 3 on the image) turns off.
 Loading...