8
7. Getting to Know Your Micro C@m
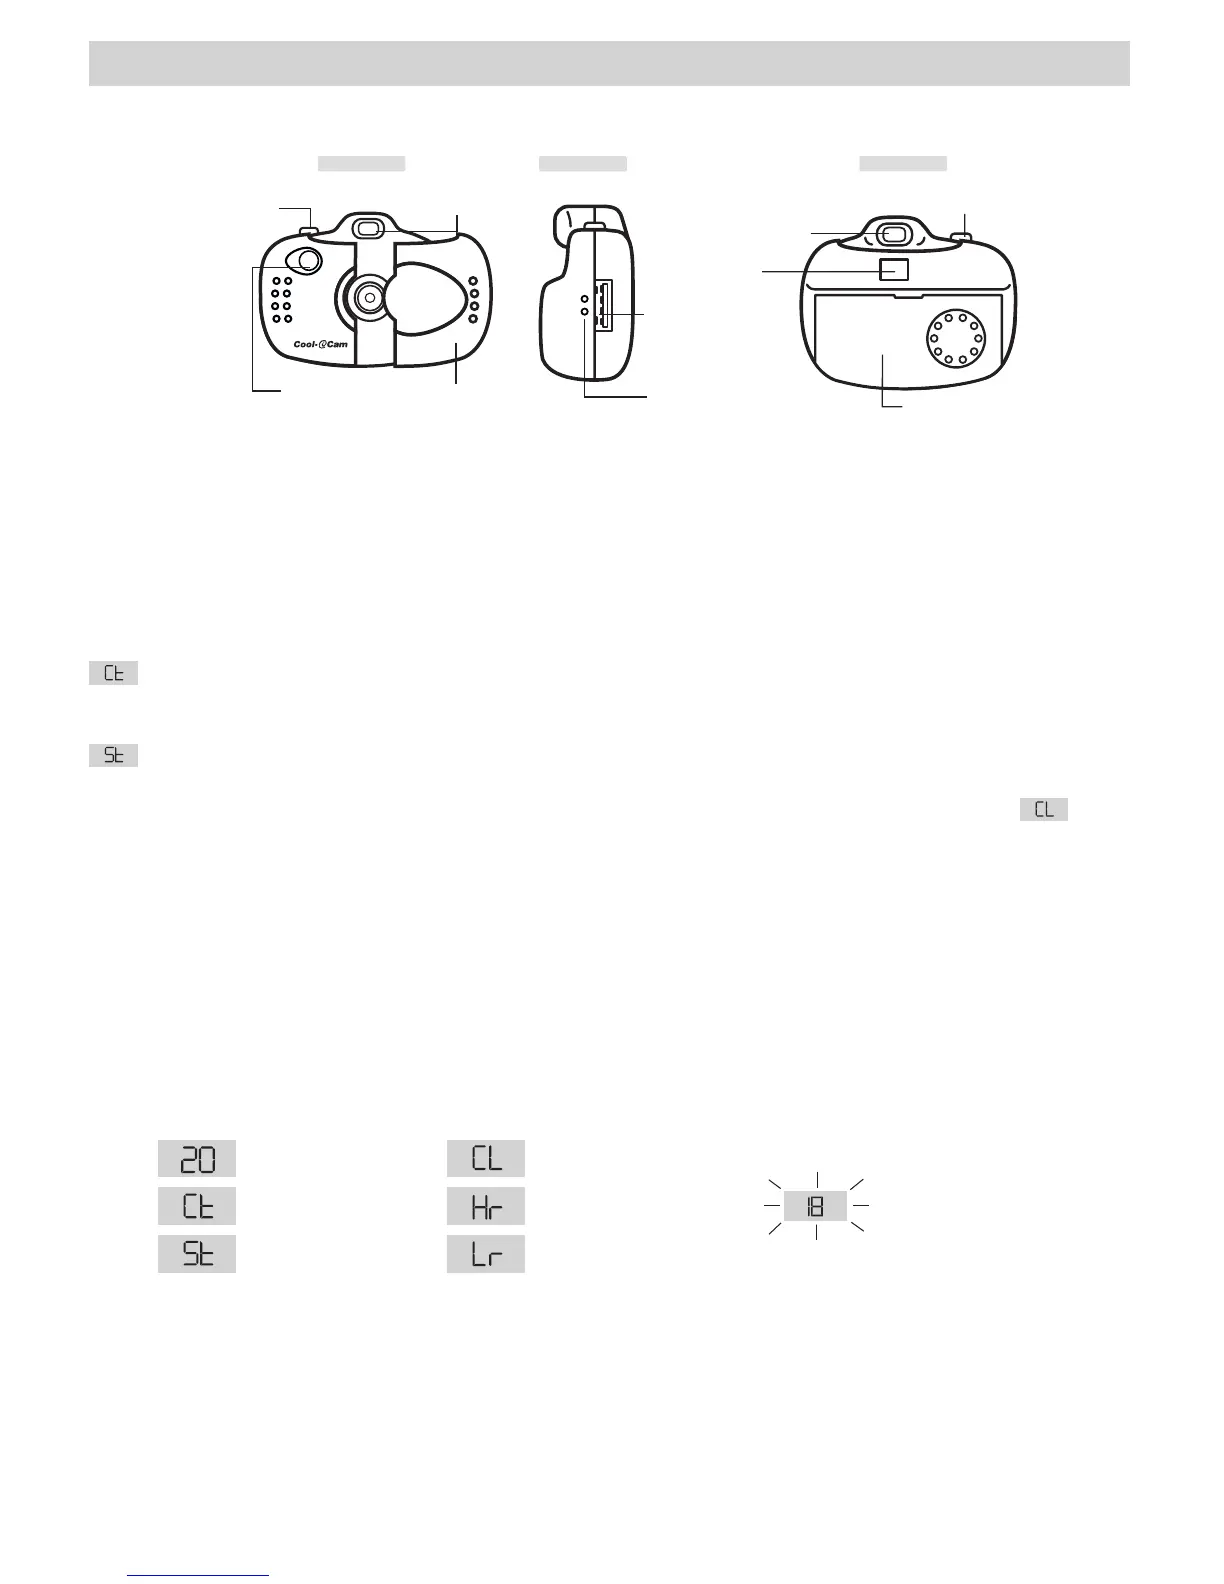
Refer to the picture below for a quick overview for your Micro C@m.
C
o
o
l
-
i
C
a
m
D
I
G
I
T
A
L
C
A
M
E
R
A
Front View
Battery Door
Mode Button
(7.4)
LCD Display
(7.3)
Shutter button
(7.1)
Side View
Back View
Viewnder (7.2)
Lens Cover
USB Cable Port
Hole for Hanging
Hook
Viewnder (7.2)
Shutter button
(7.1)
7.1 Shutter Button
The Shutter Button has 5 functions. Although these are covered in more detail later in this manual, please nd
below a brief description.
7.1.1 Still Image
To take an image, aim the Micro C@m by looking through the viewnder and press the Shutter Button once. A
beep means you have taken an image. (see section 8)
7.1.2 Movie Clip
To take a movie clip, press and hold the Shutter Button to start taking continuous images when in the Continuous
Mode. (see section 8)
7.1.3 Self-Timer
To start the 9 seconds Self-Timer, simply press the Shutter Button when the Micro C@m is in the Self-Timer
Mode. (see section 8)
7.1.4 Clear Memory
To clear all images that you have taken, simply press the Shutter Button when you are in the Clear mode.
(see section 8)
7.1.5 Change Resolution
The Shutter Button can be used to switch between Hi-Res and Low-Res settings. To do this, the memory must
rst be cleared, and the resolution option selected. (see section 8)
7.2 Viewnder
The viewnder is the window you look through when you aim the Micro C@m. Make sure you center the subject
in the viewnder before taking an image.
7.3 LCD Display
By default, the 2 digit LCD screen displays the number of images remaining that can be taken before the Micro
C@m’s memory is lled. It is also used in conjunction with the Mode Button to access and display the Micro
C@m settings.
Images Remaining
Clear Memory Mode
Self-Timer Mode
Low Resolution
(Low-Res) Mode
High Resolution
(Hi-Res) Mode
Continuous Mode
Low Battery Warning
(LCD will blink)
7.4 Mode Button
The Mode Button has 2 primary functions:
7.4.1 Turning your Micro C@m On from the Stand-by Mode
When your Micro C@m is in Stand-by Mode, press the Mode button to reactivate.
7.4.2 Cycling Through the Operating Modes
You can also use the Mode Button to cycle through the operating modes of your Micro C@m. (For more details,
see 8.3 Getting Started)