EasyManua.ls Logo

Coolaroo Simple Lift - User Manual

Coolaroo Simple Lift
6 pages
Print Icon
To Next Page IconTo Next Page
Loading...
Congratulations on the purchase of your Coolaroo® Simple Lift™ Outdoor Roller Shade. Whether you choose to install it in your apartment or home on a
window, balcony, patio, porch or deck, simply follow the directions included here to create a safer, more enjoyable environment with increased privacy.
Your Simple Lift™ Outdoor Roller Shade is fully assembled and only needs to be installed before it can be used. Before beginning the steps below, please
take a moment to review the parts list you will need to hang the shade.
Your Simple Lift™ Outdoor Roller Shade can either be hung from the top of a surface (i.e. window frame, (Fig. 1) or side mounted on the inside surface of a
wall, patio or porch. Regardless of how you choose to install the shade, the installation instructions remain the same.
INSTALL THE MOUNTING BRACKETS
A. Using the mounting bracket as your guide, mark the holes where the
screws will go with a pencil. The tension wheel bracket will need to be
installed on the right hand side.
Note: Be sure the brackets on both ends are level and in
line with each other.
B. Use a 3/16” drill bit to pre-drill the holes. If you are mounting the
shade on a material other than wood The optional wall anchors which
can be inserted into the pre-drilled holes are included.
C. Mount the installation brackets to the ceiling or wall using the wood
screws provided. (Fig. 1)
INSTALL THE SHADE
A. Next, position the shade so that the tension wheel side of the roller
shade is on the right. (Fig. 2)
Note: You will also want to position the head rail (roll) so that
the red tension brake is facing you. This will make it easier for
you to remove the brake as described in Step E.
2
1
ADDITIONAL TOOLS
NEEDED
Screwdriver
Measuring tape
Pencil
Drill with 3/16” drill bit
PARTS LIST QTY
1 Head rail 1
2 Mounting brackets 2
3 Tension wheel component 1
4 Idle end 1
5 Shade 1
6 Bottom rail 1
7 Bottom rail cap 2
8 Wood screws 4
9 Drywall anchors 4
20 minute set up
(approximate time)
Fig.1
Fig.2
(1) Head rail
(3) Tension wheel
component
(4) Idle end
(5) Shade
(6) Bottom rail
(7) Bottom
rail cap
(8) Wood
screws
(9) Drywall
anchors
(2) Mounting
brackets
Outdoor Roller Shade
Simple Li
TM
INSTRUCTION MANUAL
Question and Answer IconNeed help?

Do you have a question about the Coolaroo Simple Lift and is the answer not in the manual?

Summary

Install Mounting Brackets

Mark Bracket Placement

Mark screw holes using the mounting bracket as a guide, ensuring the tension wheel bracket is on the right.

Pre-drill Holes and Use Anchors

Pre-drill holes with a 3/16" drill bit; use optional wall anchors for non-wood surfaces.

Mount Brackets to Surface

Secure installation brackets to the ceiling or wall using the provided wood screws.

Install the Roller Shade

Position Shade for Installation

Position the shade with the tension wheel side on the right, and the red tension brake facing you.

Attach Right Bracket to Tension Wheel

Insert the tab on the right bracket into the tension wheel mechanism to attach the right side.

Attach Left Bracket to Idle End

Slide the idle end into the corresponding idle end bracket to secure the left side.

Remove Tension Wheel Tape

Remove the blue tape from the tension wheel end after the roller shade has been mounted.

Engage Tension Wheel Break

Gently pull the shade down until the red tension wheel brake is fully disengaged from the tension wheel.

Raise and Lower Shade Operation

Lowering the Shade

Lower the shade by pulling down on the center of the bottom rail to the desired height.

Raising the Shade

Raise the shade by gently guiding it upwards with the bottom rail until it stops at the desired position.

Tension Adjustment

Increase Retraction Tension

Turn the tension wheel 1-2 rotations counterclockwise on the left side to increase spring tension.

Decrease Retraction Tension

Turn the tension wheel 1-2 rotations clockwise on the left side to decrease spring tension.

Test and Adjust Tension

Check shade function after adjustments and repeat tension changes as needed.
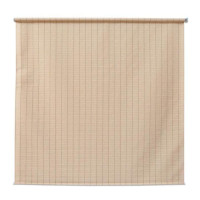
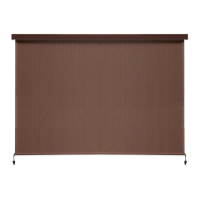
Coolaroo Simple Lift Specifications

General IconGeneral
TypeWindow Shade
OperationManual
MaterialFabric
UV ProtectionYes
InstallationInside Mount
SizeVarious
Mounting TypeBrackets
ColorVarious

Related product manuals