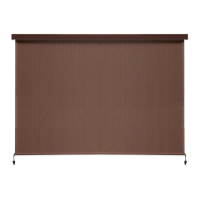
Solar Motorized
with Full Valance
10-minute set up
(approximate time)
Outdoor Roller Shade
ADDITIONAL TOOLS NEEDED
Drill with 3/16 in bit
Level
Tape measure
Pencil
PARTS LIST PARTS
QTY
1
Full Valance 1
2 Shade 1
3 Bottom rail caps 11-BRC 2
4 Bottom rail 1
5 Bungees 11-BUNGEE TD 2
6 Receivers 1-RECEIVER 2
7 Wood screws 4-WS 12
8 Quick connects Z-14-FCIBW 3
9 Anchors 12
10 Solar panel 1
11 Mounting bracket 1
12 Solar panel clip 1
13 Screw 1
14 Nut screw 1
(2) Clutch Plug
(1) Clutch Unit
(4) Chain
(3) Bracket Covers
(5) Bottom
Rail Cap
(6) Tie Downs
(7) Bottom Rail
(8) Shade
(9) Idle End
Unit
(10) Idle End Plug
(11) Aluminum Tube
(2) Clutch Plug
(1) Clutch Unit
(4) Chain
(3) Bracket Covers
(5) Bottom
Rail Cap
(7) Bottom Rail
(8) Shade
(9) Idle End
Unit
(10) Idle End Plug
(11) Aluminum Tube
(2) Clutch Plug
(1) Clutch Unit
(4) Wand
(3) Bracket Covers
(5) Bottom
Rail Cap
(7) Bottom Rail
(8) Shade
(9) Idle End
Unit
(10) Idle End Plug
(11) Aluminum Tube
(2) Clutch Plug
(1) Clutch Unit
(3) Wand
(4) Bottom
Rail Cap
(6) Bottom Rail
(7) Shade
(8) Idle End
Unit
(9) Idle End Plug
(10) Aluminum Tube
(2) Clutch Plug
(1) Clutch Unit
(3) Wand
(4) Bottom
Rail Cap
(6) Bottom Rail
(1) Shade
(8) Idle End
Unit
(9) Idle End Plug
(10) Aluminum Tube
(2) Bottom
Rail Caps
with rings
(4) Bottom Rail
(1) Full Valance
(5) Receiver
(3) Bungee
(6) Wood
Screws
(7) Brackets
(9) Tension
adjustment
tool
(10) sola panel
(11) mounting
bracket
(12) solar panel clip
(13) screw
(14) nut screw
(8) Anchors
(2) Clutch Plug
(1) Clutch Unit
(4) Chain
(3) Bracket Covers
(5) Bottom
Rail Cap
(6) Tie Downs
(7) Bottom Rail
(8) Shade
(9) Idle End
Unit
(10) Idle End Plug
(11) Aluminum Tube
(2) Clutch Plug
(1) Clutch Unit
(4) Chain
(3) Bracket Covers
(5) Bottom
Rail Cap
(7) Bottom Rail
(8) Shade
(9) Idle End
Unit
(10) Idle End Plug
(11) Aluminum Tube
(2) Clutch Plug
(1) Clutch Unit
(4) Wand
(3) Bracket Covers
(5) Bottom
Rail Cap
(7) Bottom Rail
(8) Shade
(9) Idle End
Unit
(10) Idle End Plug
(11) Aluminum Tube
(2) Clutch Plug
(1) Clutch Unit
(3) Wand
(4) Bottom
Rail Cap
(6) Bottom Rail
(7) Shade
(8) Idle End
Unit
(9) Idle End Plug
(10) Aluminum Tube
(2) Clutch Plug
(1) Clutch Unit
(3) Wand
(4) Bottom
Rail Cap
(6) Bottom Rail
(1) Shade
(8) Idle End
Unit
(9) Idle End Plug
(10) Aluminum Tube
(2) Bottom
Rail Caps
with rings
(4) Bottom Rail
(1) Full Valance
(5) Receiver
(3) Bungee
(6) Wood
Screws
(7) Brackets
(9) Tension
adjustment
tool
(10) sola panel
(11) mounting
bracket
(12) solar panel clip
(13) screw
(14) nut screw
(8) Anchors
DETERMINE DESIRED MOUNTING METHOD
This two-in-one valance design allows you to easily mount the sun shade to either
a ceiling (Fig. 1) or a wall (Fig. 2).
For ease and flexibility in mounting divide your shade into three even zones, the
three quick-connect brackets can be positioned anywhere inside each of these
three zones.
Be sure to keep each of the three brackets inside these zones for proper balance
and weight distribution of the valance.
WARNING: If you do not ensure the quick mount brackets
are positioned with the release button in the correct direction
(Fig. 4 and Fig. 5), removing the shade may be difficult. The
brackets must be positioned and installed level to ensure the
shade hangs level and functions properly.
OR
Fig. 1
Fig. 2
1
(2) Shade
(3) Bottom
rail caps
(4) Bottom rail
(1) Full Valance
(6) Receivers
(5) Bungees
(7) Wood
screws
(8) Quick
connects
(10) Solar panel
(11) Mounting
bracket
(12) Solar panel clip
(13) Screw
(14) Nut screw
9) Anchors