CM3000
|
4
Step 3: (Optional) Cut the Foam seal to
the length of your window and attach it
to the window frame. This will help seal
along the Window kit.
Step 4: Open a window and ! t the
Window kit. Extend the attachments as
required and lock into place with the
Window kit plug provided. Ensure the
outlet is not obstructed. The Window kit
can be installed horizontally or vertically,
to suit your window type. If necessary the
Window kit can be secured to the window
frame with the Fixing screws provided.
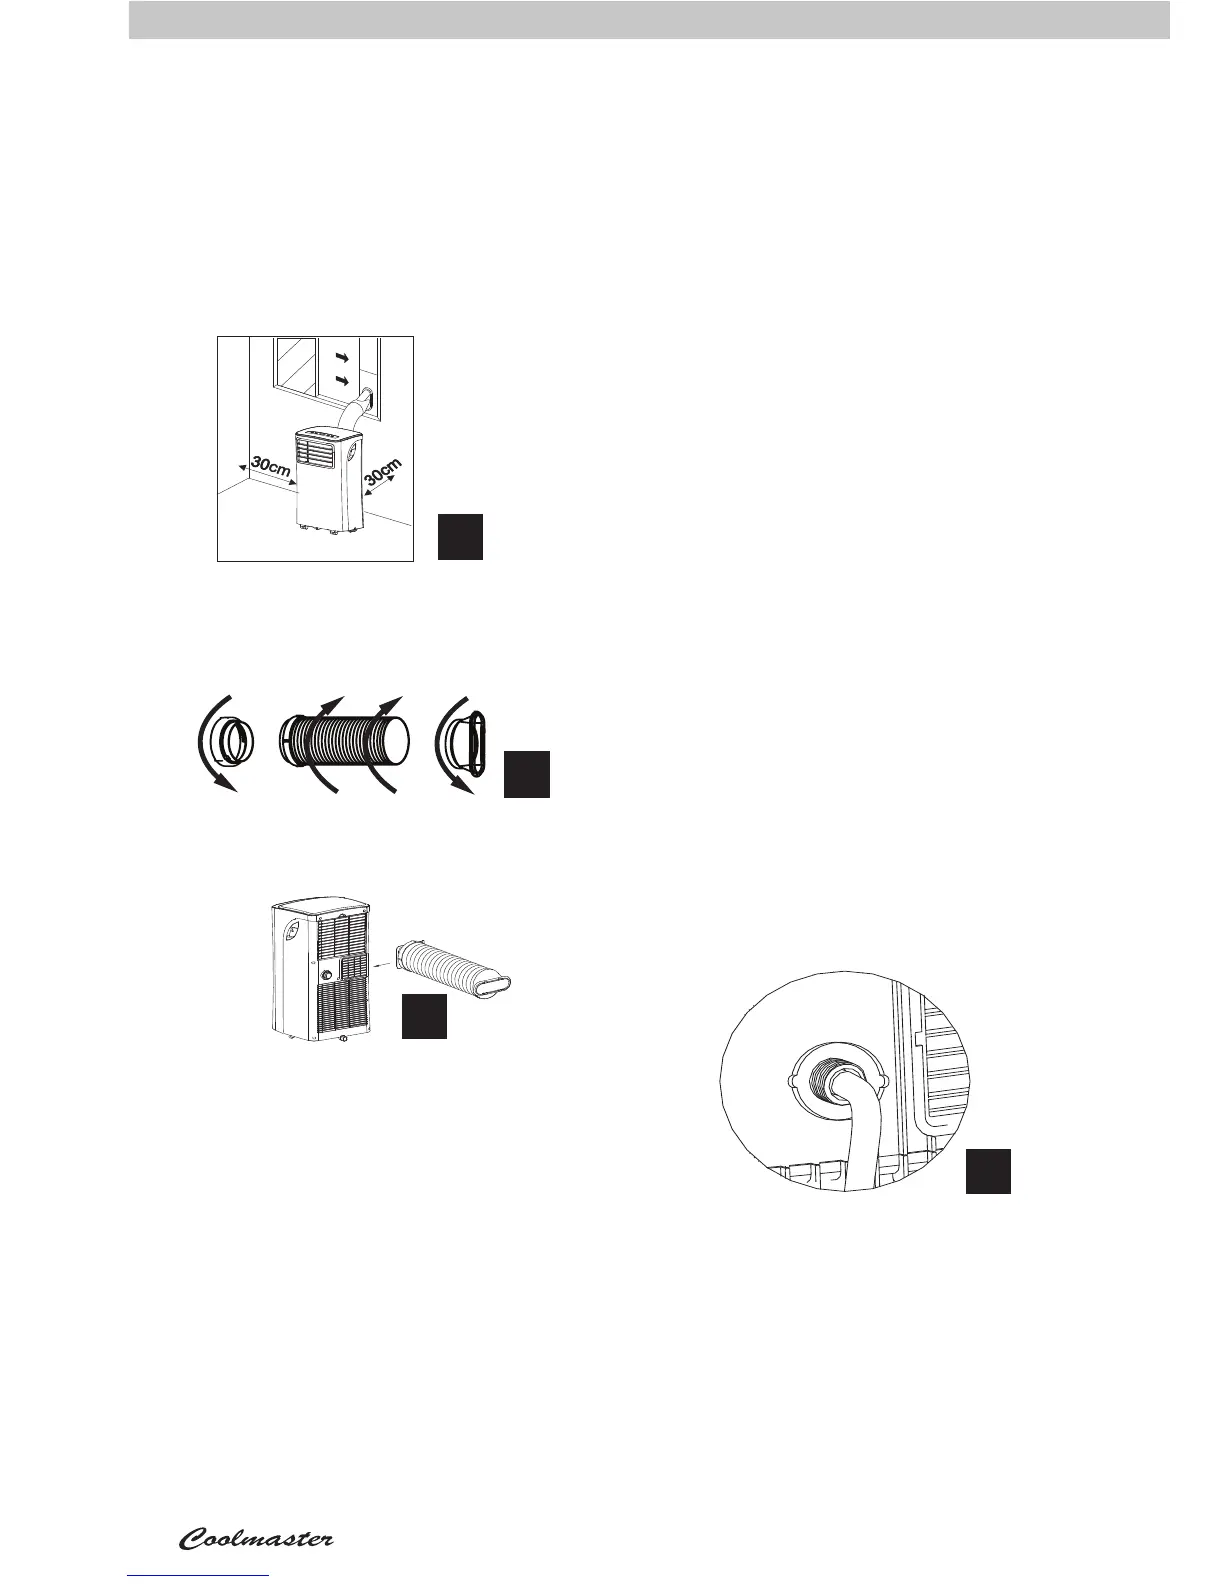
Air conditioner location
Place the air conditioner on a ! rm and " at
surface. The minimum distance required
from the operating air conditioner to any
walls or objects is 30 cm (Fig. 5).
Installing the Exhaust Hose
Step 1: Fit the Exhaust hose to the Hose
end connectors by turning the parts in the
direction shown in Figure 6.
Step 2: Slide the Hose end onto the
Exhaust outlet at the rear of the air
conditioner as shown in Figure 7.
INSTALLATION
5
6
7
Step 5: Fit the Exhaust nozzle to the
Window kit, and lock into place. Keep the
Exhaust hose as short and straight as
possible. This will maximise the cooling
performance.
Don’t use extension pieces for the
Exhaust hose as this will reduce
performance and possibly result in
damage to the air conditioner.
Hot air and mist will be emitted outside
through the Exhaust hose. It is critical to
the performance of the unit that all of the
exhaust air is removed from the space
being cooled.
Installing the Drain Hose
For continuous draining of water during
DRY mode operation.
Step 1: Remove the Drain outlet plug at
the rear of the air conditioner (Fig. 4).
Step 2: Connect the Drain hose to the
Drain outlet. Push on ! rmly to secure into
place, see Figure 8.
8
Step 3: Run the free end of the Drain
hose to a drain. Make sure that the drain
hose does not rise above the drain outlet
as the water will not " ow otherwise.