Do you have a question about the Cooper & Hunter CH-M10K7B and is the answer not in the manual?
Explains DANGER, WARNING, CAUTION, and NOTICE symbols used in the manual for hazard communication.
Explains the symbol indicating a hazard requiring a signal word like WARNING or CAUTION.
Details the use of R32 refrigerant, its flammability, and environmental impact.
Provides critical warnings about handling the refrigerant, repair, storage, and disposal.
Specifies the operating temperature range, indoor use, plug accessibility, and space requirements.
Advises against humid environments and keeping inlets clean for optimal performance.
Covers safe use by children, user maintenance, power cord handling, and grounding.
Warns against water splashing, fire sources, and improper operation.
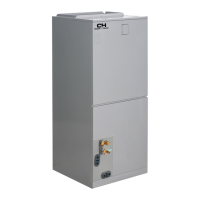
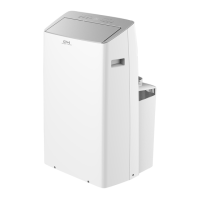
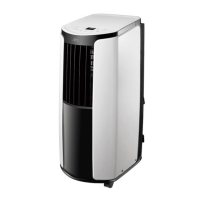
Identifies the main parts of the portable air conditioner unit with labels.
Identifies the parts of the remote controller with labels.
Explains the layout, buttons, and indicators on the unit's control panel.
Details the function of the ON/OFF button and the temperature adjustment (+/-) buttons.
Explains the layout, buttons, and indicators on the unit's control panel.
Details the function of the ON/OFF button and the temperature adjustment (+/-) buttons.
Instructions on adjusting the up/down airflow direction using horizontal louvers.
Instructions on adjusting the left/right airflow direction using vertical louvers, including a caution.
Lists and describes the functions of each button on the remote controller.
Explains the meaning of various icons displayed on the remote control screen.
Details the ON/OFF button and the MODE button with its various modes (Auto, Cool, Dry, Fan, Heat).
Describes how operation and settings differ for Cool, Dry, Fan, and Heat modes.
Explains the +/- buttons for temperature and the FAN button for fan speed.
Describes the HEALTH and AIR functions controlled by the HEALTH SAVE button.
Explains the SAVE mode and the X-FAN function for drying.
Details the TEMP button for changing displayed temperature information.
Explains the TIMER, SLEEP, and LIGHT functions of the remote.
Describes the Child Lock and temperature display switchover functions.
Outlines the sequence of using the remote for basic operation (power, mode, temp, fan).
Instructions and diagrams for replacing batteries in the remote control.
Important notes regarding remote signal, interference, and battery replacement.
Instructions for cleaning the exterior surfaces and grilles of the air conditioner.
Step-by-step guide on how to remove, clean, and reinstall the air filter.
Instructions for cleaning the heat discharge pipe.
Checklists for inspections before and after the operating season.
Guidelines for storing the unit and its disposal notice.
Troubleshooting steps for when the air conditioner does not operate.
Troubleshooting steps for issues related to cooling or heating performance.
Troubleshooting steps for problems with the remote controller signal or responsiveness.
Troubleshooting steps for when there is no fan operation.
Troubleshooting steps for when the set temperature cannot be adjusted.
Troubleshooting steps for issues related to odors and unusual noises.
Explains common malfunction codes and their solutions.
Lists critical phenomena requiring immediate power off and dealer contact.
Safety warnings regarding codes, power cords, and general installation practices.
Guidelines for selecting a suitable installation location, avoiding malfunctions.
Safety precautions for electrical connections, including grounding and wiring.
Lists all included accessories and necessary tools for installation.
Lists optional accessories that can be used with the unit.
Steps to assemble the wire hook and wind the power cord around it.
Instructions for installing a drainage pipe for continuous water removal from the lower hole.
Explains the "H8" error code and buzzer for when the chassis is full of water.
Instructions for using a drainage hose from the middle hole for automatic water emptying.
Important attention points for proper hose placement to avoid water filling the chassis.
Steps to connect guards, attach them to the window panel, and apply sponge.
Steps for attaching the window panel and ensuring the exhaust cover is fitted.
Details on using the window panel and adjustment/extension panels for different window widths.
How to secure the window sash and seal with sponge B, including bracket attachment.
Steps to connect guards, attach them to the window panel, and apply sponge for sliding windows.
Steps for installing the window panel into the sliding window frame.
Details on using the window panel and adjustment/extension panels for different window heights.
How to secure the window sash and seal with sponge B, including bracket attachment.
Steps to connect joints to the heat discharge pipe and insert into the unit.
Guidance on directing the exhaust hose outside and attaching the window adapter.
Notes on keeping the heat discharge pipe short, flat, and avoiding extensions for efficiency.
Advises against prolonging or connecting multiple pipes.
Specifies installation height and shows correct/incorrect installation examples.
Steps to remove joint A from the unit and heat discharge pipe.
Steps to remove joint B+C from the heat discharge pipe outdoors.
Steps to perform after installation to verify normal operation.
Diagram illustrating the main board (AP1) and interconnected components for technical reference.
| Refrigerant | R410A |
|---|---|
| Weight (Indoor Unit) | 8 kg |
| Cooling Capacity | 10000 BTU |
| Power Supply | 220-240V, 50Hz |
| Type | Wall Mounted |
| Noise Level (Outdoor) | 50 dB |