EasyManua.ls Logo

Cornerstone BASCULE BRIDGE - User Manual

Default Icon
6 pages
Print Icon
To Next Page IconTo Next Page
Loading...
HO Structure Kit
BASCULE BRIDGE
933-3070
© 2016 Wm. K. Walthers, Inc., Milwaukee, WI 53218 waltherscornerstone.com I-933-3070 Printed In China
Thanks for purchasing this Cornerstone® kit. Please read these instructions and study the drawings before starting
construction. All parts are styrene, so use compatible glue and paint to finish your model. As part of the Cornerstone
Engineered Bridge System, walthers.com/bridgesystem, your new model can easily be used with other Corner-
stone bridges and accessories to create a custom structure for your railroad. PLEASE NOTE: your new bridge is
designed as a working model. The gears in the drive mechanism are made of Delrin® plastic and should be lubri-
cated with a light, plastic-compatible grease before operation.
Rivers have always challenged railroad bridge builders, especially where the waterway is used for commercial
shipping. While pleasure boats require very little clearance, ocean-going freighters or large naval vessels must also
be able to pass safely. In congested urban areas, the best choice for the job is a Bascule bridge.
Fixed at one end to open and close like a jackknife, the basic idea dates back centuries, a common example being
drawbridges over moats protecting medieval castles. For railroads, the design has many advantages. Smaller and
simpler, they have fewer moving parts than other movable bridges, so they’re cheaper to build and maintain. Their
greatest advantage however is that they can be partially raised to quickly clear small vessels, then closed, making
them an ideal choice for busy rail lines.
The actual lifting work is done by a large counterweight, with help from a heavy-duty electric motor and gear drive
to overcome its inertia. As the balance point is reached, the motor shuts off and gravity takes over, raising the
bridge.
Because approaching vessels have the right-of-way, the bridge must be manned 24 hours a day; where a channel
is closed during winter months, the bridge is left in the down position. So that the bridge tender has a clear view of
the waterway and the railroad, a crow’s nest is mounted at the fixed end. Today, he or she is in radio contact with
passing trains, as well as approaching vessels since advance notice is required to coordinate safe movements.
Before centralized traffic control, an interlocking tower was an integral part of the bridge, where the operator
controlled signals regulating movement of trains across the structure. Railroads preferred to build single-track
bridges, and it was easier to funnel a double-track mainline into a single track, with additional turnouts and signals
on each side.
For added safety, all signals interlocked with the lifting mechanism so a signal to proceed could only be displayed
when the bridge was closed. While the lowered counterweight would effectively stop an approaching train on that
side, some roads also installed derails (special track switches that would actually derail the train) or “smash boards”
(similar to a semaphore blade that hung over the tracks) if the engineer failed to stop.
While the majority of Bascule bridges were stand-alone installations, if conditions required approaches standard
bridges were used. The Bascule Bridge was installed over the deepest part of the channel, where the largest
vessels would pass.
Due to their heavy steel construction and regular maintenance, many of these bridges have provided decades of
service and remain in daily operation. In some areas where shipping traffic was diverted or eliminated, moving
bridges are no longer needed. But since they are expensive to replace and are in useable condition, the existing
Bascule Bridge was simply left in place.
Based on a Northern Pacific bridge crossing the Duwamish River in Seattle, Washington, and still in use by BNSF,
similar Bascule Bridges can still be found on all types of railroads today. To prevent derailments or severe damage
to the structure, they’re fitted with special track and guardrails, which can easily be added to your model with
Walthers Code 83 Bridge Track with Separate Approach Ends (#948-886, sold separately). To simplify installation
in new or existing scenery, Single-Track Railroad Bridge Concrete Abutments (#933-4551) are available separately.
For more ideas and information on the Cornerstone Engineered Bridge System please visit
walthers.com/bridgesystem. For additional products to complete your scene, see your participating hobby dealer,
check out the latest Walthers Model Railroad Reference Book or visit us online at walthers.com.
Question and Answer IconNeed help?

Do you have a question about the Cornerstone BASCULE BRIDGE and is the answer not in the manual?

Summary

HO Structure Kit: Bascule Bridge

Step 1: Main Structure Assembly

Girder Assembly and End Girders

Assemble main girders and attach end girders to form the primary structure.

Side Girder Halves and Splice Plates

Join side girder halves and attach splice plates for structural integrity.

Top Girder and Latticework Assembly

Assemble top girders and integrate latticework sections.

Cross Girders, Portals, and Bracing

Attach cross girders, portals, end caps, and bottom bracing.

Bridge Shoes and Abutment Switch

Install bridge shoes or the lower abutment switch assembly.

Step 2: Cabin & Drive Subassembly

Drive and Wiring Diagram

Diagram showing motor, switches, diodes, and power connections for the drive.

Drive Shafts and Gears

Cut drive shafts to specified lengths and assemble gears.

Motor Mounts and Shaft Installation

Install motor mounts and slide shafts through holes.

Cabin and Floor Assembly

Assemble cabin walls, floor, and attach to shaft supports.

Step 3: A-Frame Assembly

Gearbox and Shaft Assembly

Assemble gearbox halves and install gears onto motor shafts.

A-Frame and Cross Girder Integration

Glue cross girders to A-frame assemblies.

Cabin Support and Assembly

Insert cabin supports and slide cabin assembly into place.

Rack and Bracing Installation

Assemble and glue racks, install back bracing.

Step 4: Walking Beam & Weight Assembly

Walking Beam Support and Lattice

Assemble walking beam supports with crisscross and straight lattice.

Latticework and Bracing Pieces

Fit and glue latticework to bracing pieces.

Walking Beam Halves Assembly

Assemble right and left walking beam halves.

Counterweight Assembly

Glue counterweight walls, add weight, and secure top and hatch.

Step 5: Final Assembly and Decaling

Connecting A-Frames and Walking Beam

Connect A-frames to bridge and walking beam assembly.

Gear Rack and Drive Mechanism

Place gears on shafts, align gear racks, and secure drive mechanism.

Weighting and Lubrication

Add weight to counterweight assembly and lubricate moving parts.

Interlocking Tower Assembly

Assemble and glue tower walls, base, platforms, and railings.

Decaling Procedure

Instructions for applying decals using water, Micro Sol, and a pin.

Overview

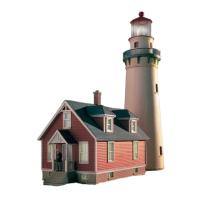
The device described in the manual is the Walthers Cornerstone HO Structure Kit Bascule Bridge (933-3070). It is a model railroad structure kit designed to represent a working bascule bridge.

Function Description

The Bascule Bridge kit allows model railroad enthusiasts to construct a detailed, working model of a bascule bridge, a type of drawbridge that pivots at one end to open and close like a jackknife. This design is historically significant, dating back centuries for applications like medieval castle drawbridges, and is particularly suited for railroad crossings over waterways used by commercial shipping, where varying clearances are required for different vessel types (from pleasure boats to ocean-going freighters).

The model is designed to be functional, meaning it can be operated to raise and lower its span. This operation is achieved through a drive mechanism that includes a heavy-duty electric motor and a gear drive. A large counterweight assists in the lifting work, and the motor helps overcome inertia. Once the balance point is reached, the motor shuts off, and gravity takes over to complete the bridge's movement.

The kit is part of the Cornerstone Engineered Bridge System, allowing it to be integrated with other Cornerstone bridges and accessories to create larger, custom railroad layouts. It is based on a real-world Northern Pacific bridge crossing the Duwamish River in Seattle, Washington, which is still in use by BNSF, ensuring a realistic representation.

For a non-working model, specific parts (Bridge Shoes 2x 200) can be glued in place. However, for a working model, a Lower Abutment Switch Assembly is required for later installation.

Important Technical Specifications

  • Model Type: HO Scale Structure Kit
  • Device Name: Bascule Bridge
  • Product Number: 933-3070
  • Material: Styrene (for all parts)
  • Drive Mechanism: Electric motor and gear drive
  • Gears: Made of Delrin® plastic
  • Power Requirement: 6 volts DC (for motor operation)
  • Recommended Track: Walthers Code 83 Bridge Track with Separate Approach Ends (#948-886, sold separately)
  • Recommended Abutments: Single-Track Railroad Bridge Concrete Abutments (#933-4551, available separately)
  • Weight for Counterweight: Approximately 5 ounces (141.7g) of weight (e.g., BBs or sand) is required for balancing the bridge (not included).
  • Drive Shaft Lengths (provided metal rod):
    • 2x #114: 3.8" (99mm) each
    • 1x #117: 0.9" (25mm)
    • 6x #119: 0.3" (10mm) each
  • Wiring: Requires a double-pole, double-throw (DPDT) reversing switch (sold separately) for motor control. Includes a Cabin Micro Switch and an Abutment Micro Switch for operational control and safety.
  • Safety Features:
    • The motor must shut off completely when the bridge reaches its up or down positions to prevent damage.
    • In real-world bascule bridges, signals are interlocked with the lifting mechanism, allowing a proceed signal only when the bridge is closed. Some roads also installed derails or "smash boards" for added safety. The model incorporates micro switches to simulate operational limits.
    • Special track and guardrails are recommended to prevent derailments or severe damage to the structure (Walthers Code 83 Bridge Track with Separate Approach Ends).

Usage Features

  • Working Model Capability: The primary feature is the ability to construct a fully functional bridge that can be raised and lowered, adding dynamic realism to a model railroad layout.
  • Integration: Designed as part of the Cornerstone Engineered Bridge System, it can be easily combined with other Cornerstone bridges and accessories.
  • Realistic Operation: The model simulates the real-world operation of a bascule bridge, including the use of a counterweight, motor, and gear drive.
  • Control System: The motor operation is controlled via a DPDT reversing switch (sold separately) and includes micro switches (Cabin Micro Switch and Abutment Micro Switch) to automatically stop the bridge at its fully open and closed positions.
  • Adjustable Span: The manual suggests adjusting the moveable span on the layout for optimal performance.
  • Interlocking Tower: The kit includes components for an Interlocking Tower, which historically was an integral part of such bridges, allowing the operator to control signals and movements. This adds to the scene's realism and operational narrative.
  • Detailing: The kit allows for painting and decaling to enhance realism. Decals are applied using water, Micro Sol® to conform to irregular surfaces, and a pin for air bubbles.
  • Optional Lighting/Interior Details: The Interlocking Tower Roof can be glued or set in place to allow for the addition of lights or interior details (sold separately).

Maintenance Features

  • Lubrication: The Delrin® plastic gears in the drive mechanism require lubrication with a light, plastic-compatible grease before operation. A small amount of plastic-compatible grease is also recommended for the Worm Gear on the motor shaft, and a drop of plastic-compatible oil for other rotating parts.
  • Adjustability: The micro switches (Cabin Micro Switch and Lower Abutment Switch) need to be adjusted to ensure the motor turns off precisely when the movable span touches down or reaches the "up" position, preventing damage to the mechanism.
  • Access for Adjustments/Maintenance: The Shed Roof of the cabin can be set in place (not glued) to allow for easy removal, facilitating future adjustments or maintenance of the internal components.
  • Durability: Real-world bascule bridges are known for their heavy steel construction and regular maintenance, providing decades of service. The model aims to replicate this robust nature through its design and material.
  • Wiring Access: The manual suggests threading motor wires through the Right Hand A-Frame during assembly, indicating consideration for wire management and potential access.

Cornerstone BASCULE BRIDGE Specifications

General IconGeneral
BrandCornerstone
ModelBASCULE BRIDGE
CategoryToy
LanguageEnglish

Related product manuals