Page 3
SRP-003-448Issue 3
5. SSH Mounting (to the wall)
5.1 Open the front door of the unit. Place the
housing on the wall mounting surface. Mark the four
mounting holes with a black felt-tip pen. Mounting
surface should be flat to prevent warping.
5.2 Drive anchors or wood screws in at these
locations leaving a
1
/
8
-inch gap between the
mounting surface and screw or bolt-head.
NOTE: Mounting hardware not provided.
5.3 Place the unit on the mounting hardware and
tighten the hardware.
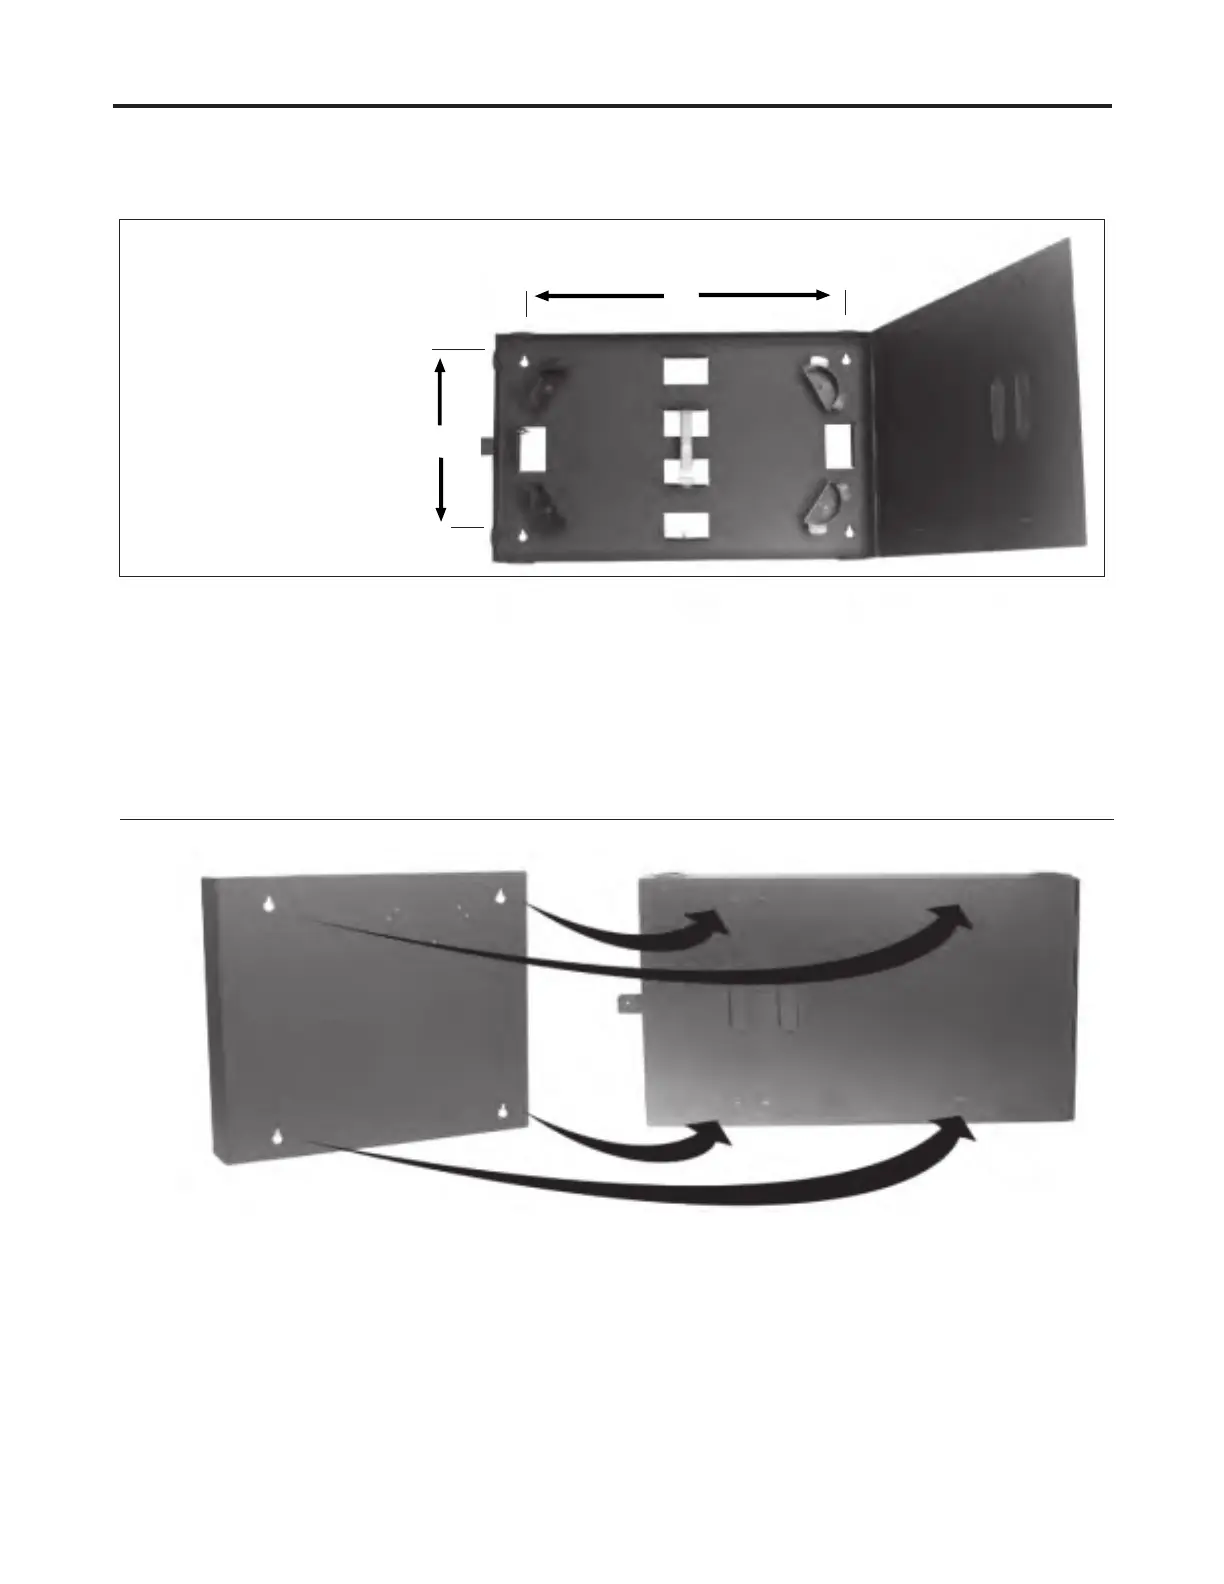
6. WCH Mounting (to the SSH)
Figure 4
L
H
WCH-SSH-4-12
L: 19.5 in (49.53 cm)
H: 10.5 in (26.67 cm)
WCH-SSH-2
L: 10.06 in (25.55 cm)
H: 7.37 in (18.73 cm)
6.1 Remove the appropriate knockouts in the SSH
door and the WCH backplate (Figure 4).
6.2 Start screws in the appropriate holes in the
door of the SSH (Figure 4). Four screws are provided
in the kit.
6.3 Place the WCH on the screws and tighten the
screws.
Figure 3