Hi-Speed USB Portable Flash Disk User’s Manual Guide
Page 14
To boot your computer from your Corsair Flash Voyager USB 2.0 Flash Drive:
1. Power on or restart your computer with the bootable Corsair Flash Voyager
USB 2.0 Flash Drive connected to the USB port.
2. During power on, run the BIOS Setup program of your computer. Refer to
your computer or motherboard user’s manual on how to activate the BIOS
Setup program.
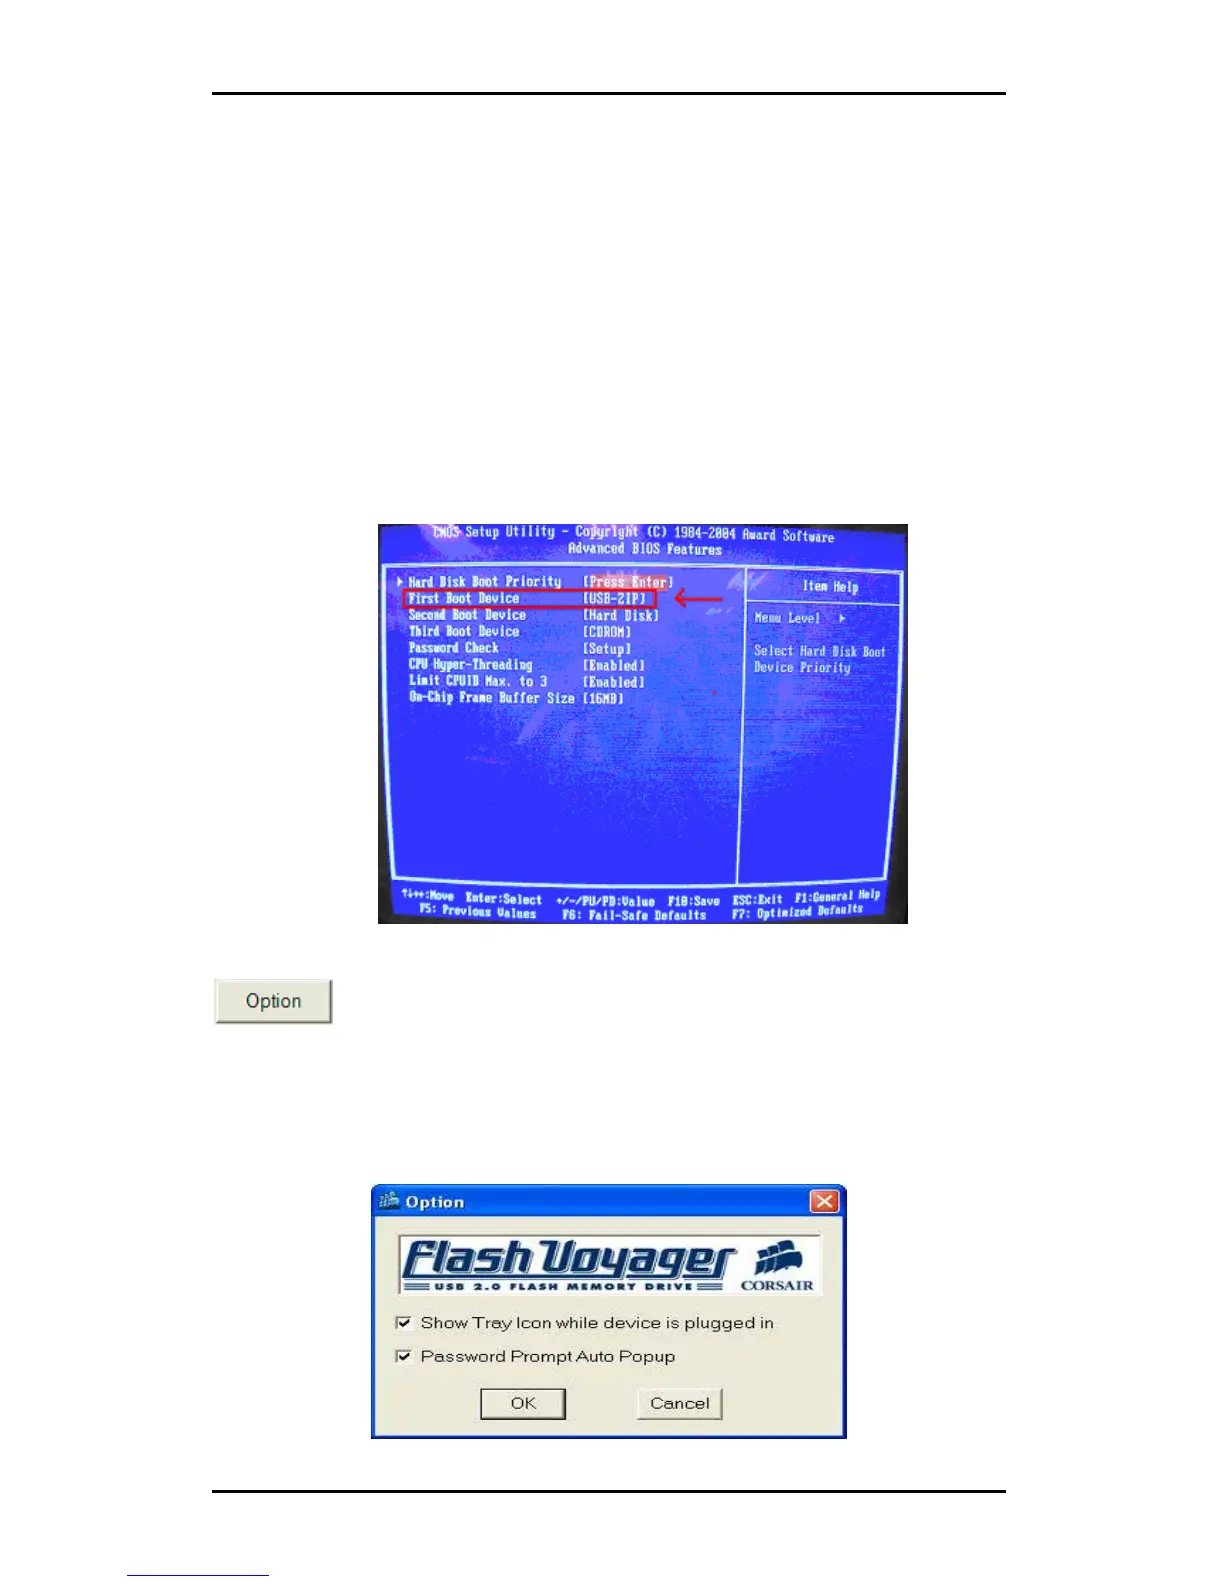
3. Check if the BIOS Setup program includes Boot Options for USB devices
like USB-ZIP, USB-FDD, or USB-HDD. Set the first boot option to USB-ZIP
and save CMOS settings. Exit the BIOS Setup program and check if your
computer can boot from your Corsair Flash Voyager USB 2.0 Flash Drive.
You can also try to set USB-FDD or USB-HDD if the USB-ZIP does not work.
Please contact your computer or motherboard maker for technical support
on USB boot device.
Option
This button allows you to set the options for the following:
¾ Showing the program icon on the Windows taskbar (system tray) whenever
you plug-in the device.
¾ Auto pop-up the check password dialog box whenever you plug-in the
device and there is a password set.
 Loading...