1
Installing the AMD Mounting Bracket
• Remove the integrated Intel mounting bracket (figure 1).
• Install the AMD bracket by pushing both sides into the
slot on the pump until secure (figure 2).
Note: It is important that the AMD retention bracket be
evenly secured on all sides before installation.
• Pour retirer le support de fixation Intel intégré (illustration 1).
• Installez le support AMD en appuyant des deux côtés dans
le logement sur la pompe jusqu'à ce qu'il soit en place
(illustration 2).
Remarque: Il est important que le support de retenue
AMD soit bien en place des deux côtés avant de procéder
à l'installation.
• Entfernen Sie die integrierte Intel-Halteklammer
(Abbildung 1).
• Drücken Sie zum Installieren der AMD-Halterung beide
Seiten in die Aussparung an der Pumpe, bis sie fest sitzt
(Abbildung 2).
Hinweis: Vor der Installation muss die AMD-Halteklammer
an allen Seiten gleichmäßig befestigt sein.
• Verwijder de geïntegreerde Intel-montagebeugel
(afbeelding 1).
• Plaats de AMD-beugel door beide zijden in de sleuf op de
pomp te duwen totdat de beugel stevig vastzit
(afbeelding 2).
Let op: het is belangrijk dat de AMD-retentiebeugel aan
alle zijden gelijkmatig vastzit voordat met de installatie
wordt begonnen.
• Rimuovere la staa di montaggio Intel integrata (figura 1).
• Installare la staa AMD spingendo entrambe le estremità
nell’apposito alloggiamento sulla pompa fino a bloccarla
(figura 2).
Nota: è importante che la staa di bloccaggio AMD sia
fissata in modo uniforme su tutti i lati prima
dell’installazione.
• Retire el soporte de montaje Intel integrado (figura 1).
• Instale el soporte de AMD presionando ambos lados hacia
el interior de la ranura en la bomba hasta que quede fijado
(figura 2).
Nota: Es importante que el soporte de retención de AMD
esté uniformemente fijado en todos los lados antes de
la instalación.
• Remova o suporte de montagem Intel integrado (figura 1).
• Instale o suporte AMD empurrando ambos os lados para
dentro da abertura da bomba até ficarem presos (figura 2).
Observação: É importante que o suporte de retenção
AMD esteja uniformemente preso em todos os lados
antes da instalação.
• Zdemontuj przymocowany uchwyt montażowy Intel
(rysunek 1).
• Zamocuj uchwyt AMD, wpychając z obu stron w gniazdo
na pompce (rysunek 2).
Uwaga: Uchwyt montażowy AMD należy zamocować
stabilnie i równomiernie ze wszystkich stron
przed instalacją.
• Отсоедините встроенный монтажный кронштейн Intel
(рис.1).
• Установите кронштейн AMD, вставив обе его стороны в
паз на насосе до полной фиксации (рис.2).
Примечание. Очень важно перед установкой
равномерно закрепить крепежный кронштейн AMD
на всех сторонах.
.(1 ﻞﻜﺸﻟا) ﺔﺠﻣﺪﳌا Intel ﺖﻴﺒﺜﺗ ﺔﻔﻴﺘﻛ ﺔﻟازﺈﺑ ﻢﻗ •
ﺔﺤﺘﻔﻟا هﺎﺠﺗ ﺒﻧﺎﺠﻟا ﲆﻋ ﻂﻐﻀﻟا ﻖﻳﺮﻃ ﻦﻋ AMD ﺔﻔﻴﺘﻛ ﺐﻴﻛﱰﺑ ﻢﻗ •
.(2 ﻞﻜﺸﻟا) مﺎﻜﺣﻹا نﻀﻟ ﺔﺨﻀﳌا ﲆﻋ ةدﻮﺟﻮﳌا
ﺐﻧاﻮﺠﻟا ﻊﻴﻤﺟ ﲆﻋ يوﺎﺴﺘﻟﺎﺑ ﺔﻤﻜﺤ
ُ
ﻣ AMD ﺞﻟﺎﻌﻣ زﺎﺠﺘﺣا ﺔﻔﻴﺘﻛ نﻮﻜﺗ نأ ﻢﻬﳌا ﻦﻣ :ﺔﻈﺣﻼﻣ
.ﺐﻴﻛﱰﻟا ﻞﺒﻗ
• 拆下 Intel 安装支架 (图 1)。
• 将 AMD 支架两端推入泵上的插槽直到固定 (图 2)。
注意:AMD固定支架的每一边都必须均衡 固定,才能进行
安装。
Installation du support de fixation AMD • Installation der AMD-Montagehalterung • Installatie van de
AMD-montagebeugel • Installazione della staa di montaggio AMD • Instalación del soporte de montaje
para AMD • Como instalar o suporte de montagem AMD • Zamocowanie uchwytu montażowego AMD
Установка монтажного кронштейна AMD • AMD
ﺖﻴﺒﺜﺗ ﺔﻔﻴﺘﻛ ﺐﻴﻛﺮﺗ • 安装 AMD 安装支架
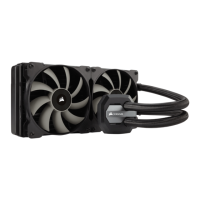
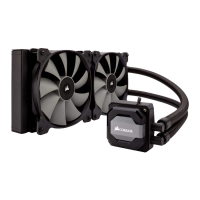
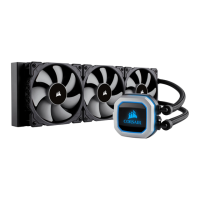
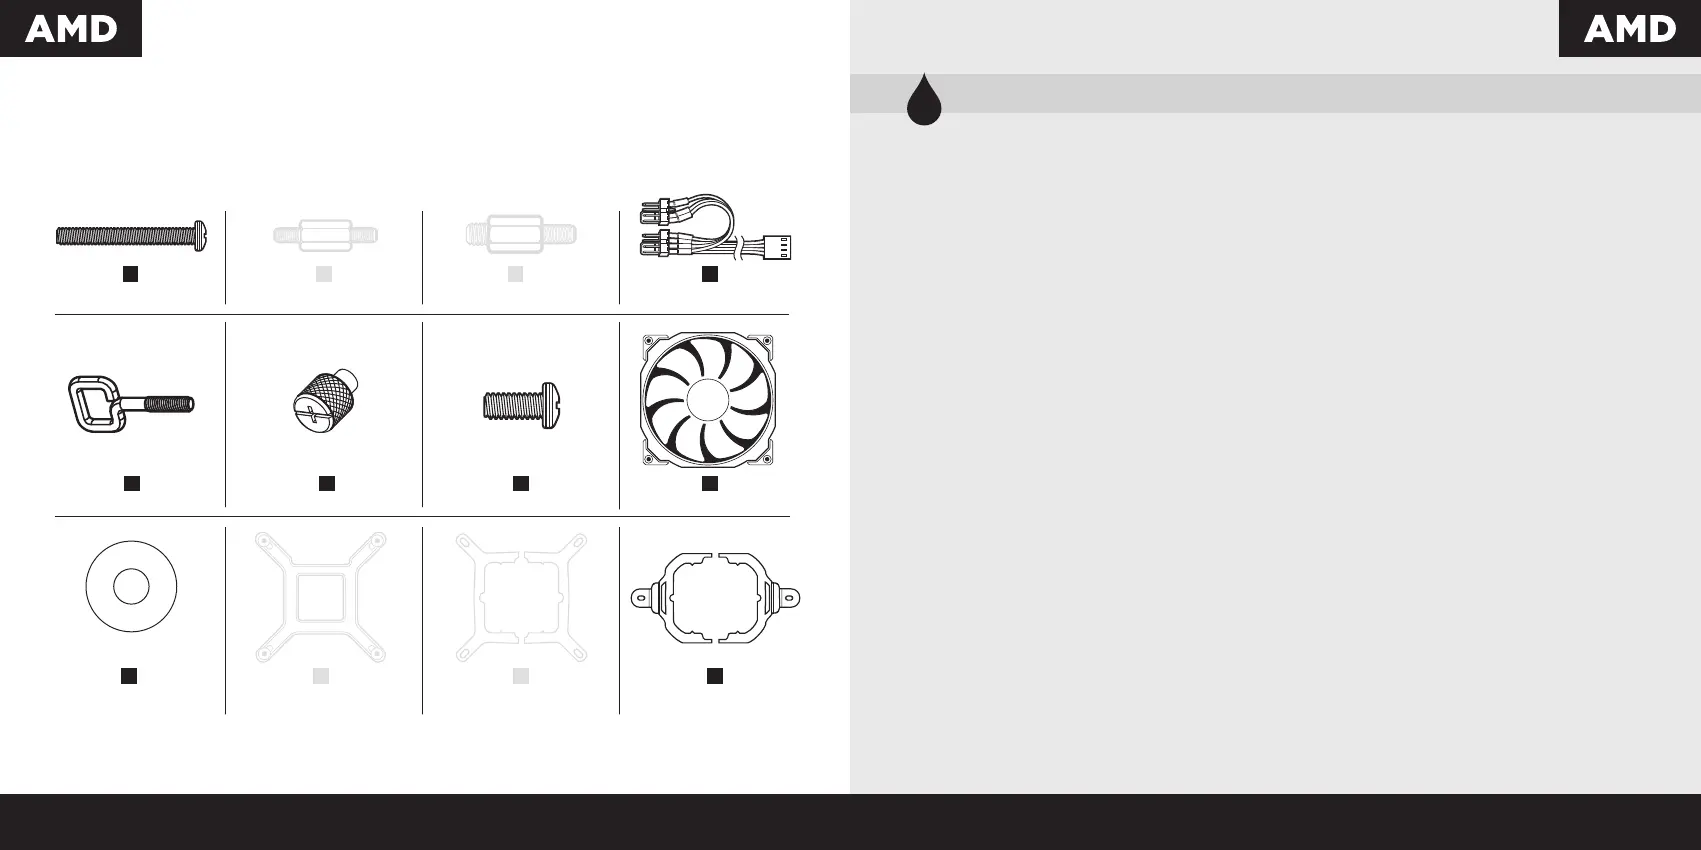
Included Hardware
x1 INTEL MOUNTING BRACKET
(PRE-INSTALLED)
K
x2 SP120 PWM FAN
H
x1 INTEL BACKPLATE
J
x16 LONG FAN SCREWS
A
x1 FAN Y HEADER
D
x4 THUMBSCREWS
F
x4 LGA 2011/2011-3/2066
STANDOFF
C
x4 LGA 115X/1366
STANDOFF
B
x16 WASHER
I
x2 AMD SCREW CLIP
E
x1 AMD MOUNTING
BRACKET
L
x8 RADIATOR SCREWS
G
Highlighted parts for AMD installation only • Les sections en surbrillance concernent uniquement l'installation AMD
Die markierten Passagen beziehen sich nur auf die AMD • Gemarkeerde tekst heeft alleen betrekking op AMD-installatie
Parti evidenziate esclusivamente per l’installazione della staa AMD • Componentes de instalación solamente para AMD
Partes destacadas somente para instalação da AMD • Wyróżnione części dotyczą tylko instalacji produktów AMD
Части, выделенные цветом, только для установки AMD •
ﻂﻘﻓ ﺞﻟﺎﻌﻣ ﺐﻴﻛﱰﻟ ةﺰﻴﻤﳌا ءاﺰﺟﻷا • 突出显示的部分仅限 AMD 安装
AMD
 Loading...