9ASSEMBLY INSTRUCTIONS |
IV. ASSEMBLY INSTRUCTIONS
ATTENTION:
1. The gasket shall be placed at both ends of the bolts (against the bolt head and nuts), unless
otherwise stated.
2. Preliminary assembly is hand tightening of all bolts and nuts and hand tightening with the
wrench for complete assembly.
3. Some spare parts have been pre-assembled by the factory.
4. It is strongly recommended this machine to be assembled by two or more people to avoid
possible injury.
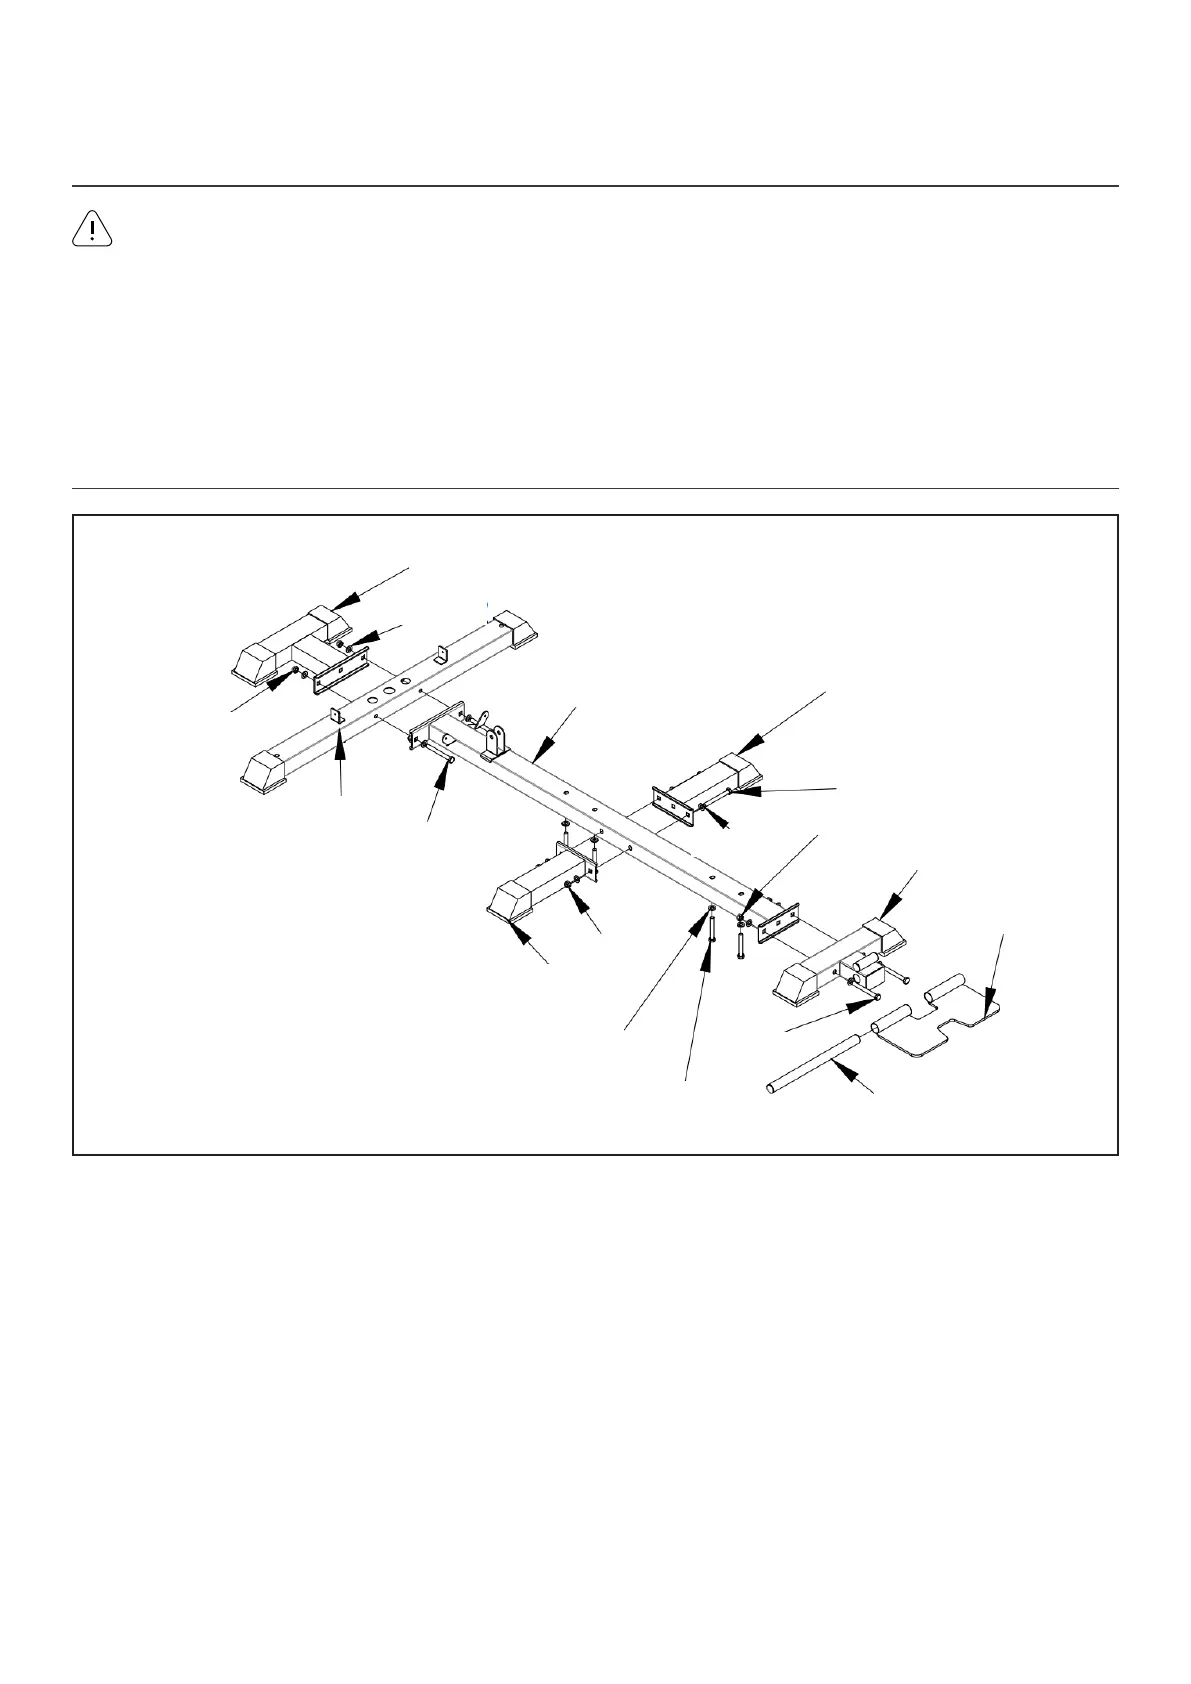
1. Place (#2) and (#4) on both sides of (#1) and secure with bolts (#56-1), flat gasket (#56-12), nuts
(# 56-14).
2. Place two (#6) on both sides of (#2) as shown and secure with bolts (#56-1), flat gasket (#56-12), and
nuts (# 56-14).
3. Connect (#3) with bolts (#56-1), spacers (#56-12), nuts (#56-14) and (#2) as shown in the drawing.
Next install bolts (#56-2), flat gasket (#56-12) to (#2) in advance.
4. Install (#5) to (#3) by placing (#27) into the tube of (#5) and (#3) as shown.
STEP 1
4
56-12
2
56-14
1
56-1
56-14
6
56-12
56-2
56-1
27
5
3
56-14
56-12
56-1
6