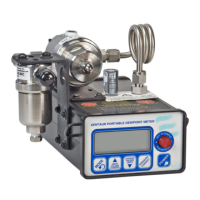
13
5.3 Set-up State
To enter the Setup State power-up the unit while depressing the Mode key.
Refer to Appendix B for a flow diagram of the Set-up State.
The set-up state provides the following nine capabilities:
1. Testing the optional analog output: By pushing the up, down or pressure correct
buttons, the user forces the analog output to its low, high and mid values, respectively.
This facilitates the hook-up and testing of the remote terminal.
2. Display of alternate units: In this mode, a second unit can be chosen to be dis-
played alternating with the unit selected in the operating state, for example, a dew-point
can be displayed alternating with the sample temperature, or dewpoint can be alternated in
two different units.
3. Selecting the sensor type: In this mode the user can select the software matching
the type of sensor installed in the instrument; XTR-100 (-100°C to +20°C); XTR65 (-65°C
to +20°C).
4. Adjusting low end sensor attenuation and/or dewpoint: These modes are used to
enter a data pair representing a low dewpoint and the sensor attenuation measured at this
low dewpoint.
NOTE: Items 3) and 4) are set at the factory and need only be modified when a sensor is changed.
5. Manual calibration: (Not yet available) In this mode, the user can enter multi-point
calibration data to improve the instruments accuracy.
6. Output range setting: These modes are used to set dewpoints corresponding to the
low and/or high end of the current loop output.
7. Lock/Unlock the instrument: This mode is used to block access to parameter set-
tings, protecting the instrument from unauthorized or inadvertent changes of parameters.
Attempting to change settings while instrument is locked will display LOC and beep_ To
unlock instrument press the arrow up key, to lock the instrument press the arrow down
key.
Note: It is imperative that one returns the instrument to the lock mode to
avoid unauthorized changes.