Go to the non-motor end and make sure the
rope will come straight back from the rope
channel of the track to the pulley. If the
ropes do not come straight back, the
mechanism should be moved to balance the
rope angle on both sides. Only a 1/2”
variance from straight is allowed on either
side.
11
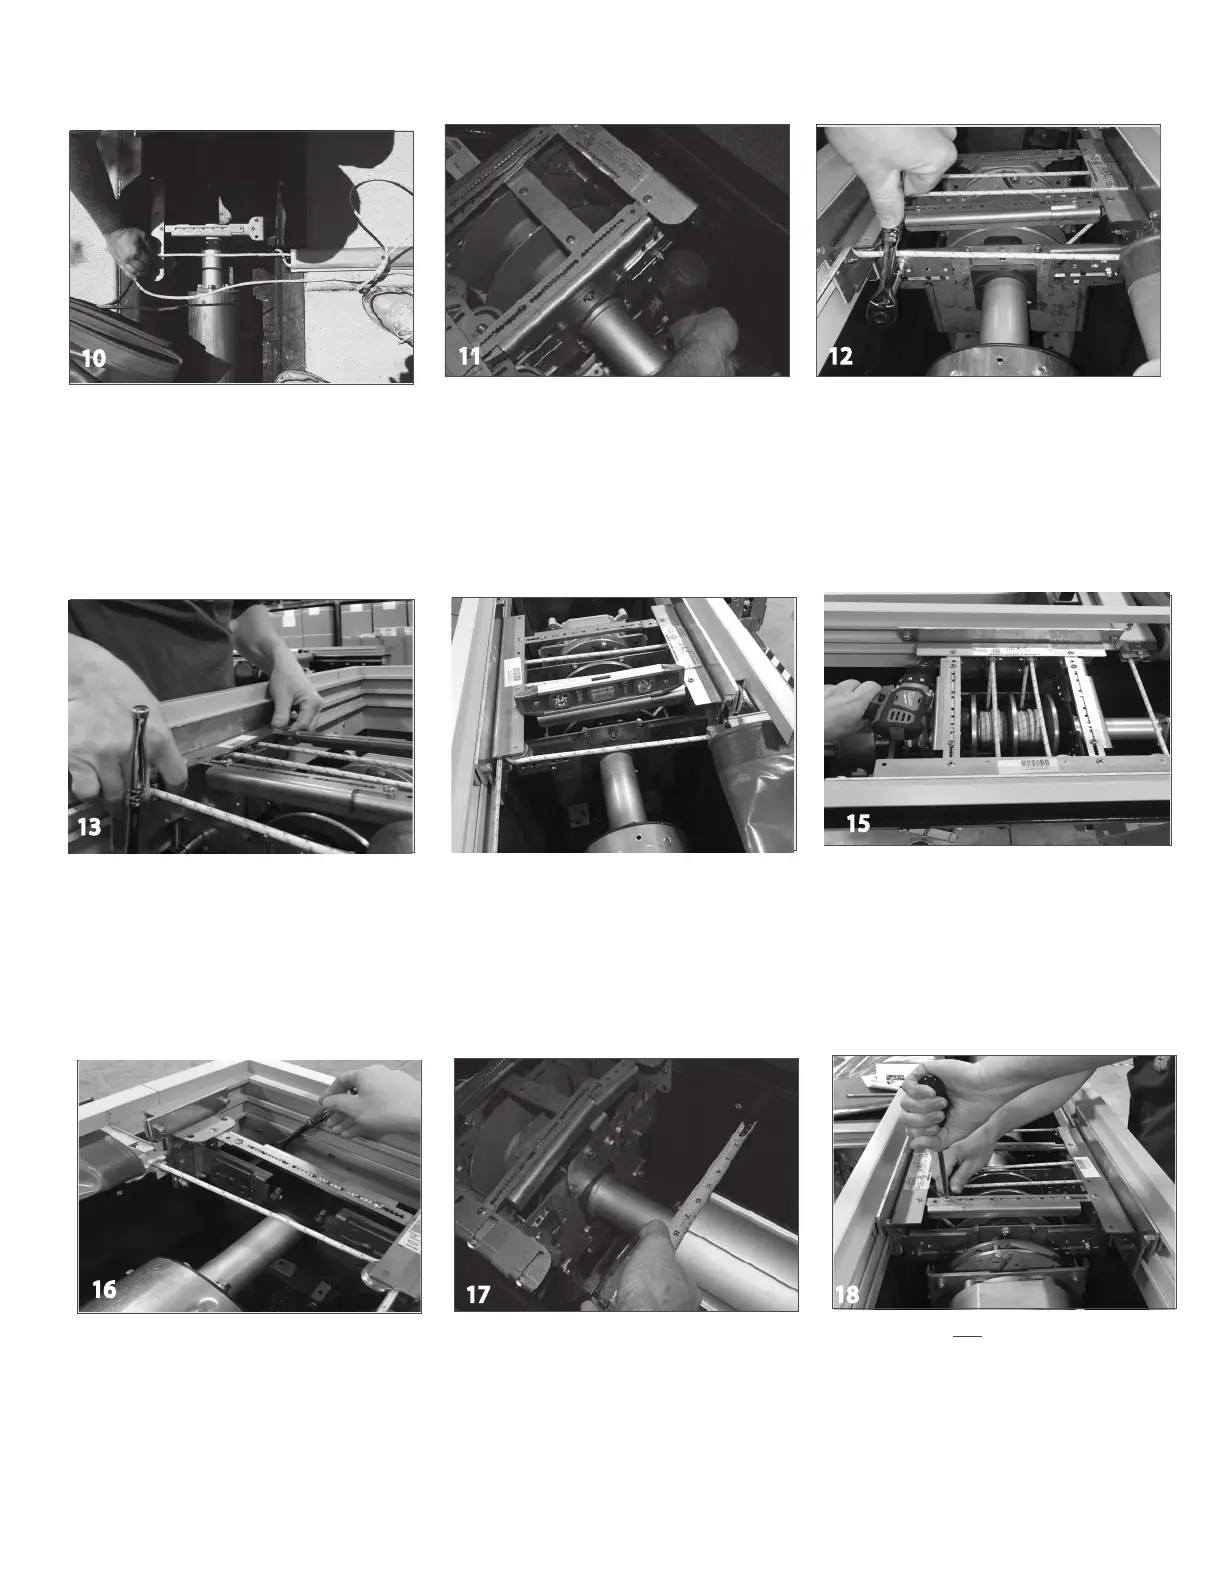
Anchoring the Tube/Mechanism
Anchor the mounting feet into the housing
using as many anchor points as possible. Use
the appropriate screws and/or anchors for the
specific cover box being used.
Extending the Pulley Brackets
Loosen the nuts in the four positions on the
adjustable brackets of the mechanism. Spread
the brackets outward against the walls of the
housing.
Raise the pulley brackets up so that the top
of the bracket is even with the top of the
encapsulation. This insures the ropes will
be level.
Tip: before raising the pulley brackets,
make sure the feet are set as high as
possible without the roll up tube rubbing
on the lid.
With the brackets in position, level the
mechanism and center it in the housing
from front to back. Tighten the four nuts on
the adjustable brackets.
Anchoring the Pulley Brackets
Anchor the motor mechanism brackets into
the housing in as many places as possible.
Use the appropriate screws and /or anchors
for the specific type of cover box being used.
17
18
10
Raise the pulley bracket so it is level with the
top of the cover track. Center the non-
motor side front to back in the housing.
On the motor and non-motor side, use
the half inch screws and nylock nuts
provided and bolt the cross braces
together.
© Latham Pool Products, Inc. 2019. All rights reserved.
Step By Step Instructions
12
13
14
15
Loosen the bolts on the adjustable brackets
on the non-motor end of the mechanism.
Spread the pulley brackets outward against
the walls of the cover box.
16