112
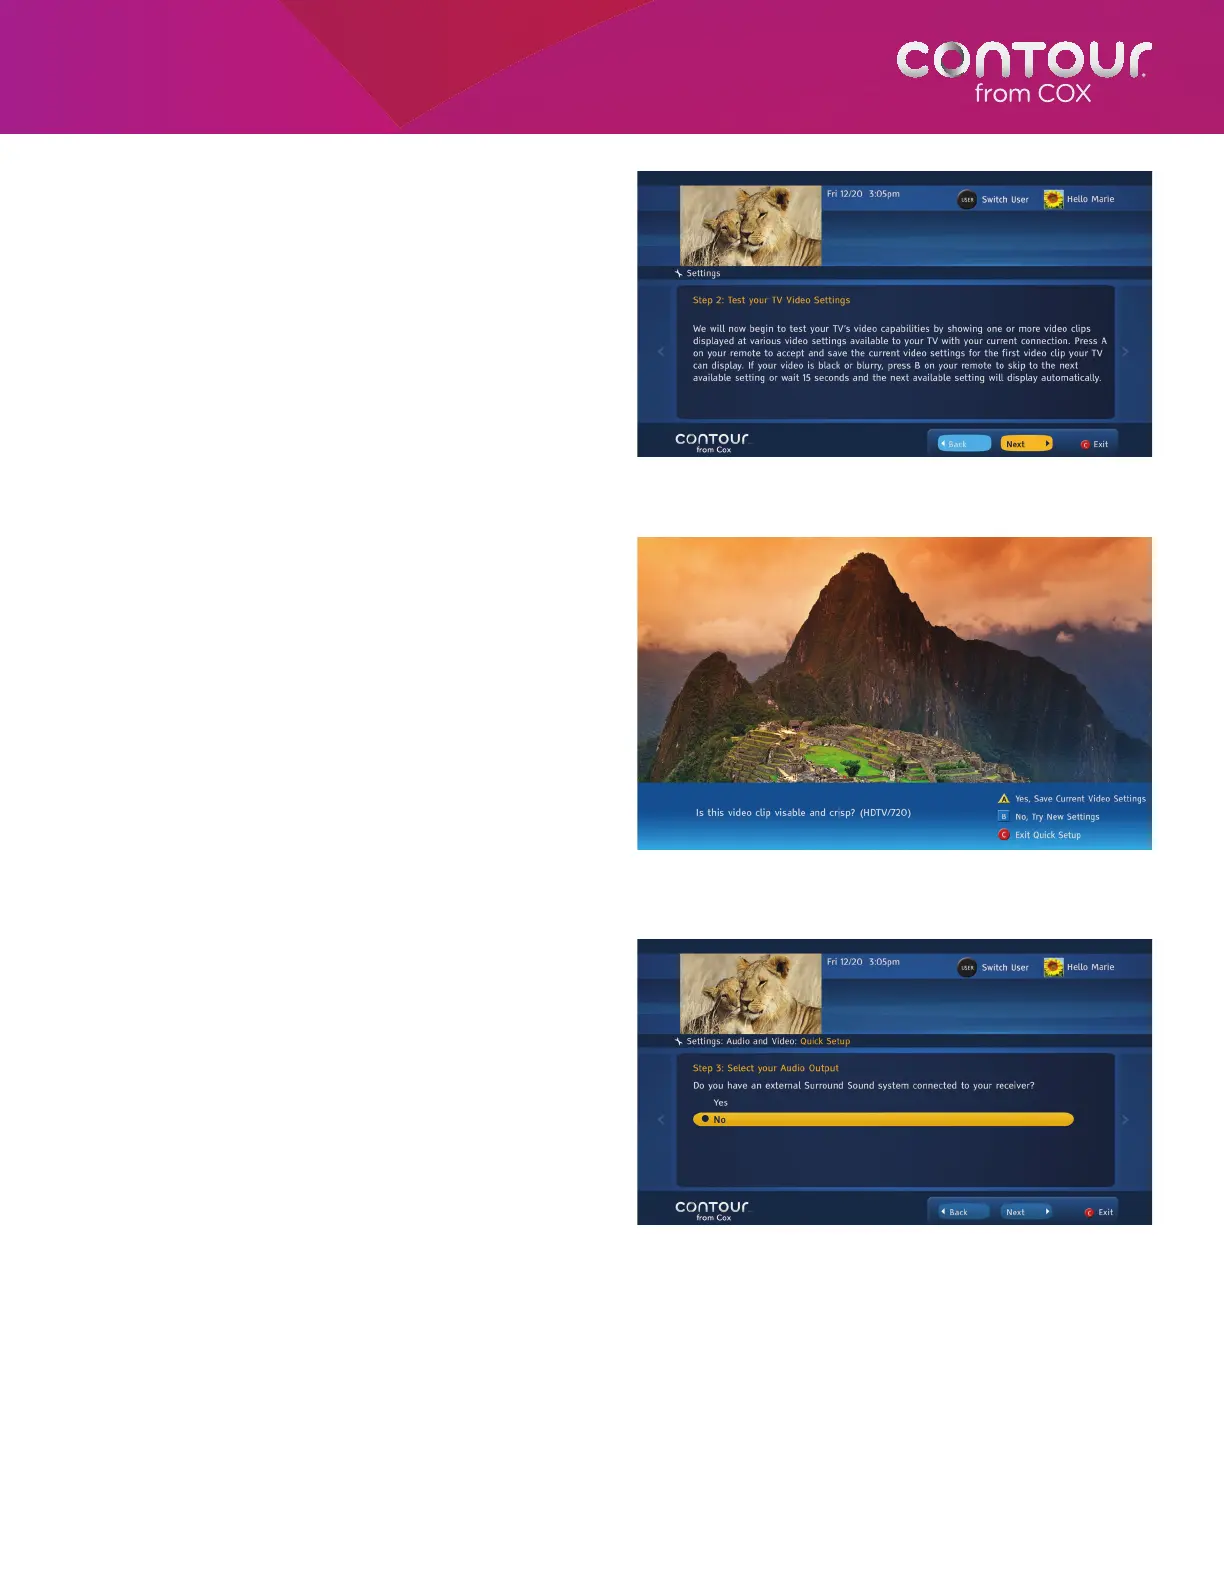
5. On the next screen, you will receive
instructions for the Video Resolution
Settings test. Video Resolution Settings test
determines the highest resolution the TV
can display and confirms that the TV is, in
fact, able to display high definition video.
Once you have read the instructions, press
SELECT to move to the next screen.
6. This screen will show you a series of video
clips in different resolutions. Watch these
video clips and confirm which one of
these clips looks crisp and clear on your
television set. If the clip doesn’t look crisp
or if you are unsure, then press the B button
to see the next video clip in a different
video resolution. Continue this process
until the video clip looks crisp and clear on
your television set. When you are satisfied
of the video resolution, press the A button
on your remote control to set this as your
video resolution and move to the next
screen.
7. On the next screen, you will be asked if
your receiver is connected to an external
surround-sound system or not. Highlight
Yes or No to make your selection and
press SELECT. Press the DOWN arrow to
highlight Next and press SELECT to move
to the next screen.
Press SELECT to proceed to the next step of the
Quick Setup wizard. Follow the screen prompts to
complete the Quick Setup.
Press the A button to confirm the selection or press
the B button to try a different video resolution.
Press the A button to confirm the selection or press
the B button to try a different video resolution.
Note: If you confirm that your receiver is indeed connected to an external surround-sound system, then audio output
from the receiver will be set up as surround-sound. If you confirm that your receiver is not connected to an external
surround-sound system, then you will be asked to select the output your television can support. Press UP or DOWN
arrow to make your selection and press SELECT. Press the DOWN arrow to highlight Next and press SELECT to move
to the next screen.