8
ASSEMBLY
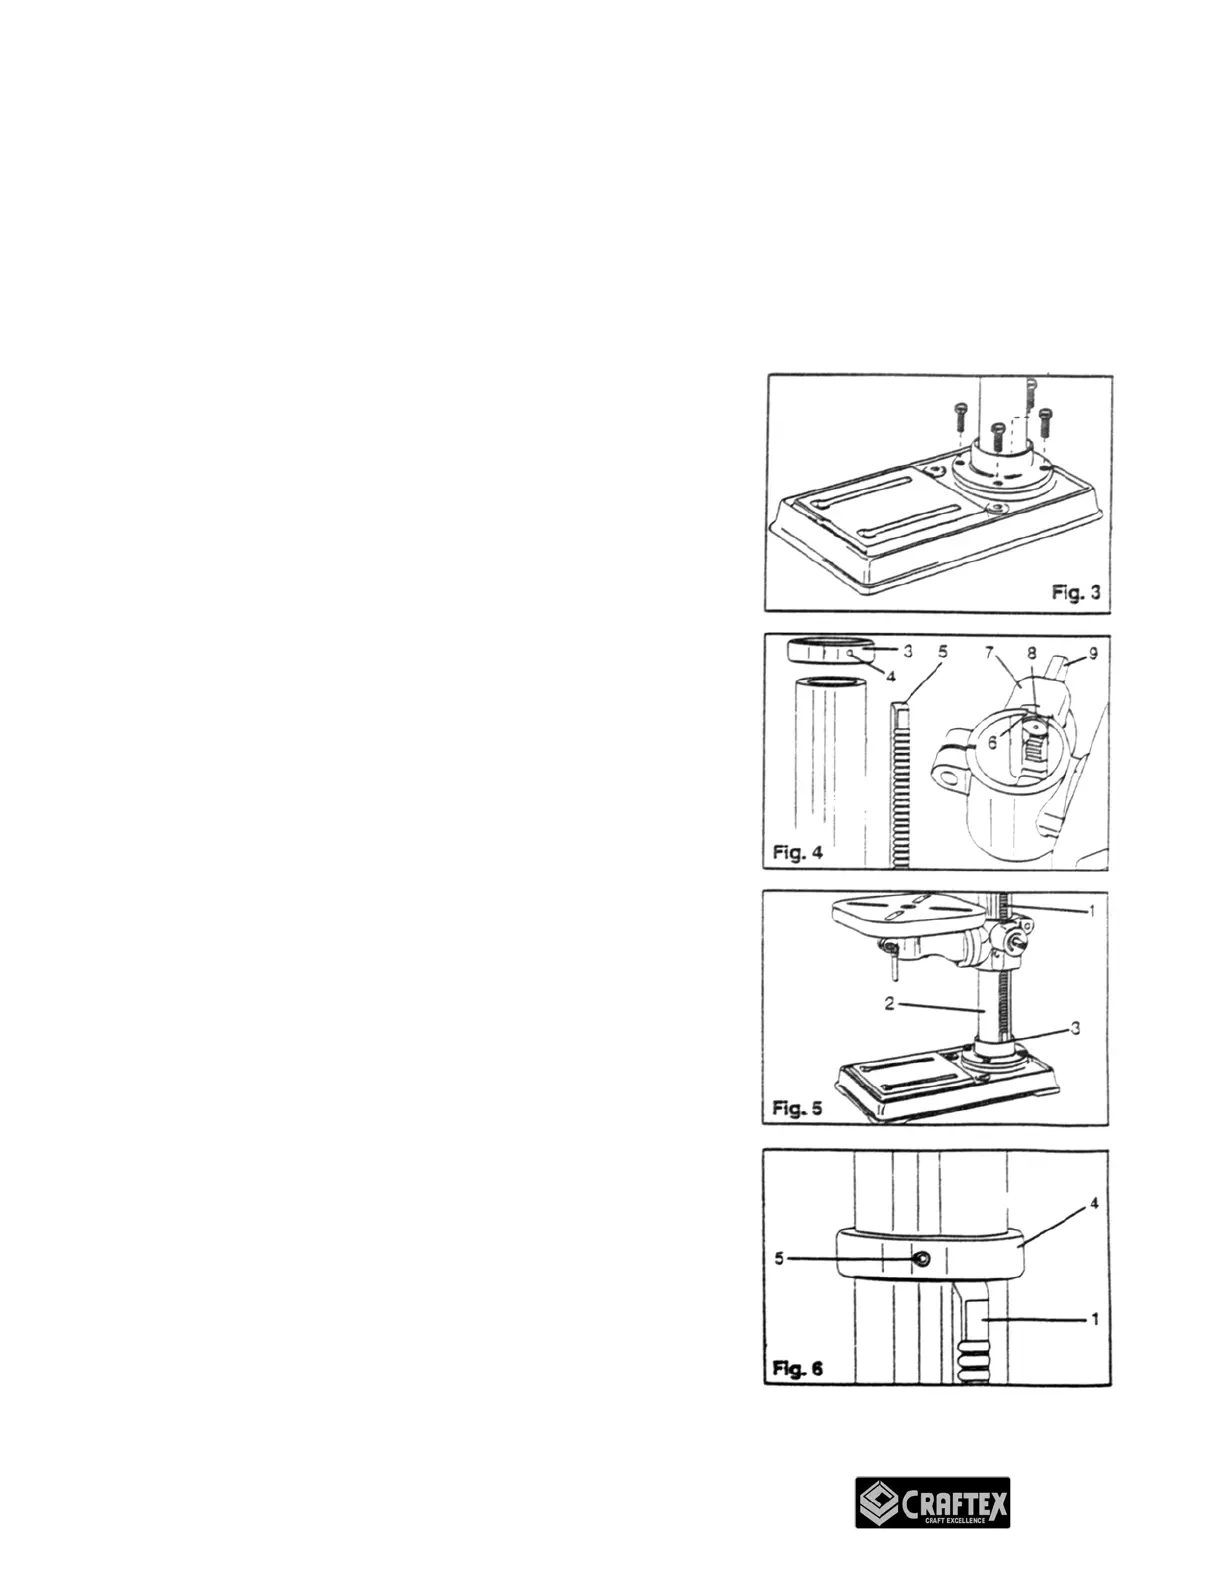
BASE TO COLUMN
Select the base and the drill press column from the
loose parts. Select the four 10mm x 25mm bolts
from the parts bag. Align the holes of the post flange
to the threaded holes in the base. Insert the bolts
and tighten securely.
TABLE TO COLUMN
Remove the ring (3) by loosening the set-screw (4).
Remove the rack (5) from the column.
Check that the worm gear (8) is properly seated
inside the table bracket (7) and it comes in contact
with the gears. The handle shaft (9) should extend
out of the housing by about 1”.
Insert the rack (5) into the geared groove (6) of the
table bracket (7). The table bracket should sit at the
center section of the rack.
Slip the table bracket and rack (1) carefully onto the
column (2). Insert the bottom of the rack into the slot
(3) at the base of the column.
Hold the bracket and rack against the column and
slip the rack ring (4) onto the column.
The rack (1) fits under the rack ring (4). Make sure
there is enough clearance between the rack and the
ring to allow the table to rotate around the column.
Tighten the set-screw (5) to hold the ring in position.
 Loading...