11
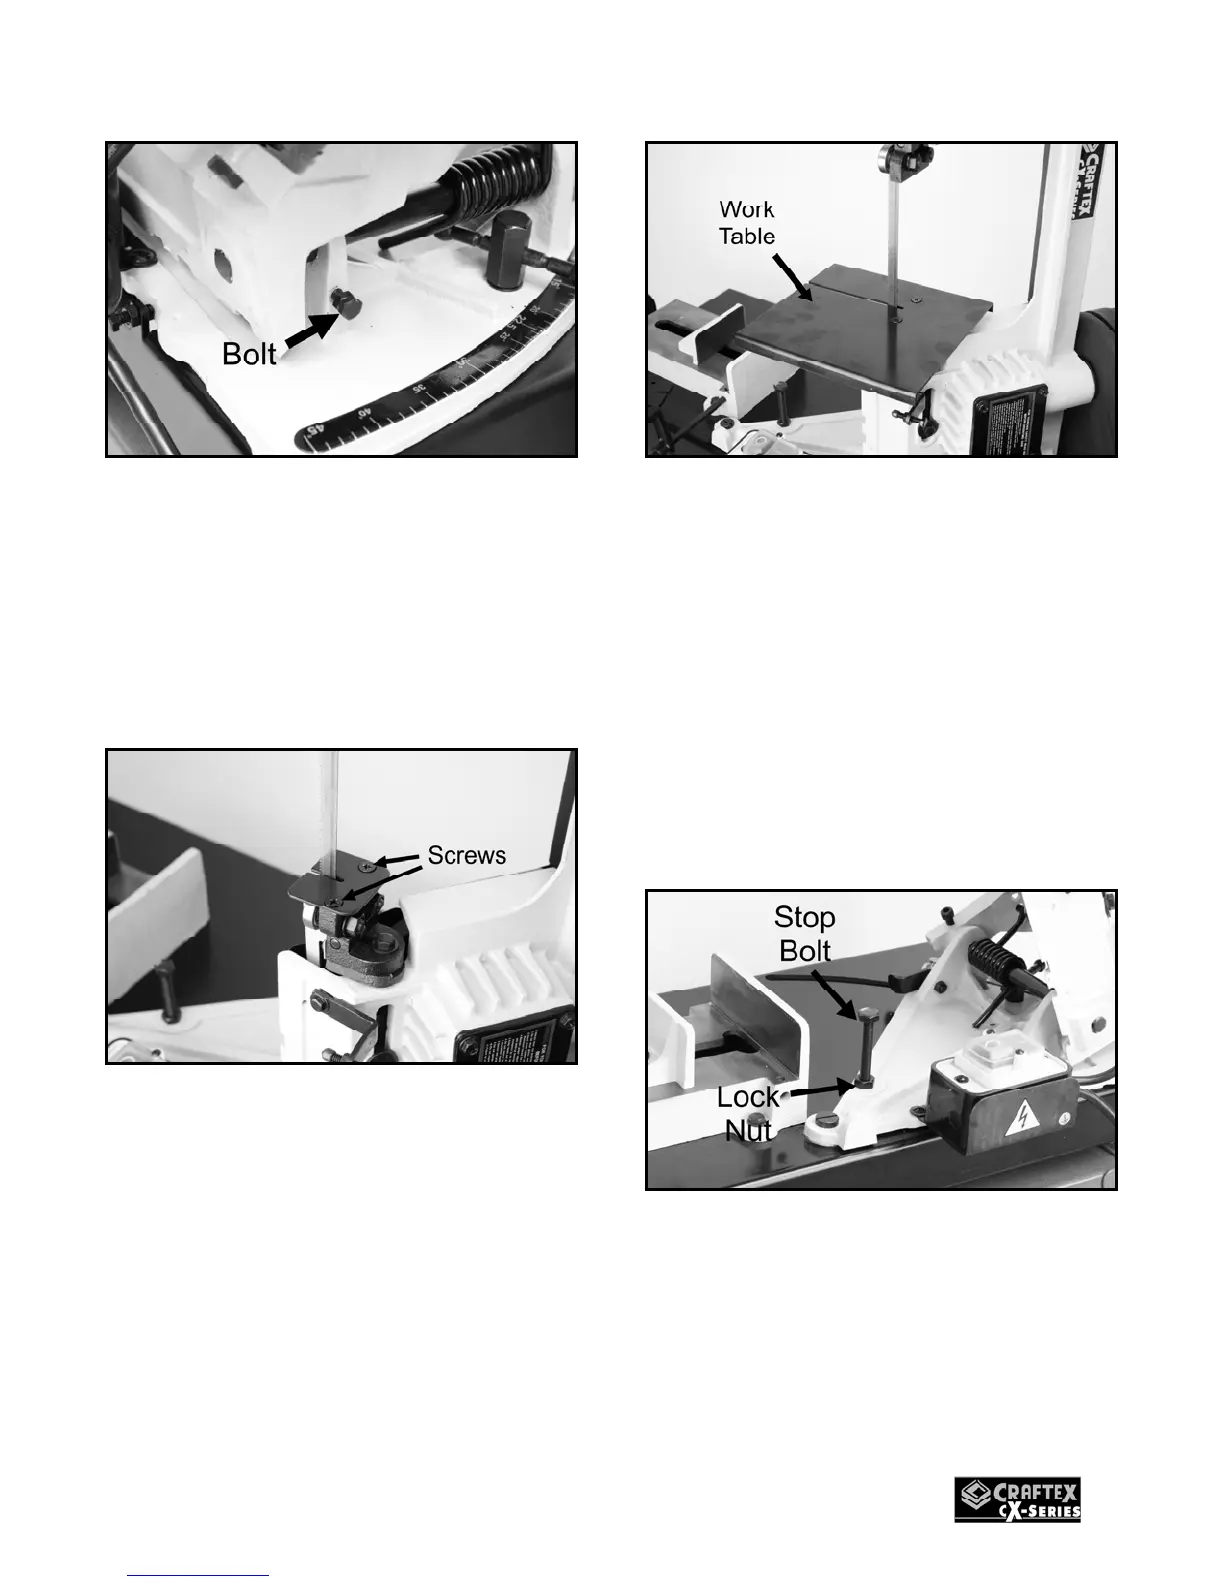
Figure-10 Removing the bolt to position the
bad saw at 90°
3. Once the bolt is removed, lift the saw
arm to the vertical position.
4. Use a screw driver and remove the two
screws as shown in figure-11.
Figure-11 Removing the two screws
5. Guide the blade through slot in the table
and secure the table with two screws
removed in step-4. See figure-12.
Figure-12 Installing the work table
STOP BOLT
Stop bolt is located on the band saw base
and is adjusted to stop the band saw at the
desired height when cutting.
To adjust the stop bolt:
Loosen the lock nut shown in figure-13 and
thread the bolt in or out. Once the bolt is at
the desired height, re-tighten the lock nut.
Figure-13 Stop bolt
 Loading...