9
ASSEMBLY
Follow the instructions given below to
assemble your CX212 table saw.
Install the hand wheels onto the shafts and
make sure the notch in each wheel fits over
the pin on each shaft. Secure the knobs.
See figure-2.
Figure-2 Installing the hand wheels
Remove all the screws from the end of the
main table and clean mating surfaces of the
main table and the extension wings. Make
sure there is no debris or any foreign
material on the mating surfaces of the main
table and the extension wing which can
cause misalignment and the wings can not
be properly attached to the table.
Attach the extension wings to the table
using the screws removed from the main
table, finger tighten for now. Place a
straightedge across the extension wings
and the main table to make sure that the
extension wings surface is flat with the main
table. See figure-3.
Figure-3 Installing the extension wings
Attach motor cover to the saw cabinet using
screws provided. See figure-4.
Figure-4 Installing the motor cover
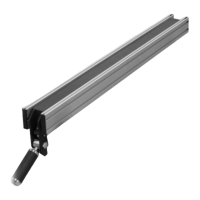
Remove the two hex bolts from the switch
bracket and insert into the bottom slot of the
fence rail. See figure-5. This will be used to
mount the switch later.
Figure-5 Bolts for mounting switch
IMPORTANT!
If the outside end of the extension wings
tilts down or up, use a strip of masking
tape to align it with the main table.