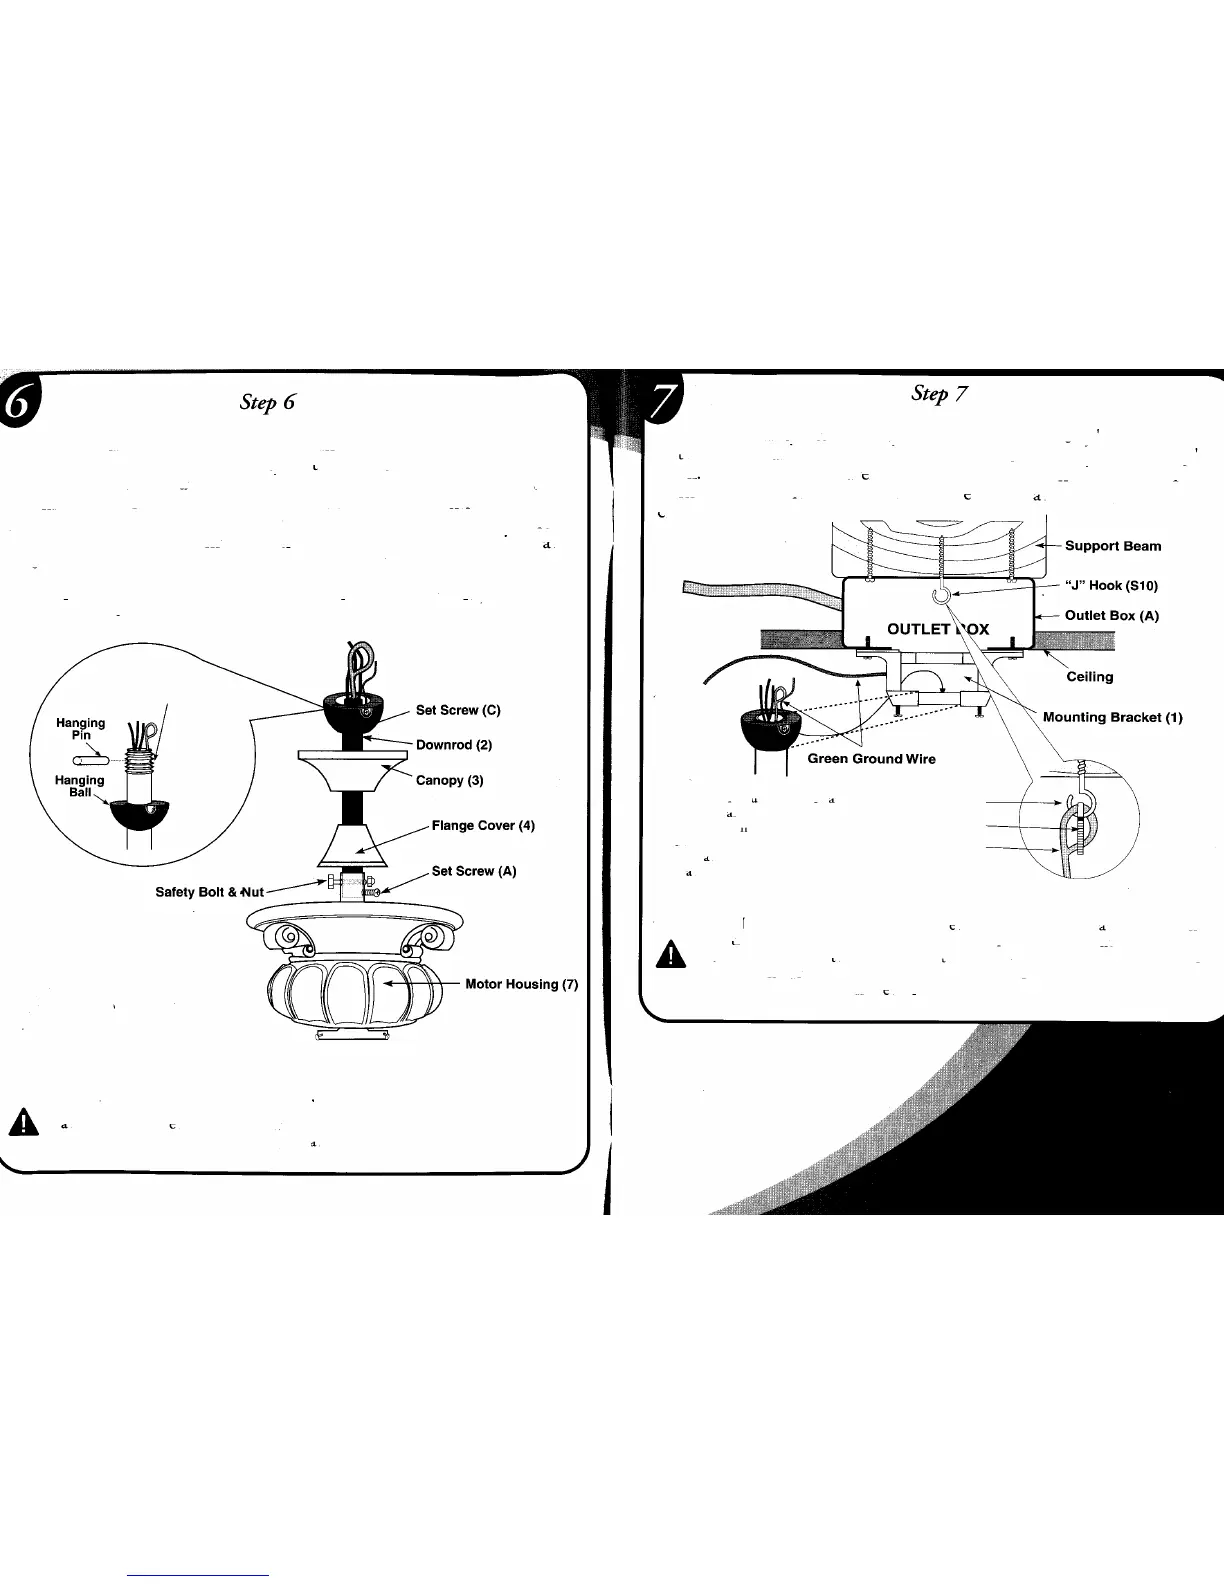
Position downrod so the hole in the downrod aligns with the hole in the
coupling on the motor. Insert safety bolt (58) through coupling and
downrod and attach nut. Tighten firmly. Tighten set screw "A" against
downrod. Place flange cover (5) over downrod assembly until it covers
flange. Place canopy (3) over downr~d (2). Replace h,~nr.i?gball,.insert
hanging pin through downrod and tighten set screw C m hangmg ball
into downrod.
NOTE: Flange cover will not work with supplied 2 1/2 inch downrod. Flange cover is
decorative and will not affect the operation of the fan.
Threaded Set
Screw Hole
Ground
Wire
I
) Ball
)jcrew
WARNING:
Failure to completely tighten downrod as described in steps 5
&
6 above could
result in the fan loosening and possibly falling.
For added security, attach safety cable from fan unit to "]" hook (510) in
outlet box. 5ecure by looping zip tie (511) through safety cable and "]"
hook. Tighten zip tie securely. Lift fan onto the mounting bracket (1).
Turn housing until hanging ball seats itself into ball socket (listen for
click).
NOTE: Parts furnished will allow
you to install your fan at up to a
35° angle. Angles greater than 35°
will require a 45° angle adapter
(see dealer). NOTE:
J
Hook
installation is a Canadian
requirement only.
"J"
Hook (S10)
Zip Tie (S11)
Safety Cable
WARNING: To reduce the risk of fire, electric shock or personal injury, mount
so outlet box marked "acceptable for fan support" and use mounting screws
provided with the outlet box. Most outlet boxes commonly used for the support
of lighting fixtures are not acceptable for fan support and may need to be
replaced. Consult a qualified electrician if in doubt.