page 6
5. Fan Assembly. (cont.)
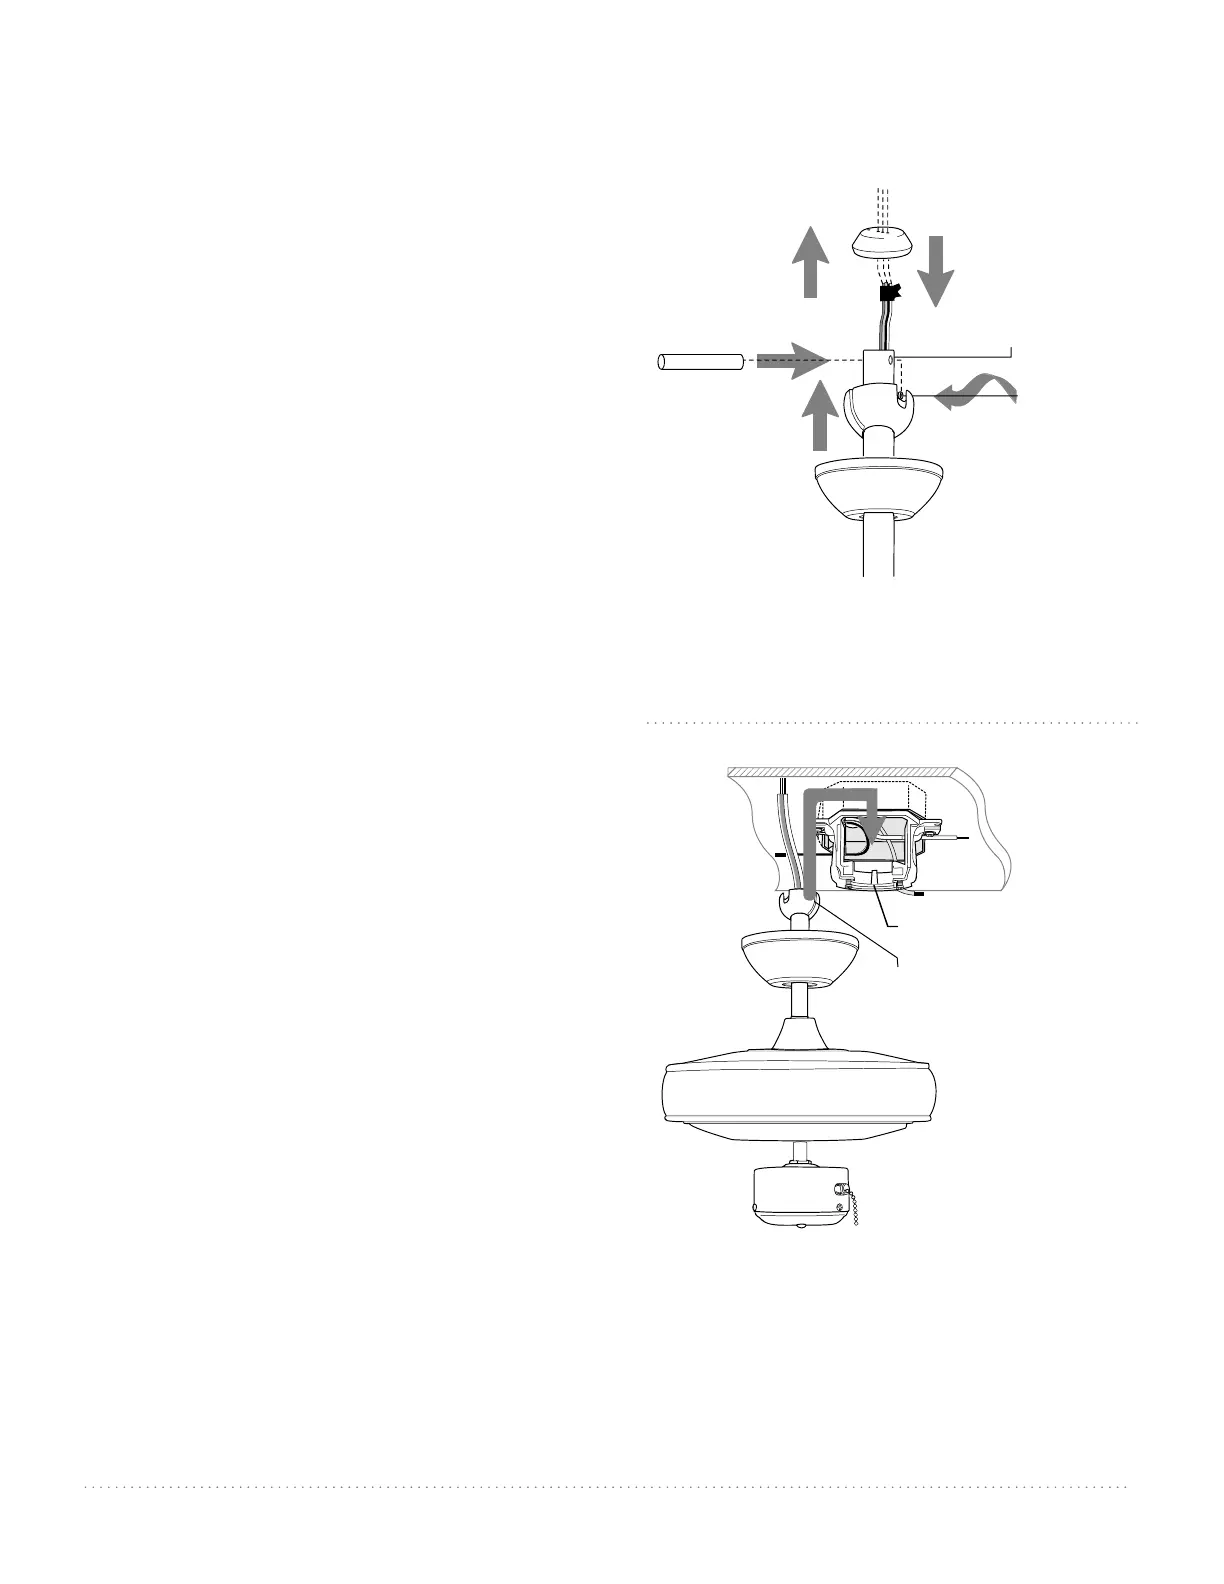
diagram 4
Thread wires through hanging ball and then
slide hanging ball over downrod--the top of the
downrod should be noted as having a set screw
hole; use this hole when setting the set screw.
Insert stop pin into top of downrod and raise
hanging ball. Be sure stop pin aligns with slots
on the inside of the hanging ball. Tighten set
screw securely.
[Refer to diagram 4.]
Remove electrical tape from electrical wiring and
thread each of the wires through a dierent hole
in the weatherproof hanging ball cover. Pull
weatherproof hanging ball cover down securely
over hanging ball (on downrod).
[Refer to diagram 4.]
WARNING: Failure to tighten set screw (on
hanging ball) completely could result in the fan
becoming loose and possibly falling.
set screw hole
set screw
hanging ball
canopy
stop pin
weatherproof
hanging
ball cover
electrical wiring
With the hanging bracket secured to the outlet
box and able to support the fan, you are now
ready to hang your fan. Grab the fan rmly with
two hands. Slide downrod through opening in
hanging bracket and let hanging ball rest on the
hanging bracket. Turn the hanging ball slot until
it lines up with the hanging bracket tab.
[Refer to diagram 5.]
WARNING: Failure to align slot in hanging ball
with tab in hanging bracket may result in serious
injury or death.
Tip: Seek the help of another person to hold the
stepladder in place and to help lift the fan up to
you once you are set on the ladder.
diagram 5
hanging ball slot
hanging bracket tab
motor housing