-TABLE OF CONTENTS
:i-....... ,,:. ::2 Operating: Coriti;o s: .,. _............... 6
Warrantv Troube:Sh0oting:i:i.:::.: : 8
..... ......... 2-1
'::i_:::::. ,...:.......... ::.i i:::i !:::. 4 REPAIR PARTS :... ::.:i:i i, ..... ..... 2-6
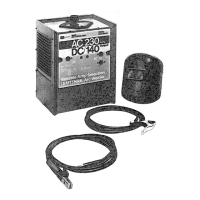
AND CHECKING CONTENTS
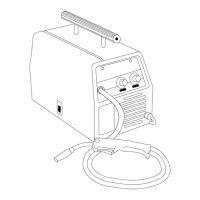
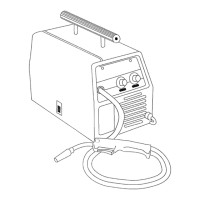
ON-OFF
ELECTRODE
DIAMETER GAUGES
OUTLET JACKS
WORK CABLE
;K
DO OUTLET4
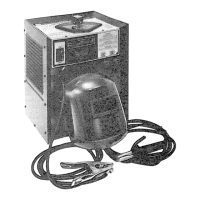
WELDING
HELMET
/
/
WORK CABLE AND
WORK CLAM P
SET-UP INSTRUCTIONS
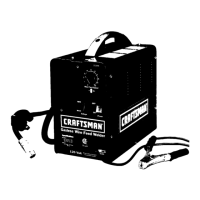
This Craftsman welder.is shipped complete in one
carton: in :order:;_to facilitate packaging, certain
itemslmust:i be assembled when received by the
purchaSei;:2BemoVe afl items.from the carton and .
ident fy item : as :;shOwn in::,:the! e:,x,ptOded::!iview _
iilUSt:ration: These :: "Loose i Parts" :sho:ul:d i:_!:be _-_:
accounted for before discarding: any packag rig: ....
material.
WARNING: FOR YOUR OWN SAFETY, DO NOT
PLUG WELDER IN IF PARTS ARE MISSING OR
DAMAGED.
Key_ .
PartName Qty
,,, = ._
Welding HElmet:(Partially assembled) 1
N0.
1
2
3
4
5
Helmet band assembly (Not Assembled) .. .... ....... 1
Electrode cable assembly .............. . :::..... :.... 1
Work cable assembly , .................... .,.,:.., t
Loose Parts Bag -- Coetainingt;qefollowing items: ... 1
ElectrodeHolder ..... . .... : ...... :...:, 1
Work Clamp ........ .............. ..:..:....- .... . 1
Screw Hex Hd. 1/4-20x 3/4in..:;.....:,:,._,...:.. !
NuL Hex. !14-20 ::,..... ....... .-..::,.,,i..... ....
/
Washer: Flat 17164in............ :. .... ...:..,...., _ 1
L0ckwasher, 1t4 in......................... !
ASSEMBLY
TOOLS NEEDED
7/16-inch wrench
Screwdriver (medium)
ATTACHING ELECTRODE HOLDER
TO ELECTRODE CABLE
1. Locate the slotted head, handle locking screw
near the front of the insulating handle. Remove
this screw.
Z Slide the handleoff electrode holder and insert
end of electrode cable assembly through the
handle: The electrode cable is the one with
insulation stripped from one end.
3. Prepare=the end of the cable by splitting the
strands into two equal bundles. Bend the bundles
into a forked shape and twist together to prevent
fraying.