EasyManua.ls Logo

Craftsman 139.53415SR User Manual

Craftsman 139.53415SR
22 pages
To Next Page IconTo Next Page
Page #1 background imageLoading...
Page #1 background image
/
®
Owners anual
00000
Garage Door Opener
Model
Model
Model
Model
Model
139.53315SR ", 1/3HP
139.53415SR- 1/2HP
139.53615SR = 1/2HP
139.53625SR - 1/2HP
139.53699SR _ 1/2HP
FASTEN THIS MANUAL NEAR THE GARAGE DOOR AFTER
INSTALLATION, PERIODIC CHECKS OF THE OPENER ARE
REQUIRED TO INSURE SATISFACTORY OPERATION.
FOR RESIDENTIAL USE ONLY,
, ,= ,= ,,NIU = I , , I ............................
CAUTION
PLEASE READ THIS
MANUAL CAREFULLY
CONTENTS PAGE
Safety Rules ................... 2
Operation of Your Opener ....... 3
Maintenance Schedule ......... 3
Features of Your Opener ........ 4
Specifications ................. 4
Accessories .................... 4
Carton Check List .............. 5
You'll Need Tools ............... 5
Assembly ...................... 6
Installation Information ......... 9
Installation ................... 10
Force & Limit Adjustment ........ 17
Safety Reverse Test ............ 18
SettingtChanging Code ......... 19
Having a Problem ? .............. 20
Repair Parts, Rail Assembly ...... 22
Repair Parts, Installation ........ 22
Repair Parts, Chassis Assembly.. 23
How To Order Repair Parts ...... 24
Maintenance Agreements ........ 24
Sears Warranty ................. 24
Question and Answer IconNeed help?

Do you have a question about the Craftsman 139.53415SR and is the answer not in the manual?

Craftsman 139.53415SR Specifications

General IconGeneral
TypeChain Drive
Horsepower1/2 HP
Remote ControlYes
Safety SensorsYes
Battery BackupNo
Max Door Height7 feet
Safety FeaturesAuto-reverse
Voltage120V

Summary

Operation of Your Opener

Using the Opener

How to activate the garage door opener using the transmitter or wall push button.

Opening the Door Manually

Procedure to disconnect the opener and operate the garage door manually.

Care of the Opener

Guidelines for maintaining the garage door opener for optimal performance.

Limit and Force Adjustments

Information on adjusting door travel limits and operating force for proper function.

Maintenance of Your Opener

Schedule for routine checks and maintenance of the garage door opener.

Features of Your Opener

Specifications

Accessories

Carton Check List

Tools Required for Installation

Assembly: Tee Rail and Pulley Bracket

STEP 1 Assemble Tee Rail & Attach Cable Pulley Bracket

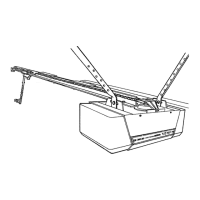
Instructions for assembling the tee rail and attaching the cable pulley bracket.

Assembly: Trolley and Chassis Connection

STEP 2 Install Trolley

Procedure for installing the trolley onto the tee rail assembly.

STEP 3 Attach Tee Rail To Opener Chassis

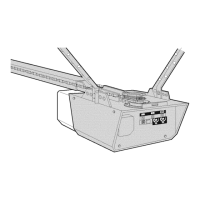
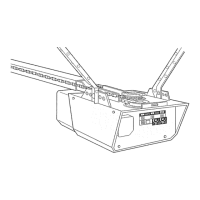
Steps for connecting the assembled tee rail to the main opener chassis.

Assembly: Chain and Cable Installation

STEP 4 Install Chain and Cable

Detailed steps for installing the drive chain and safety cable.

Assembly: Chain and Cable Tightening

STEP 5 Tighten the Chain and Cable

Instructions for properly tensioning the drive chain and cable.

Installation: Header Bracket Mounting

STEP 1 Position and Install Header Bracket

Guidance on locating and securely mounting the header bracket to the garage wall.

Installation: Rail and Chassis Attachment

STEP 2 Attach Tee Rail to Header Bracket

Connecting the tee rail assembly to the previously installed header bracket.

STEP 3 Position Opener Chassis

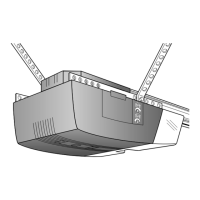
Instructions for positioning the main opener chassis correctly for installation.

Installation: Hanging the Opener

STEP 4 Hang Opener Chassis

Steps for securely attaching the opener chassis to structural supports.

STEP 5 Attach Emergency Release Rope & Handle

Installing the emergency release rope and handle for manual operation.

Installation: Wall Push Button Wiring

STEP 6 Install Wall Push Button

Guidance on mounting the wall push button in a safe and accessible location.

Installation: Light, Lens, and Power Connection

STEP 7 Install Light and Lens

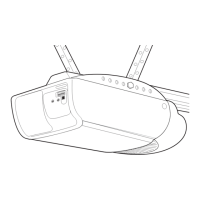
Instructions for installing the opener's light bulb and lens cover.

STEP 8 Connect Electric Power

Steps for safely connecting the opener to the main power supply.

Installation: Door Bracket and Plate

STEP 9 Install Door Bracket and Plate

Procedure for attaching the door bracket and plate to the garage door.

Installation: Connecting Door Arm

STEP 10 Connect Door Arm to Trolley

Connecting the door arm to the trolley mechanism for operation.

Adjustment Procedures

STEP 1 Adjust UP and DOWN Limits

Regulating the door's travel points for full opening and closing.

STEP 2 Adjust Force

Setting the motor's operating force to ensure safe and effective door movement.

Adjustment: Safety Reverse Test

STEP 3 Test Safety Reverse System

Verifying the safety reverse system functions correctly by testing with an obstruction.

Optional STEP 4 Install Infrared Reversing Sensor

Instructions for installing an optional safety sensor for added protection.

Radio Controls Setup

MATCH/CHANGE THE CODE IN TRANSMITTER(S)

Procedure for setting or changing the radio code for transmitters and receivers.

SET RECEIVER TO MATCH TRANSMITTER(S) CODE

Steps to synchronize the garage door opener receiver with the transmitter codes.

Repair Parts Identification

Related product manuals