EasyManua.ls Logo

Craftsman 139.53990 User Manual

Craftsman 139.53990
39 pages
To Next Page IconTo Next Page
Page #1 background imageLoading...
Page #1 background image
Owner's Manual/Manual del Propietario
GARAGE DOOR OPENER
ABRIDOR DE PUERTA DE COCHERA
For Residential Use Only/Sblo para uso residencial
Model/Modelo 139.53990
Z_
O
I-"
Read and follow all safety rules
and operating instructions before
first use of this product.
Lea y siga todas las reglas de
seguridad y las instrucciones de
operaci6n antes de usar este
producto por primera vezo
Fasten the manual near the garage
door after installation.
Guarde este manual cerca de la
puerta de la cochera.
Periodic checks of the opener are
required to ensure safe operation.
Se deben realizar revisiones
peribdicas del abridor de puertas
para asegurar su operaci6n
segura.
Sears, Roebuck and Co., Hoffman Estates, IL 60179 U.S.A
www.sears.com/craftsman
Question and Answer IconNeed help?

Do you have a question about the Craftsman 139.53990 and is the answer not in the manual?

Craftsman 139.53990 Specifications

General IconGeneral
Model Number139.53990
Horsepower1/2 HP
Frequency60 Hz
Remote Controls Included2
Safety SensorsYes
Max Lift Power1/2 HP
Drive SystemChain Drive
Voltage120V
Maximum Door Height7 ft

Summary

Prepare Your Garage Door

Tools Needed for Installation

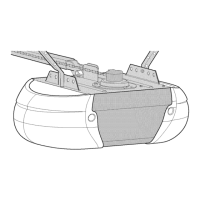
List of essential hand tools required for assembling and installing the garage door opener.

Garage Door Planning

Sectional Door Installation Considerations

Factors and requirements specific to installing openers on sectional garage doors.

Garage Door Planning

One-Piece Door Installation Considerations

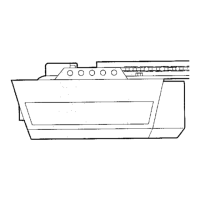
Factors and requirements specific to installing openers on one-piece garage doors.

Carton Inventory and Parts List

Hardware Inventory

Assembly Step 1: Assemble Rail and Trolley

Assembly Step 2: Fasten Rail to Motor Unit

Assembly Step 3: Install Idler Pulley

Assembly Step 4: Install Chain/Cable

Assembly Step 5: Tighten the Chain

Important Installation Safety Instructions

Installation Step 1: Determine Header Bracket Location

Sectional & One-Piece Door Track Installation

Specific steps for determining header bracket placement for doors with tracks.

One-Piece Door Without Track Installation

Header Bracket Height Example

An example calculation to determine the correct header bracket height for one-piece doors.

Installation Step 2: Install Header Bracket

Wall Header Bracket Installation

Procedure for mounting the header bracket onto a wall structure.

Ceiling Header Bracket Installation

Procedure for mounting the header bracket onto a ceiling structure.

Installation Step 3: Attach Rail to Header Bracket

Existing Craftsman Installation Option

Guidance for attaching the rail when replacing a previous Craftsman opener.

Installation Step 4: Position the Opener

Sectional & One-Piece Door with Track Positioning

How to position the opener for doors with tracks.

One-Piece Door Without Track Positioning

How to position the opener for one-piece doors without tracks.

Installation Step 5: Hang the Opener

Installation Step 6: Install Door Control

Keylock Accessory Connections

Wiring details for connecting an optional keylock accessory to the door control.

Installation Step 7: Install Lights

Installation Step 8: Attach Emergency Release

Installation Step 9: Electrical Requirements

Permanent Wiring Connection Procedure

Steps for making a permanent electrical connection to the motor unit.

Installation Step 10: Install Safety Reversing Sensor

Safety Reversing Sensor Information

Essential details on the safety sensor's function, placement, and importance.

Installing the Sensor Brackets

Garage Door Track Bracket Installation

Preferred method for attaching sensor brackets to door tracks.

Wall Bracket Installation

Steps for mounting sensor brackets directly onto a wall.

Floor Bracket Installation

Steps for mounting sensor brackets onto the garage floor.

Mounting and Wiring Safety Sensors

Aligning the Safety Sensors

Procedure for aligning the safety sensors for proper beam detection.

Troubleshooting Safety Sensors

Common problems and solutions related to the safety reversing sensors.

Installation Step 11: Fasten Door Bracket

Sectional Door Bracket Fastening

Specific steps for fastening the door bracket on sectional doors.

One-Piece Door Bracket Installation

Installation Step 12: Connect Door Arm to Trolley

Sectional Door Arm Connection

Specific steps for connecting the door arm on sectional doors.

One-Piece Door Arm and Travel Adjustment

One-Piece Door Adjustment Procedures

Detailed steps for adjusting UP and DOWN travel limits for one-piece doors.

Adjustment Step 1: Adjust Travel Limits

How and When to Adjust Limits

Guidance on determining when and how to adjust the travel limit settings.

Adjustment Step 2: Adjust Door Force

How and When to Adjust Forces

Detailed instructions for testing and adjusting the force controls.

Adjustment Step 3: Test Safety Reversal System

Adjustment Step 4: Test Safety Reversing Sensor

Operation: Important Safety Instructions

Using Your Garage Door Opener

Using the Wall-Mounted Door Control

Motion Detecting Control Console Features

Explanation of the motion detector, light, and lock features of the control console.

Automatic Light Feature Operation

How the automatic light activates and can be disabled.

Lock Feature Functionality

How to enable or disable the lock feature to prevent remote operation.

Care and Maintenance of Your Opener

Limit and Force Adjustment Guidance

Information on when and how to re-adjust travel limits and force settings.

Opener Maintenance Schedule

Recommended periodic checks and maintenance tasks for optimal opener performance.

Remote Control Battery Replacement

Troubleshooting Common Garage Door Opener Problems

Programming Your Garage Door Opener

Add Additional Remote Control

Steps to program new hand-held remote controls to the opener.

Erase All Stored Codes

Procedure to clear all previously programmed remote and keyless entry codes.

Add or Change Keyless Entry PIN

Repair Parts: Rail Assembly

Repair Parts: Installation Components

Motor Unit Assembly Parts Diagram

Optional Accessories for Opener

Garage Door Opener Warranty Information

Related product manuals