EasyManua.ls Logo

Craftsman 139.5399011 User Manual

Craftsman 139.5399011
76 pages
To Next Page IconTo Next Page
Page #1 background imageLoading...
Page #1 background image
Owner's Manual/Manual Del Propietario
3/4 HP
GARAGE DOOR OPENER
ABRIDOR DE PUERTA DE COCHERA
For Residential Use Only/Sblo para uso residencial
Model/Modelo 139.5399011
m
m
Z_
Read and follow all safety rules
and operating instructions before
first use of this product.
Fasten the manual near the garage
door after installation.
Leer y seguir todas las reglas de
seguridad y las instrucciones de
operacibn antes de usar este
producto por primera vez.
Guardar este manual cerca de la
puerta de la cochera.
Periodic checks of the opener are
required to ensure safe operation.
Se deben realizar revisiones
peribdicas del abridor de puertas
para asegurar su operacibn
segura.
Sears, Roebuck and Co., Hoffman Estates, IL 60179 U.S.A
www.sears.com/craftsman

Table of Contents

Question and Answer IconNeed help?

Do you have a question about the Craftsman 139.5399011 and is the answer not in the manual?

Craftsman 139.5399011 Specifications

General IconGeneral
Model Number139.5399011
Horsepower1/2 HP
Remote ControlYes
Safety SensorsYes
Battery BackupNo
Drive SystemChain Drive
Max Door Height7 ft
Voltage120V

Summary

Garage Door Opener Assembly

Garage Door Opener Installation

Critical Installation Safety Instructions

Critical safety warnings and instructions to follow before and during opener installation.

Installation Step 1: Determine Header Bracket Location

Guidance on finding and marking the correct position for the header bracket installation.

Installation Step 2: Install Header Bracket

Procedures for securely mounting the header bracket to the wall or ceiling.

Installation Step 3: Attach Rail to Header Bracket

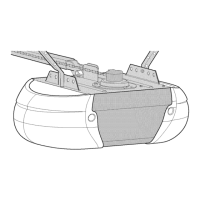
Instructions for connecting the opener rail assembly to the mounted header bracket.

Installation Step 4: Position the Opener

Guidance on placing the opener unit correctly relative to the garage door and rail.

Installation Step 5: Hang the Opener

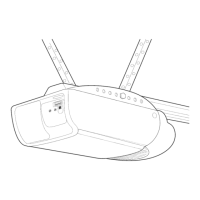
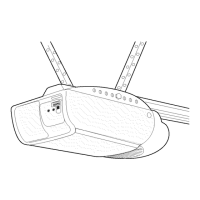
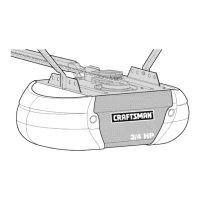
Instructions for securely hanging the opener motor unit using mounting brackets.

Installation Step 6: Install Door Control

Procedure for mounting the wall-mounted door control console and wiring it.

Installation Step 9: Electrical Requirements

Information on electrical connections, grounding, and wiring requirements for the opener.

Installation Step 10: Install Safety Reversing Sensor

Instructions for installing and aligning the safety reversing sensors for obstacle detection.

Install Safety Sensor Brackets

Methods for mounting safety sensor brackets to tracks, walls, or floor.

Adjustments and Testing

Test Safety Reversal System

Performing the safety reversal test to ensure the door stops on obstruction.

Test Protector System (Safety Sensors)

Testing the safety reversing sensors to confirm their function for door closure.

Operation

Key Operational Safety Instructions

Crucial safety warnings and guidelines for operating the garage door opener.

Troubleshooting and Diagnostics

Programming Features

Related product manuals