EasyManua.ls Logo

Craftsman 139.53963SRT User Manual

Craftsman 139.53963SRT
40 pages
To Next Page IconTo Next Page
Page #1 background imageLoading...
Page #1 background image
Owner's
Manual
Model No.
139.53963SRT
For Residential Use
Only
Caution:
Read and follow all
safety rules and
operating Instructions
before first use of this
product.
Fasten the manual
near the garage door
after installation.
Complies with UL 325 f|l _
regulations effective
January 1, 1993
I:RRFTSMRN®
GARAGE DOOR OPENER
1/2 HP
Safety Precautions
Assembly
Installation
m Adjustment
Care and Maintenance
Operation
Troubleshooting
Parts List
-.-w.i ,,
Sears, Roebuck and Co., Hoffman Estates, IL 60179 U.S.A.
Question and Answer IconNeed help?

Do you have a question about the Craftsman 139.53963SRT and is the answer not in the manual?

Craftsman 139.53963SRT Specifications

General IconGeneral
BrandCraftsman
Model139.53963SRT
CategoryGarage Door Opener
LanguageEnglish

Summary

Safety Precautions

Safety Information and Precautions; Tools

Essential safety rules, precautions, and tools needed for installation.

IMPORTANT INSTALLATION INSTRUCTIONS

Critical warnings to prevent severe injury or death during installation.

IMPORTANT SAFETY INSTRUCTIONS

General safety guidelines for operation, maintenance, and potential hazards.

Assembly

Carton Inventory

List of components included in the opener package.

Hardware

Detailed list and illustration of assembly and installation hardware.

Assembly Step 1 Assemble the Rail

Instructions for assembling the rail sections of the opener.

Assembly Step 2 Fasten the Rail To the Power Unit and Install the Trolley

Connecting the rail to the power unit and installing the trolley.

Assembly Step 3 Attach the Rail Brackets

Steps for attaching the rail brackets to the rail assembly.

Installation

SECTIONAL Door Installation

Guide for installing the opener on sectional garage doors.

ONE-PIECE Door Installation

Guide for installing the opener on one-piece garage doors.

Installation Step 1 Determine Header Bracket Location

Determining the correct location for the header bracket.

Installation Step 2 Install the Header Bracket

Procedures for fastening the header bracket to the wall or ceiling.

Installation Step 3 Attach the Rail to the Header Bracket

Connecting the assembled rail to the header bracket.

The Safety Reversing Sensor

Information and importance of the safety reversing sensor.

Installation Step 4 Install the Safety Reversing Sensor

Instructions for installing and mounting the safety reversing sensors.

Installation Step 5 Position the Opener

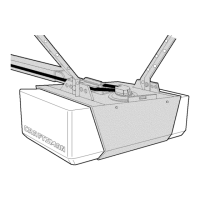
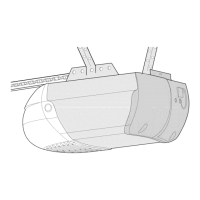
Guidelines for positioning the opener unit correctly.

Installation Step 6 Hang the Opener

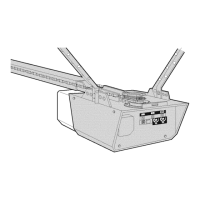
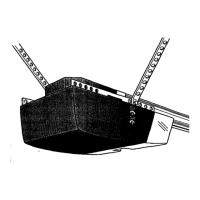
Steps for securely hanging the opener to structural supports.

Installation Step 7 Install the Premium Control Console and Connect all Wiring

Installing the control console and wiring it to the opener.

Installation Step 8 Electrical Requirements

Understanding electrical requirements and proper grounding.

Installation Step 10 Install the Lights and Lens

Installing the light bulbs and lens covers on the opener.

Installation Step 11 Attach the Emergency Release Rope and Handle

Attaching the emergency release rope and handle.

Installation Step 12 Fasten Door Bracket

Securing the door bracket to the garage door.

Installation Step 13 Connect Door Arm to Trolley

Connecting the door arm sections to the trolley.

Adjustment

Adjustment Step 1 Adjust the UP and DOWN Limits

Setting the travel limits for door opening and closing.

Adjustment Step 2 Adjust the Force

Adjusting the force settings for opening and closing the door.

Adjustment Step 3 Test the Safety Reversing Sensor

Testing the functionality of the safety reversing sensor.

Adjustment Step 4 Test the Safety Reverse System

Testing the door's ability to reverse upon obstruction.

Care and Maintenance

Care of Your Opener

Tips for maintaining the garage door opener.

Maintenance Schedule

Recommended maintenance tasks and their frequency.

Operation

Operation of Your Opener

How to activate and operate the garage door opener.

Receiver and Remote Control Programming

Programming the receiver and remote controls for operation.

Troubleshooting

Troubleshooting

Identifying and resolving common issues with the opener.

Parts List

Rail Assembly Parts

List of parts for the rail assembly.

Installation Parts

List of parts required for installation.

Opener Assembly Parts

List of parts for the main opener assembly.

Related product manuals