Do you have a question about the Craftsman 139.53989 and is the answer not in the manual?
Explains safety symbols (Warning, Caution) and signal words to alert users to potential hazards.
Essential safety precautions and checks for preparing the garage door before opener installation.
Lists and illustrates the necessary hand tools for assembling and installing the garage door opener.
Identify garage door type, survey installation area, and note specific conditions that may affect installation.
Guidance on determining the optimal and secure location for the header bracket.
Checks for floor gap, access doors, and reinforcement needs for sectional doors.
Details on reinforcement, opener placement, and headroom for sectional garage doors.
Guidance on reinforcement needs and securing the door bracket for one-piece garage doors.
Critical safety warnings regarding the reversal system and floor gap for one-piece doors.
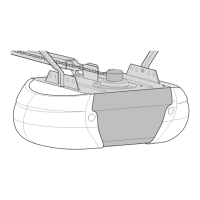
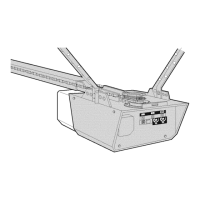
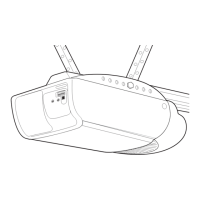
Lists the main components of the garage door opener unit and rail assembly included in the carton.
Details accessories like remote controls, keyless entry, safety sensors, and labels provided.
Lists and illustrates the hardware required specifically for the assembly of the garage door opener.
Lists and illustrates the hardware required for the installation phase of the garage door opener.
Instructions for assembling the rail sections and connecting the inner and outer trolleys.
Detailed steps for attaching the assembled rail to the motor unit using the provided U-bracket and bolts.
Guides on placing the idler pulley and securing it with the bolt, washer, and nut.
Steps for attaching the chain/cable to the trolley and motor unit sprocket, ensuring proper engagement.
Guidance on tightening the chain to the correct tension, ensuring it's 1/4 inch above the rail.
Essential safety checks including door balance, repairs, disabling locks, and electrical safety before installation.
Guidelines for mounting the opener unit, emergency release handle, and wall control for safe operation.
Instructions for placing warning labels and performing the final safety reversal system test.
Crucial warnings about securely mounting the header bracket to structural support and avoiding drywall installation.
Steps to find the correct vertical centerline and horizontal line for header bracket placement on sectional doors.
Guidance on header bracket placement for one-piece doors with track, including clearance considerations.
Procedure for determining header bracket location for one-piece doors without a track, including height calculation.
Illustrates jamb hardware and pivot hardware options for one-piece doors without tracks.
Detailed steps for securely fastening the header bracket to the wall using pilot holes and lag screws.
Instructions for mounting the header bracket to the ceiling structure, ensuring proper alignment and secure fastening.
Procedure for positioning the opener and attaching the front rail end to the header bracket using a clevis pin.
Guidance on positioning the opener using a 2x4 for correct door-to-rail distance on sectional or tracked one-piece doors.
Steps for positioning the opener for one-piece doors without track, ensuring level alignment with the motor unit.
Instructions for cutting, drilling, and attaching hanging brackets to secure the opener unit to structural supports.
Guidance for installing the opener on finished ceilings, requiring a separate sturdy bracket secured to structural supports.
Steps for installing the door control, including wiring to terminals and securing the unit to the wall.
Details on connecting bell wire to the door control and optional keylock accessories.
Instructions for installing up to 100-watt bulbs into the opener sockets and securing the lens covers.
Procedure for threading the rope through the handle and release arm, adjusting length, and securing knots.
Ensuring the opener is plugged into a proper grounding-type outlet and avoiding improper adapters or extension cords.
Steps for making a permanent electrical connection through the motor unit, including wire connections to terminals.
Details on installing the safety reversing sensor, including height, placement, and obstructions.
Information on mounting brackets, wall/floor installation options, and ensuring an unobstructed invisible light beam.
Preferred method for attaching sensor brackets directly to the garage door track using curved arms.
Alternative methods for mounting sensor brackets on the wall or floor, including use of extension brackets or wood blocks.
Attaching sensor brackets with wing nuts and routing bell wire to the opener unit, securing with staples.
Procedure for aligning the sensors using indicator lights to ensure proper beam detection and opener function.
Common problems with sensor indicator lights and their potential causes and solutions.
Guidance on reinforcing sectional doors and positioning the door bracket within specified limits for secure attachment.
Instructions for centering and fastening the door bracket to one-piece doors, including options for doors without exposed framing.
Steps to connect straight and curved door arm sections using clevis pins and fasteners for sectional doors.
Instructions for fastening the straight and curved door arm sections together and connecting them to the door bracket.
Procedure for adjusting UP and DOWN travel limits to ensure proper door opening and closing.
Final connection of the door arm to the trolley and running a complete travel cycle test.
Procedure to test if the door opens and closes completely and does not reverse unintentionally.
How to increase or decrease up and down travel limits using adjustment screws based on door travel performance.
Steps to test the down force and adjust it to ensure normal reversal or completion of the close cycle.
Procedure to test the up force and adjust it to ensure the door stops properly or opens sufficiently.
Procedure to test the safety reversal system by placing an obstruction and observing door behavior.
Recommended checks after any adjustments to door arm, limits, force, or the door itself.
Procedure to test the Protector System® by placing an object in the door's path and verifying door response.
Essential safety rules for operating the opener, including child safety, visibility, and avoiding path crossing.
Guidelines for using the emergency release handle and maintaining a balanced garage door.
Instructions for regular safety reversal system testing, professional repairs, and power disconnection.
How to operate the opener using remote, door control, or keyless entry, and expected door behavior.
Information on how the opener lights operate, including the Security+ Light Feature and its customization.
Details on operating the opener, lights, and lock feature using the premium control console.
Instructions for programming a 3-function remote to control the opener lights.
Procedure to disconnect the trolley using the emergency release handle for manual door movement.
Steps to reconnect the trolley to the opener mechanism for automatic operation.
Notes on adjusting limits and forces due to weather conditions and the need for repeat safety tests.
Monthly, semi-annual, and annual maintenance tasks including manual operation, chain tension, and lubrication.
Instructions for safely replacing the lithium battery in the remote control, including safety warnings.
Addresses issues where the opener fails to operate, has limited remote range, or has control inconsistencies.
Diagnoses problems related to the door not opening/closing fully, reversing unexpectedly, or operating by itself.
Covers problems like excessive noise, motor strain, power failure operation, and chain sag.
Step-by-step guide to program additional remote controls using the motor unit's learn button.
Procedure for programming additional remote controls via the premium control console.
Instructions to erase all previously programmed remote control codes from the motor unit's memory.
Steps to add or change a Keyless Entry PIN using the motor unit's learn button.
Procedure to add or change a Keyless Entry PIN using the premium control console.
Instructions for setting temporary PINs that expire after a set duration or number of uses.
Diagram and part numbers for the rail assembly components, including trolley, chain, and brackets.
Diagram and part numbers for installation-specific parts like control consoles, remotes, sensors, and brackets.
Diagrams and part numbers for the internal and external components of the motor unit, including gears, limit switches, and circuit boards.
Details on accessories like emergency key release and outdoor key switch for external operation.
Information on rail extension kits and support brackets for varying installation needs.
Describes accessories for controlling lights and monitoring garage door status.
Outlines the 90-day in-home, 3-year parts, and 10-year motor warranty, including limitations.
Contact numbers and websites for in-home appliance repair, parts, and professional installation services.
Contact information for carry-in repair services for various home items and electronics.
Phone numbers for purchasing protection or maintenance agreements for serviced products.
| Brand | Craftsman |
|---|---|
| Model | 139.53989 |
| Category | Garage Door Opener |
| Language | English |