Do you have a question about the Craftsman 315.275100 and is the answer not in the manual?
Read manual for applications, limitations, and potential hazards before operating.
Prevent body contact with grounded surfaces like pipes or radiators to avoid shock.
Ensure all guards are in place and in working order for safety.
Maintain a clean work area to prevent accidents and injuries.
Do not carry plugged-in tools with finger on switch; ensure switch is off before plugging in.
Use a heavy enough, good condition extension cord to prevent overheating and voltage drop.
Always use original factory replacement parts when servicing the tool.
Ensure router tables have proper guarding and are designed for the router.
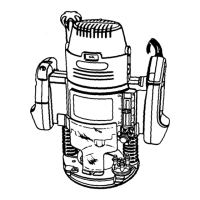
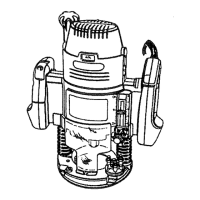
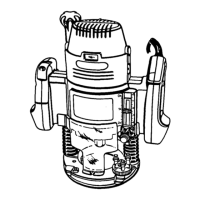
Congratulates user and highlights features like dependability, ease of operation, and safety.
Lists technical details like depth of cut, collet size, rating, speed, cord length, and weight.
Powerful motor with externally accessible brushes for easy servicing.
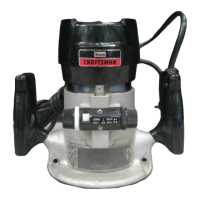
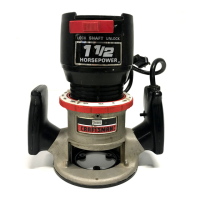
Large knob for precise depth of cut changes, useful on router tables.
Three adjustable and three fixed stops for quick depth changes with an adjustment scale.
Secures the spindle for cutter changes, with an indicator light for locked status.
Illustrates the depth control knob and its relation to the router base.
Shows the location and operation of the spindle lock mechanism.
Depicts the clear plastic chip shield fitted on the router base.
Tool provided for loosening and tightening collet nuts.
Specifies the required power supply (120V, 60Hz, AC) and warns against DC use.
Emphasizes wearing safety goggles or glasses with side shields to prevent eye injuries from flying objects.
Provides step-by-step instructions for safely installing and removing router cutters.
Critical safety step to prevent accidental starting during adjustments or cutter changes.
Do not engage spindle lock while motor is running to prevent damage.
Details using 1/2 in. and 1/4 in. collet assemblies and securing the collet screw.
Ensure collet nut is tightened securely to prevent cutter ejection during use.
Avoid cutters with undersized shanks to prevent improper tightening and ejection.
Step-by-step guide to setting the desired depth of cut using the plunge mechanism.
Detailed steps for setting the initial zero depth and subsequent cut depths.
Always unplug the router before making depth of cut adjustments.
Explains fine adjustments and use when router is mounted upside down.
Steps to adjust depth using the control knob after setting zero reference.
Details the turret system with fixed and adjustable stops for progressive cuts.
Guide to setting the turret stops for desired cutting depths.
How to use the depth stop system for multiple passes to achieve deep cuts.
Explains how to use the indicator for quick depth changes relative to a reference point.
Essential steps to practice before actual operation, including checking power and locks.
How to activate the on-off trigger and the single speed motor.
Reiterates the importance of safety goggles during operation.
How to engage and disengage the lock-on feature for continuous operation.
Steps to begin a cut, ensuring the cutter is secure and at the correct depth.
Explains feeding direction relative to cutter rotation to maintain control and prevent kickback.
Discusses finding the correct feed rate for clean cuts and avoiding overloading the motor.
Explains the negative effects of feeding the router too fast, leading to rough cuts.
Describes problems caused by feeding too slowly, such as scorching or rippled cuts.
Recommends multiple passes for deep cuts to ensure quality and prevent bit damage.
Explains how to orient feed direction and thrust to avoid kickback and ensure control.
Guides on positioning the router and guide for routing grooves along edges.
Instructions for basic edge routing, ensuring the bit does not contact the workpiece initially.
How to use bits with pilots to follow workpiece edges for shaping and depth control.
The pilot's size determines the maximum cut width when used against the workpiece edge.
Steps for routing grooves, including using straightedges as guides.
Description of the optional edge guide and its attachment to the router.
How to use the edge guide for routing circles, specifying feed direction.
Using the roller guide for uneven edges and trimming laminates.
Using guide bushings to duplicate shapes by following a template.
Step-by-step instructions for fitting the template guide bushing to the router base.
Securing the template and routing by following the guide bushing.
Using the router freehand for signs, reliefs, and sculptures.
Two methods: routing grooves or routing backgrounds for raised designs.
Tips for freehand routing, including drawing patterns and test cuts.
Warning to use only identical Craftsman replacement parts for safety and product integrity.
Advice on cleaning plastic parts and warnings about chemical damage.
Warning against letting brake fluids, gasoline, or oils contact plastic parts.
States that bearings are pre-lubricated for the life of the unit and no further lubrication is needed.
Keep cutters clean and sharp for faster, more accurate cutting results.
Step-by-step guide for checking and replacing worn brush assemblies.
Instructions for cleaning the collet and collet nut from dust and chips.
Guidance on selecting appropriate extension cords and safety precautions for their use.
Steps to readjust the plunge lock actuator after extended use.
Safety warning to unplug the router before performing adjustments on the actuator.
Emphasizes correct reassembly of parts for proper actuator function.
Describes how to verify proper adjustment for correct friction lock operation.
Guide to replacing or reattaching the depth control knob assembly.
Step-by-step procedure for replacing the depth control knob, including spring installation.
Warning against replacing the knob without the compression spring to prevent separation.
Safety warnings for using router tables and instructions for mounting the router.
Precautions regarding table conformity, guarding, and screw types for mounting.
Provides essential tips for safe and effective router operation.
| Model Number | 315.275100 |
|---|---|
| Type | Drill Press |
| Motor | 1/2 HP |
| Voltage | 120V |
| Swing | 10 inches |
| Amperage | 4.8 A |