Do you have a question about the Craftsman CMXGZBF7124336 and is the answer not in the manual?
Details crucial safety precautions, warnings, and instructions for operating the aerator safely.
Connects the two frame angles to the end plates using bolts and nuts.
Installs a spring pin into the axle and attaches a flanged bearing.
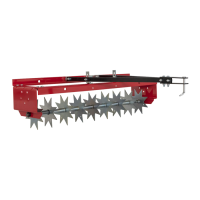
Presses flanged bearings into the spike disks for smooth rotation.
Attaches spike disks, springs, and spacers onto the axle.
Slides flanged bearing onto axle and secures it with spring pins.
Connects hitch arm mount brackets to the front and rear frame angles.
Attaches hitch mount arms to hitch arm mount brackets using bolts and nuts.
Assembles hitch mount arms together and attaches hitch brackets.
Prepares the ground and equipment before aerating, including safety checks.
Details the process of aerating, including ground conditions and weight addition.
Regularly inspect and retighten all bolts and nuts on the aerator.
Lubricate spike disk hubs at the start of each season.
Clean dirt off aerator spikes after each use, exercising caution.
Sharpen spike points periodically using a grinder for best penetration.
Store the aerator in a dry area, coating metal parts with oil.
Offers a full refund within 90 days if the product performance is unsatisfactory.
| Drive Type | Self-Propelled |
|---|---|
| Mulching Capability | Yes |
| Side Discharge | Yes |
| Rear Bagging | Yes |
| Number of Cutting Positions | 6 |
| Deck Material | Steel |
| Self-Propelled | Yes |
| Engine | Briggs & Stratton 163cc |
| Cutting Width | 21 inches |
| Start Type | Pull Start |
| Wheel Size (Front) | 8 inches |