2
is being cut. Some materials may require sanding before nal installation.
Inspect all cuts prior to installation. Do not install cut pieces with splinters
or sharp edges. Keep splinters and cut pieces with sharp edges out of the
work area.
This cutter has two pressure rollers that can pinch and crush ngers or hands.
Keep hands away!
Keep ngers and hands out from underneath the blade carrier, as these can
be crushed against the material being cut, or against the bed of the cutter.
The cutter has a safety lock that holds the leverage handle and the blade in
the down position. For protection, lock the safety lock whenever the cutter is
not in use. Also, lock the safety lock whenever the cutter is being transported
or placed in storage. To lock the safety lock, move the handle to the down
position, then slide the safety lock to the far right (Figure 3). When the safety
lock is locked, tighten the safety lock’s lock nut to x the safety lock in locked
position.
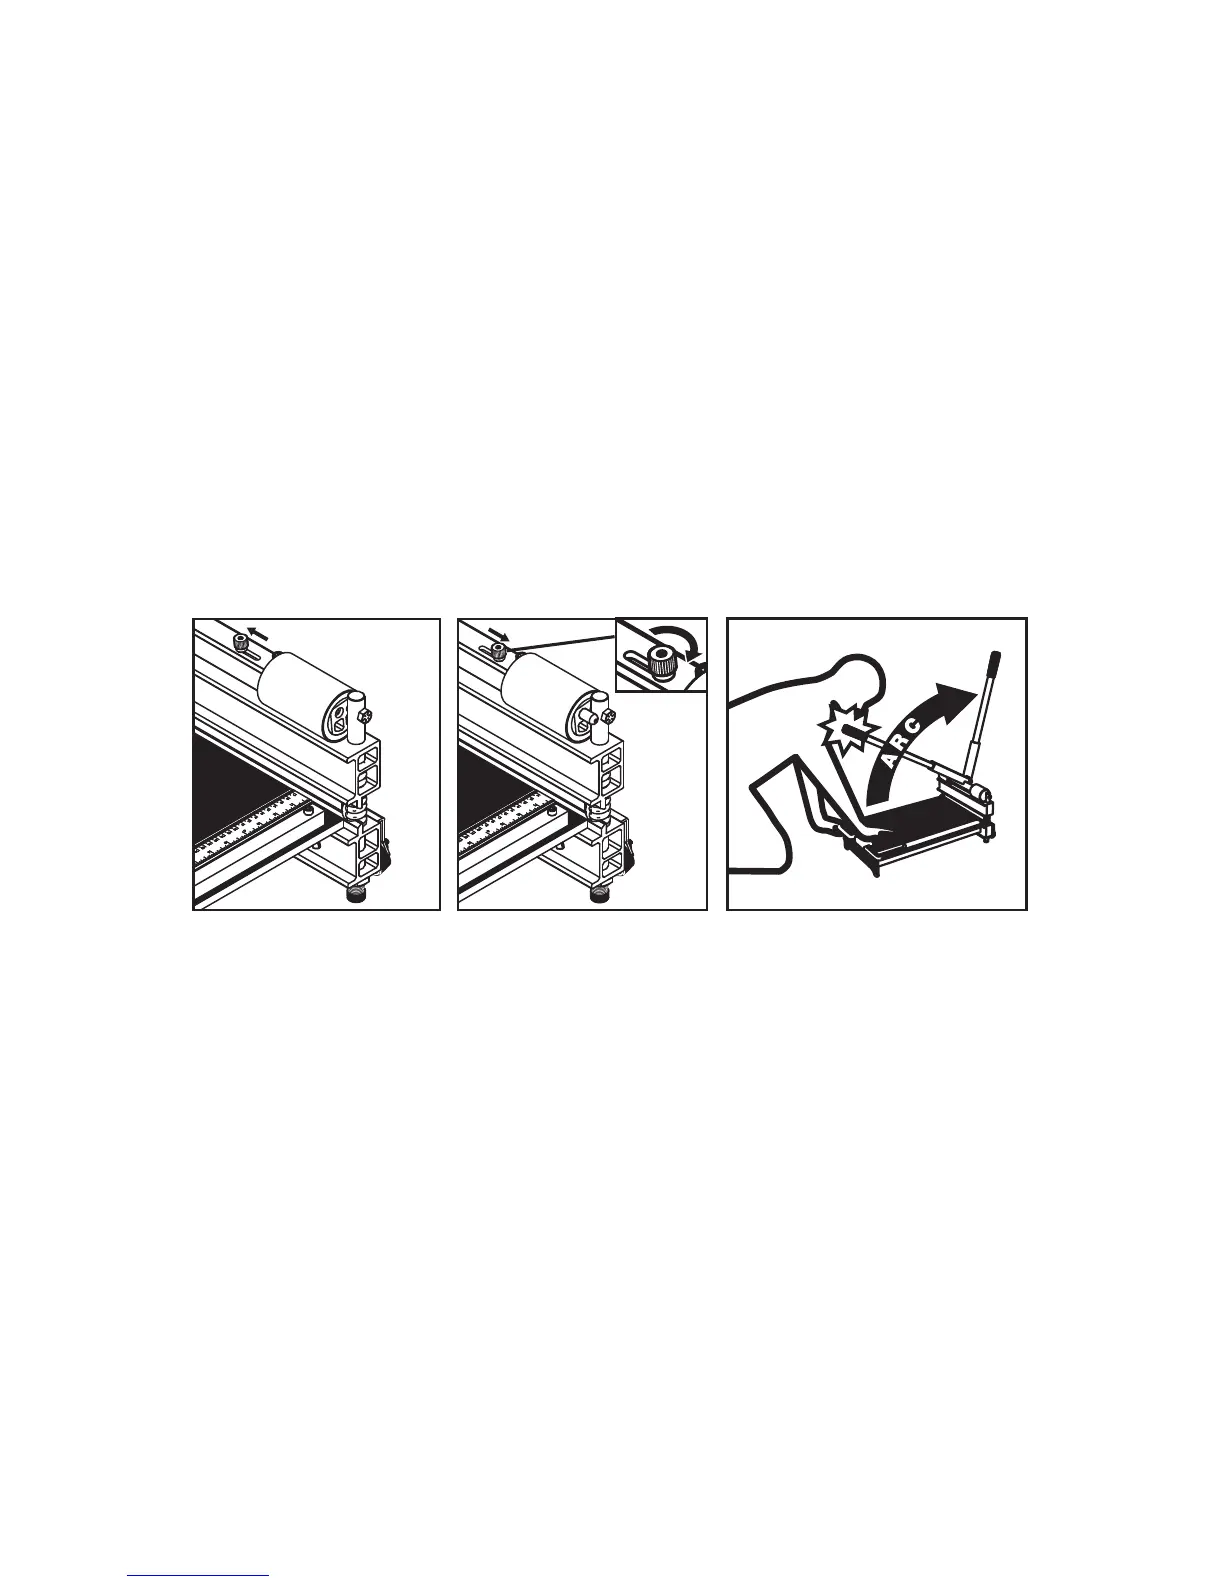
This cutter has a spring-loaded leverage handle that rises automatically with
enough force to cause injury (Figure 4). Be aware of the motion of the lever-
age handle. As it rises, guide the leverage handle to its starting upright posi-
tion to prevent it from slamming against its stop or impacting your body. In
operation, kneel to the side of the leverage handle, keeping your head and the
rest of the body out of its arc, and keep bystanders out of the way.
Wear eye and ear protection when using this cutter.
This cutter is not to be used by children or persons with reduced physical,
sensory or mental ability, or that lack experience and knowledge, unless they
have been given supervision or instruction.
Keep the work area clean. Clutter invites accidents. The work environment
should be clean, dry, well lit, and clear of any ammable materials or explo-
sive gasses. Do not use the cutter in wet or damp conditions.
Keep children and bystanders away from the cutter and out of the work area.
LOCK
NUT
Figure 2 - Unlocked Figure 3 - Locked Figure 4
 Loading...