Do you have a question about the Crane Merchandising Systems Merchant 180 and is the answer not in the manual?
Explains electrical requirements for the merchandiser.
Instructions for removing packing materials.
Steps to move the merchandiser through tight spaces.
Steps to remove the top panel for easier movement.
Steps to detach the lower panel and delivery bin.
Procedure for removing trays to fit through narrow openings.
Guidance on placing the merchandiser in its final indoor location.
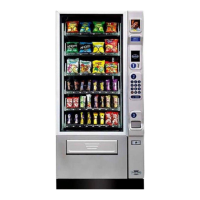
How to correctly place product trays for loading.
Instructions for configuring trays to dispense products.
How to configure trays for wider product items.
Steps for safely removing product trays from the merchandiser.
Function of the interlock switch for fan control.
How the merchandiser communicates with users and operators.
The keypad used by customers for making selections.
Button to return coins before a vend.
Key to clear selection inputs.
How the bill acceptor handles currency.
Keypad for programming and diagnostics.
Details the two LEDs on the main controller board.
Details the main power switch and electronics breaker.
Steps to move the merchandiser through tight spaces.
Steps to remove the top panel for easier movement.
Steps to detach the lower panel and delivery bin.
Procedure for removing trays to fit through narrow openings.
Guidance on placing the merchandiser in its final indoor location.
How to correctly place product trays for loading.
Instructions for configuring trays to dispense products.
How to configure trays for wider product items.
Steps for safely removing product trays from the merchandiser.
How to remove and replace dividers within product trays.
Handling trays when they are removed from the unit.
Procedure for replacing a motor with a spiral bearing.
Steps for safely connecting/disconnecting motor wiring.
Details on removing and installing product spirals.
Guidance on selecting the correct spiral rotation.
Steps to detach the spiral coupler.
Procedure for removing and installing spiral motors.
Instructions for installing gears to couple spirals.
How to attach spiral couplers to motors.
Adjusting tray positions to accommodate different product heights.
Steps for inserting trays back into the merchandiser.
How to use product spacers to keep items upright.
General guidelines for loading products into trays.
Specific advice for bagged products, thin packages, and Kit Kats.
How to use spiral wall retainers for better product ejection.
How to use product pushers for better vending.
Specific setup for vending "Lunch Bucket" items.
Specific setup for vending "Top Shelf" items.
Performing test vends to verify product dispensing.
Verifying all aspects of the merchandiser are working correctly.
Troubleshooting spiral indexing issues.
Troubleshooting spiral indexing for multiple motors.
Procedure to test the functionality of the bill validator.
Overview of the merchandiser's LCD display and menu navigation.
Details the service and customer keypads.
Shortcuts for accessing programming menus directly.
Explanation of movement and selection keys.
Accessing sales data that cannot be cleared.
Accessing sales data that can be reset.
Viewing sales data broken down by individual products.
Procedure to reset sales and vend data.
Checking logs for main door openings.
Checking logs for power loss events.
Checking the date and time of the last data clear.
Checking the date and time of the last price change.
Checking the date and time of the last vend.
Accessing machine and board identification details.
Instructions for printing machine data.
Procedure to check the merchandiser for operational errors.
Table listing error messages and their descriptions.
How to perform a test vend for a specific product selection.
Performing test vends without the SureVend system.
Procedure for calibrating the SureVend system.
Checking the status and errors of the motors.
Procedure to home motors and check their status.
Procedure to test the operation of the coin return motor.
Procedure to test the merchandiser's display screen.
Procedure to test the functionality of the keypads.
How to set prices for each product selection.
Setting a single price for all selections on the machine.
How to set prices for entire trays of products.
Checking the highest and lowest product prices set.
Displaying the current software configuration version.
Enabling or disabling the SureVend system.
Configuring the SureVend system's failure behavior.
Setting the timer for the anti-jackpot feature.
Configuring the trigger for the anti-jackpot feature.
Setting up which products are available for selection.
Setting up FIFO groups for product rotation.
Steps to add products to FIFO groups.
Steps to remove products from FIFO groups.
Steps to modify existing FIFO groups.
Viewing how products are mapped into FIFO groups.
Electronically coupling adjacent tray motors.
Programming time-based vending events.
Setting up the winner mode for special prizes.
Programming product combinations for discounted vends.
Enabling token vending for specific products.
Enabling or disabling the free vend mode.
Setting the unique identification number for the machine.
Setting the physical location identifier for the machine.
Setting the current date on the merchandiser.
Setting the current time on the merchandiser.
Configuring daylight saving time settings.
Choosing the display language for the merchandiser.
Choosing the type of coin mechanism installed.
Checking coin inventory and dispensing coins.
Setting the amount of change for no-purchase returns.
Configuring the threshold for low change alerts.
Choosing the installed bill validator model.
Setting bill acceptance limits during low change conditions.
Configuring which bill denominations are accepted.
Choosing the installed card reader model.
Enabling or disabling card revaluation functionality.
Configuring how change is dispensed after purchases.
Configuring how credit is handled for failed vends.
Setting up data transfer parameters.
Choosing the data communication protocol (e.g., DEX).
Configuring which data items are included in transfers.
Setting the format for CA304 data transmission.
Configuring how data is reset (Auto or Save).
Configuring how event data is reset.
Setting the baud rate for printer communication.
Instructions for installing and removing the data key.
Warning against using this underdeveloped feature.
Downloading default factory settings from the data key.
Copying settings to the data key for backup.
Copying configuration and sales data to the data key.
Viewing saved data descriptions from the data key.
Loading configuration data from the data key to the machine.
Removing data from the data key.
Warning about this not-yet-functional feature.
Checking the date and time of the last data backup.
Performing a backup of all settings and data.
Restoring data from backup or factory defaults.
Adjusting the display contrast for readability.
Displaying the machine's software version information.
Displaying manufacturer, serial, model, and SW version of the IO board.
Selecting Celsius or Fahrenheit for temperature display.
Customizing what appears on the idle display.
Defining custom messages for the display.
Reference for entering text and numbers via keypad.
Procedure to enter the supervisor PIN to access advanced menus.
Changing the supervisor PIN code for security.
Locking or unlocking access to menu selections.
| Brand | Crane Merchandising Systems |
|---|---|
| Model | Merchant 180 |
| Category | Vending machines |
| Language | English |