4
Contact CRC Industries at 800-556-5074 | smartwasher.com
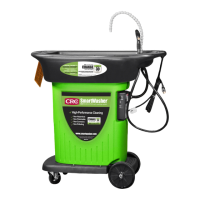
Your SmartWasher
®
is almost ready to use. (The OzzyMat
®
, support grid
and false bottom of the sink are packed inside the sink.) Visually inspect for
damage (minor scratches and scuffs are normal due to the molding process).
Parts Washer Setup
1. Remove the OzzyMat
®
from its package, unfold it and lay it on the mat support grid
located in the lowest level in the sink. Make sure to lay the OzzyMat
®
white side up.
2. Place the false bottom in position in the sink.
3. Form the exible nozzle to its desired shape and be sure that the parts brush is inside
the sink.
4. DO NOT PLUG UNIT IN BEFORE ADDING OZZYJUICE
®
.
5. At start-up, carefully add OzzyJuice
®
to the SmartWasher
®
by slowly pouring the
solution directly into the sink. Refer to the chart below for amounts.
6. Plug the unit into a 115VAC GFCI electrical outlet.
7. The SmartWasher
®
will take approximately four hours to heat up to its selected optimal
temperature of 105°F (+-2°) (40°C) (+-1°) OR 115°F (+-2°) (46°C) (+-1°). This temperature
will be maintained as long as the SmartWasher
®
is plugged in and full of OzzyJuice
®
. (If
the “add uid light” is on, the heater automatically shuts off.)
Installation and Setup
Fill Amounts
• Remove the false bottom and check to make sure
the mat support grid is in the bottom of the sink.
• Remove and discard packing material.
Parts Washer Unit Start-Up Fluid
SW-23 15 gallons (three 5-gallon containers)
SW-25 25 gallons (ve 5-gallon containers)
SW-28 25 gallons (ve 5-gallon containers)
SW-28XE 25 gallons (ve 5-gallon containers)
SW-37 25 gallons (ve 5-gallon containers)
 Loading...