4
Proprietary, patented product and assembly instructions. Do not copy or distribute.
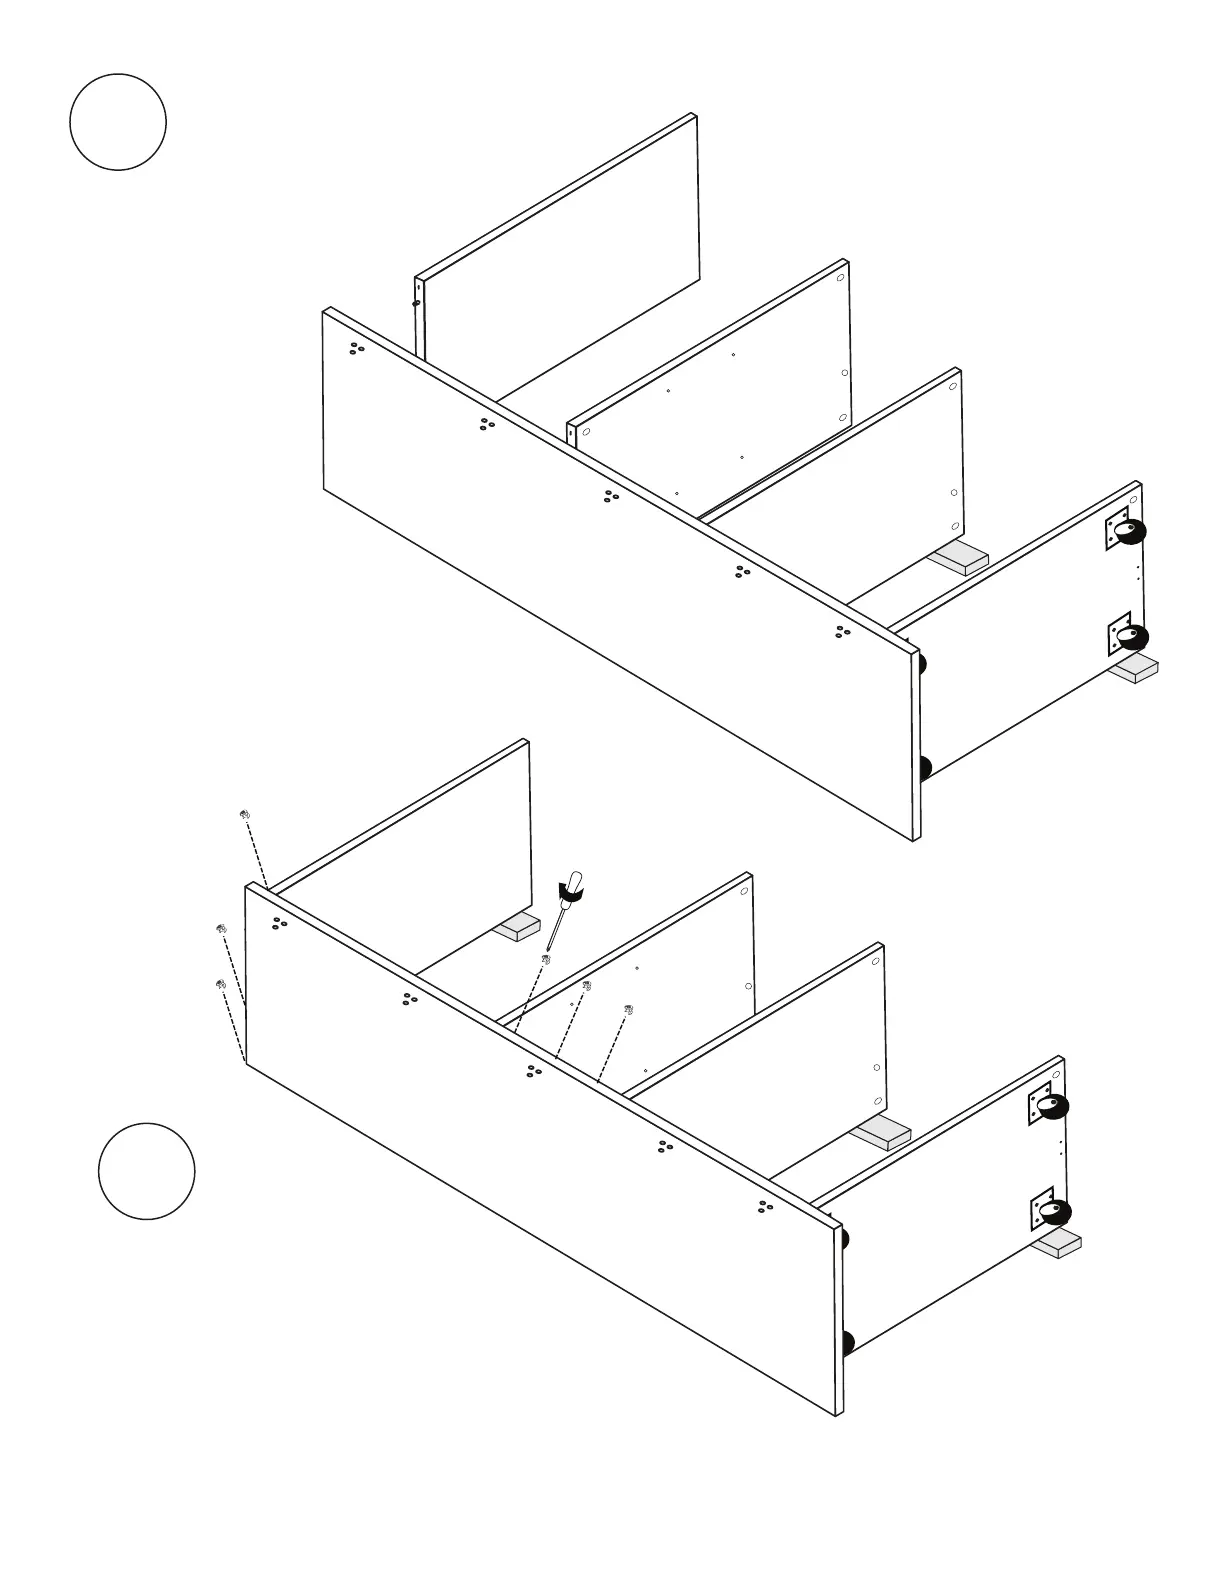
Carefully fit CB Lid & CB Shelf 2 to
CB Side 1. Be sure Posts are aligned
with holes. Tap edges until
secure.
6
Secure CB Shelf 2 & CB Lid to CB1 using (6)
Locking Cams. To lock cams, turn 220 degrees.
Use a shelf to support Lid and Shelf 2.
*Note that 3 Locking Cams will insert into the TOP
of Lid (outside of the box) and the other 3
will insert into the UNDERSIDE of Shelf 2.
7
**Finished edges facing up**
F20
CB Lid
CB1
CB Shelf 2
Locking
Cams (6)
CB Lid
CB1
CB Shelf 2
Slide CB dividers (2) in one at a time
& secure to
CB Lid
&
(4) #3 1 1/2 Confirmat Screws
in each divider.
Use ONLY a MANUAL phillips
screw driver.
Install (2) angle brackets
using (8) #5 14mm washer
screws.
11